Camper Floor Plan Planning: The Ultimate Guide to Your Van Conversion
The most expensive mistake in a van build doesn’t happen at the saw. It happens at the kitchen table, with a pencil and a sheet of graph paper — and only shows up months later, on the scale or at the inspection.
Search for “camper floor plan” and you’ll mostly find pictures. This guide instead delivers what’s actually behind every good floor plan: the five basic layout types, the measurements they fail on in practice, and the one decision — the build method of your furniture — that decides several hundred kilograms without changing the floor plan itself at all.
What you’ll have after this guide:
- A floor plan type that fits your height, how long you travel, and how much gear you carry
- The measurements most builds fail on in practice — aisle width, work height, wheel arches, roof taper
- A feel for how much the build method alone changes your conversion weight — and how to check axle load and centre of gravity before the first panel is cut
1. Before You Draw: Your Vehicle’s Four Numbers
For most people, the first floor plan starts on a sheet of graph paper: bed at the back, kitchen on the left, seating area at the front. That’s a good start — it’s just missing the one thing everything else hangs on: size.
Four numbers are in your vehicle documents, and they decide more about your build than any layout idea:
- Maximum permissible mass — what the vehicle is allowed to weigh fully loaded
- Kerb weight — what it already weighs empty
- Permissible front and rear axle load — each individually, not as a sum
- Payload — the difference between the first two
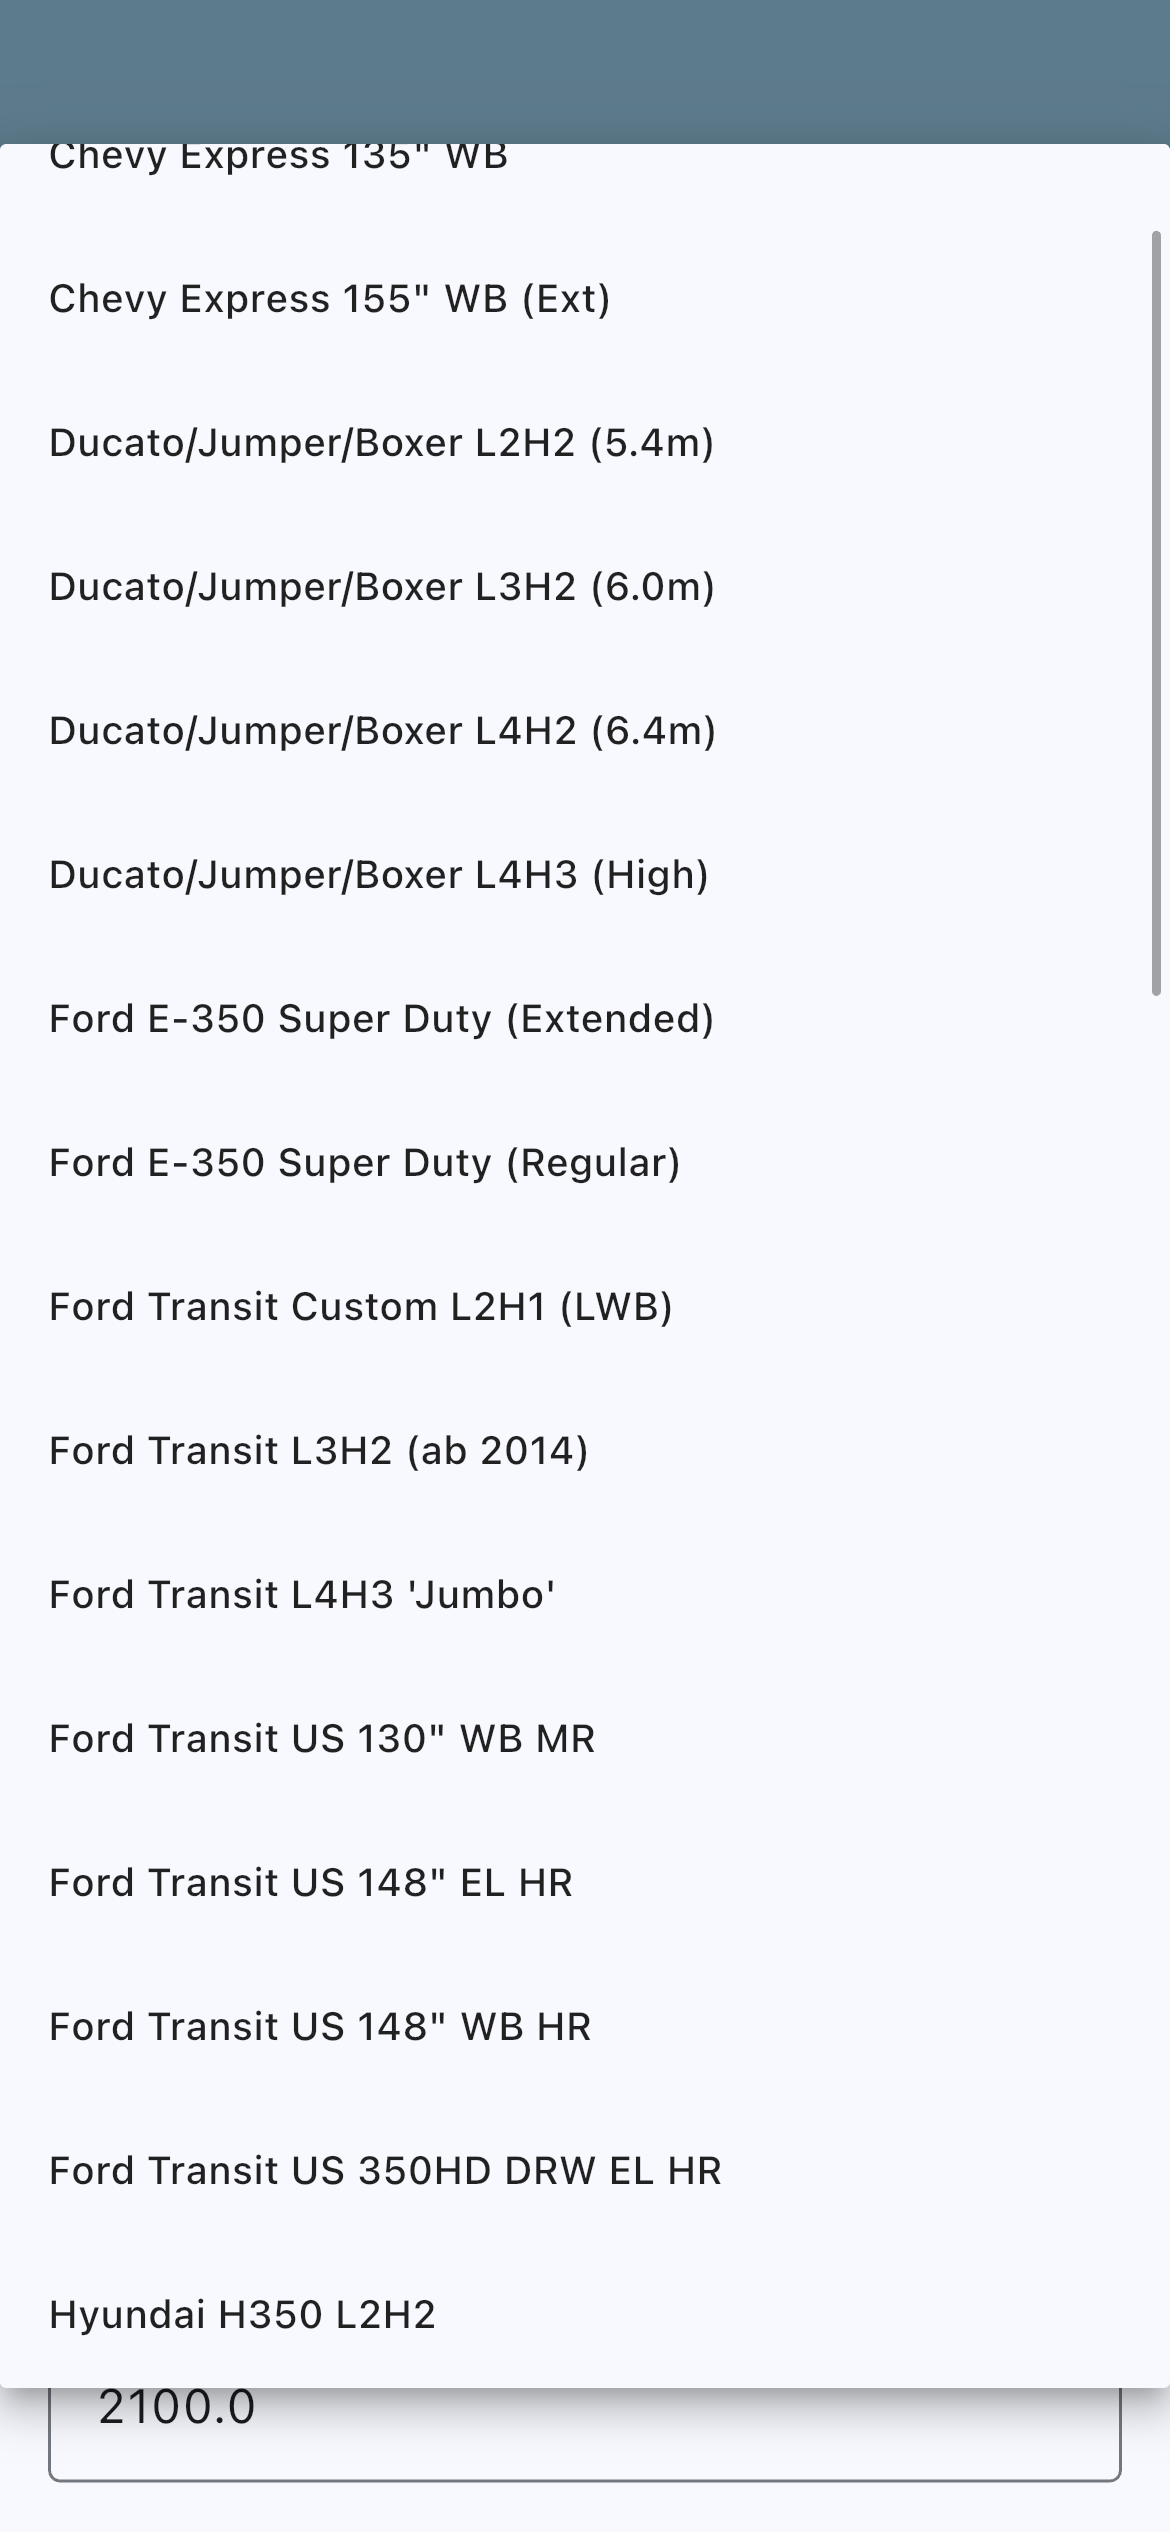
Over 40 vehicle templates with real manufacturer dimensions.
A real-world example: a Ducato L2H2 with 3.3 t maximum permissible mass and around 2,000 kg kerb weight has 1,300 kg of payload. Sounds like a lot. It isn’t.
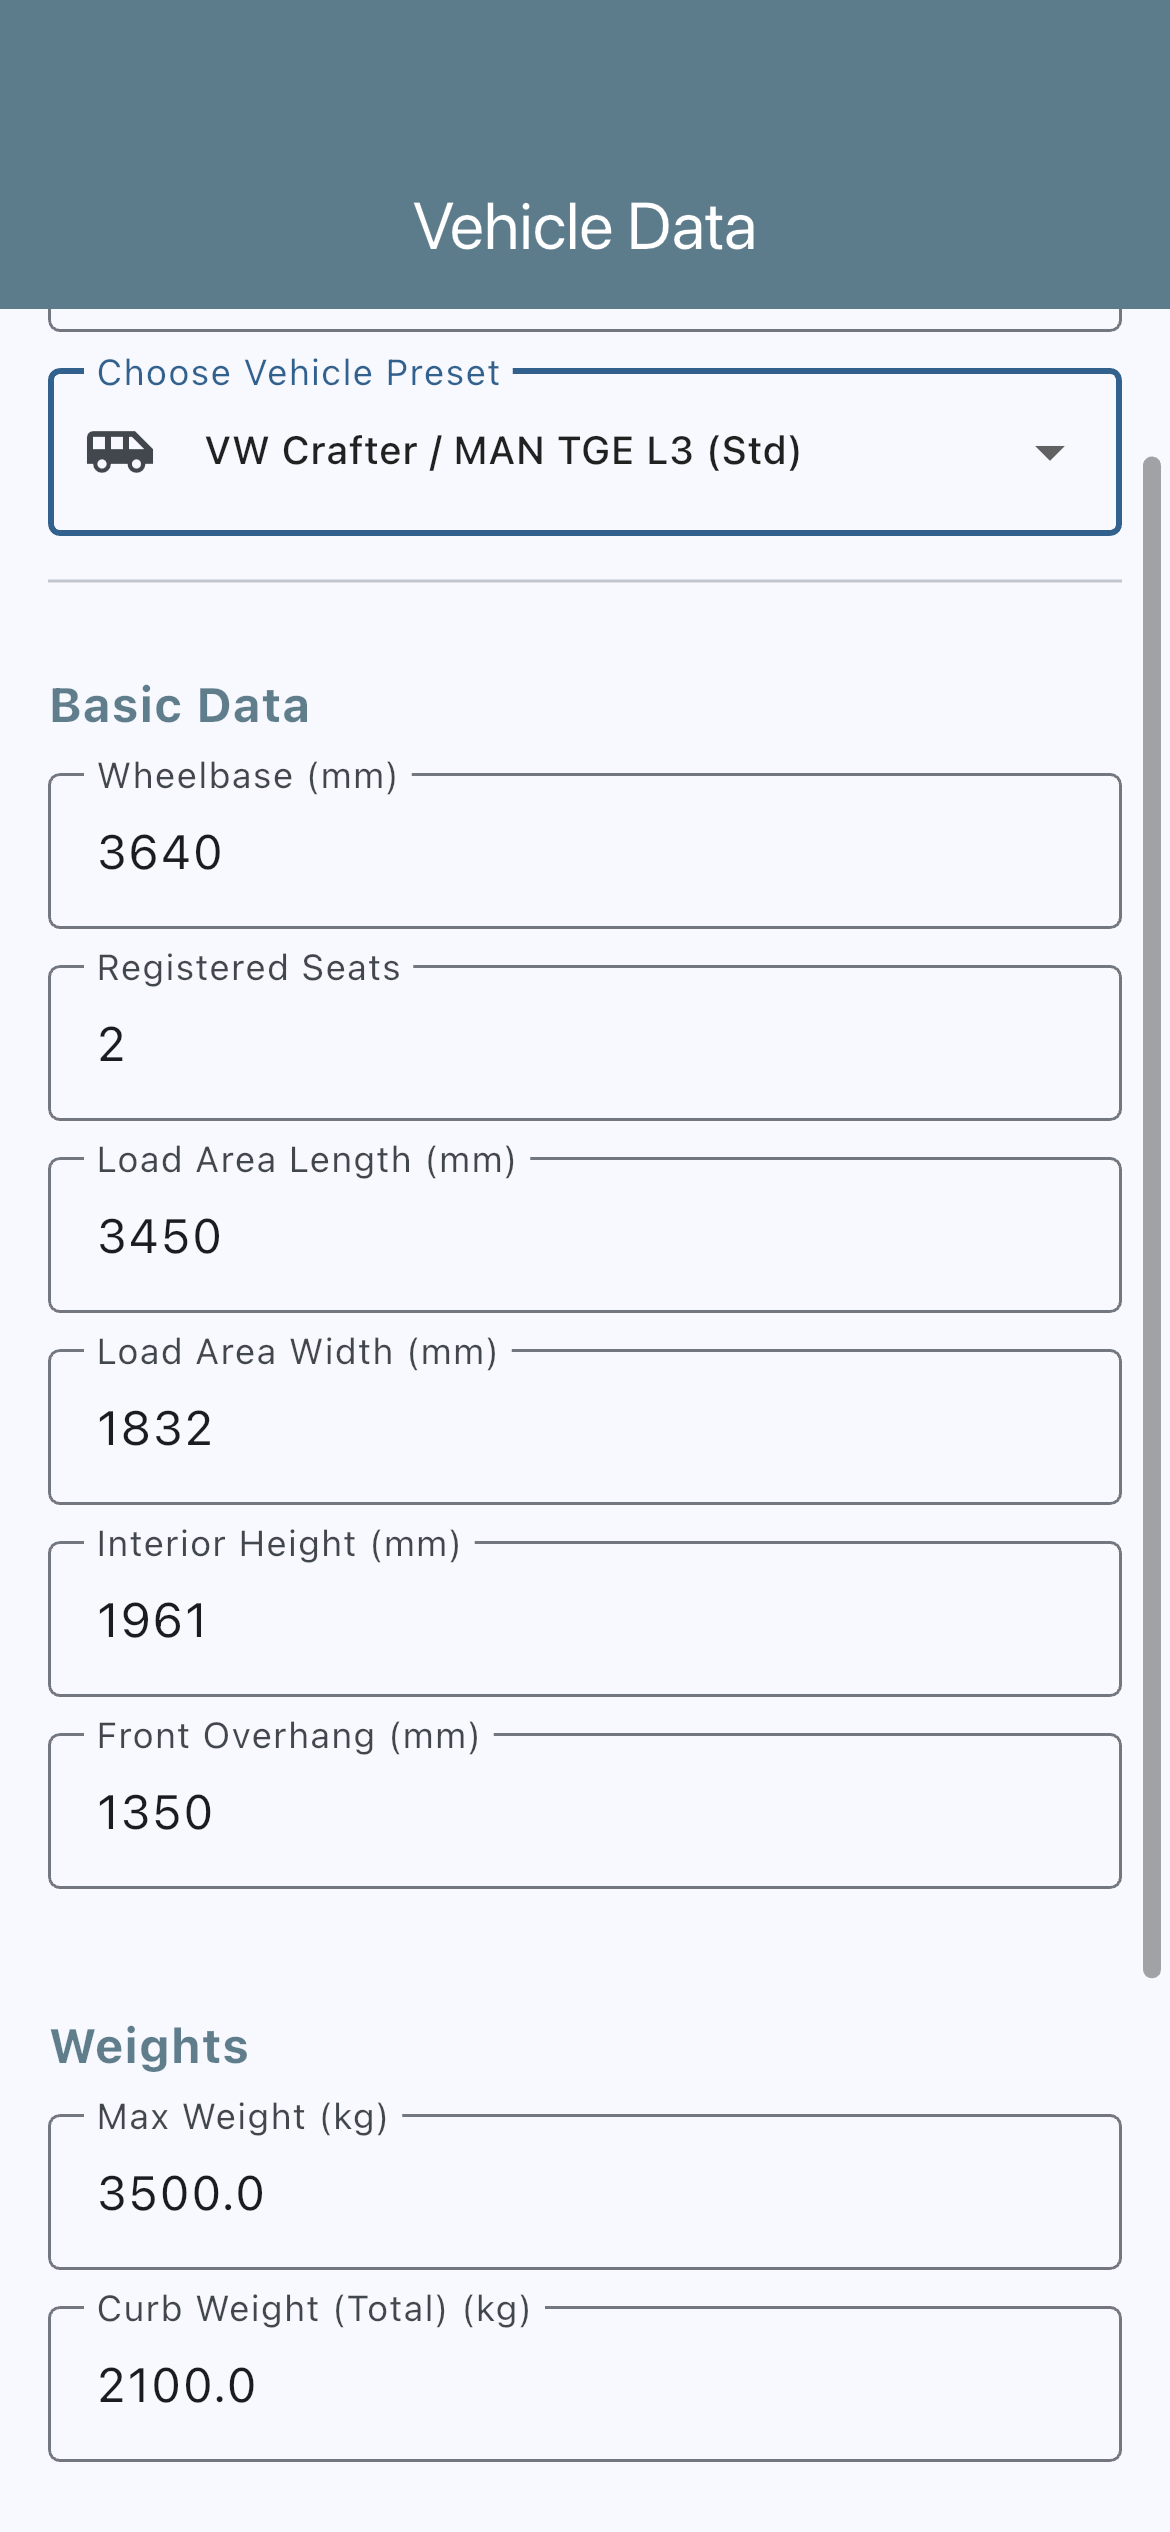
Vehicle data for the Ducato L2H2 from the example above, filled in automatically — 3,300 kg maximum permissible mass, 2,000 kg kerb weight.
Payload isn’t what you’re allowed to build in
Before a single board is screwed in, some of those 1,300 kg is already gone: driver and passengers, the full fresh water tank, gas, food, clothes, tools, bikes. With two people, 100 litres of water, a gas bottle and luggage, 400 to 500 kg disappears fast. What’s actually left for the build itself — furniture, insulation, flooring, electrics — is then 800 to 900 kg.
That’s manageable. But not if you build whatever cabinet comes to mind. (Just how big the difference from build method alone is — that’s in Chapter 4.)
Axle load isn’t total weight divided by two
This is where the trap lies that most people only discover on the scale. In the Ducato example, the front axle may carry 1,750 kg, the rear axle 1,900 kg — together 3,650 kg, well above the permissible 3,300 kg. That doesn’t mean you have room to spare. There are three limits that all apply at the same time: front, rear and total. Any one of them can be exceeded on its own.
Quick math: the lever principle A piece of furniture doesn’t act where it stands, but through the wheelbase onto both axles. At a 3.45 m wheelbase, a 100 kg crate standing half a metre behind the rear axle distributes like this: the rear axle carries 114 kg — and the front axle is relieved by 14 kg. Everything that moves behind the rear axle takes weight off the front. That’s why the rear garage and bike rack are the most critical points of any floor plan.
Remember this for the rest of this guide: every position in the floor plan is also a weight decision.
2. The Five Basic Van Floor Plan Types
Almost every camper floor plan is a variant of five basic shapes. Which one suits you comes down to three questions: how tall are you? How long are you travelling? And what else has to come along besides you?
All five floor plans here are fully worked through — with real vehicle dimensions, real materials and real weights. For each type you see the to-scale top-down view and the axle load distribution calculated from it — not estimated values, but numbers actually run in VanLogic.
Type 1: Transverse Bed
The bed sits crosswise at the rear, so you sleep across the width of the vehicle. Underneath, that automatically creates the largest storage volume in the vehicle.
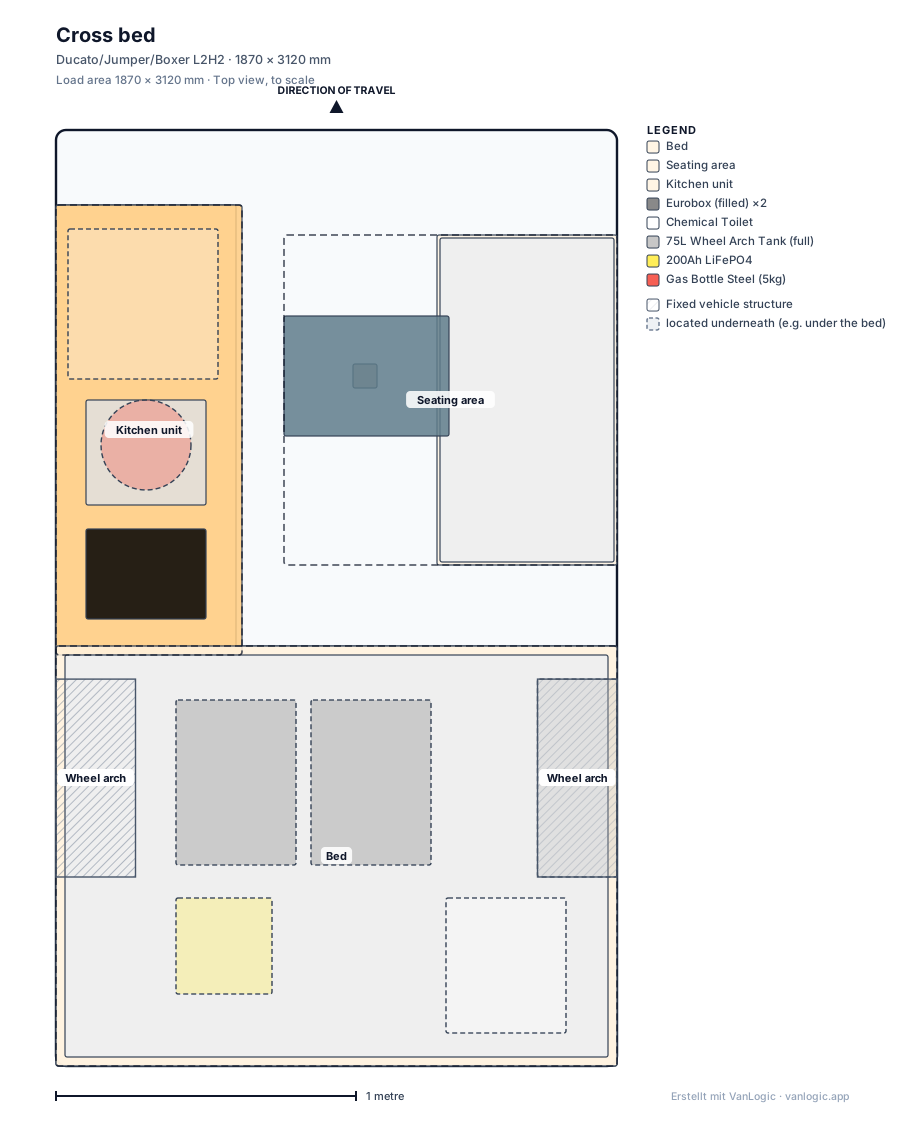
Transverse bed in the Ducato L2H2: largest storage volume under the bed, wheel arch and tank integrated into the cavity.
Click for the full-size original
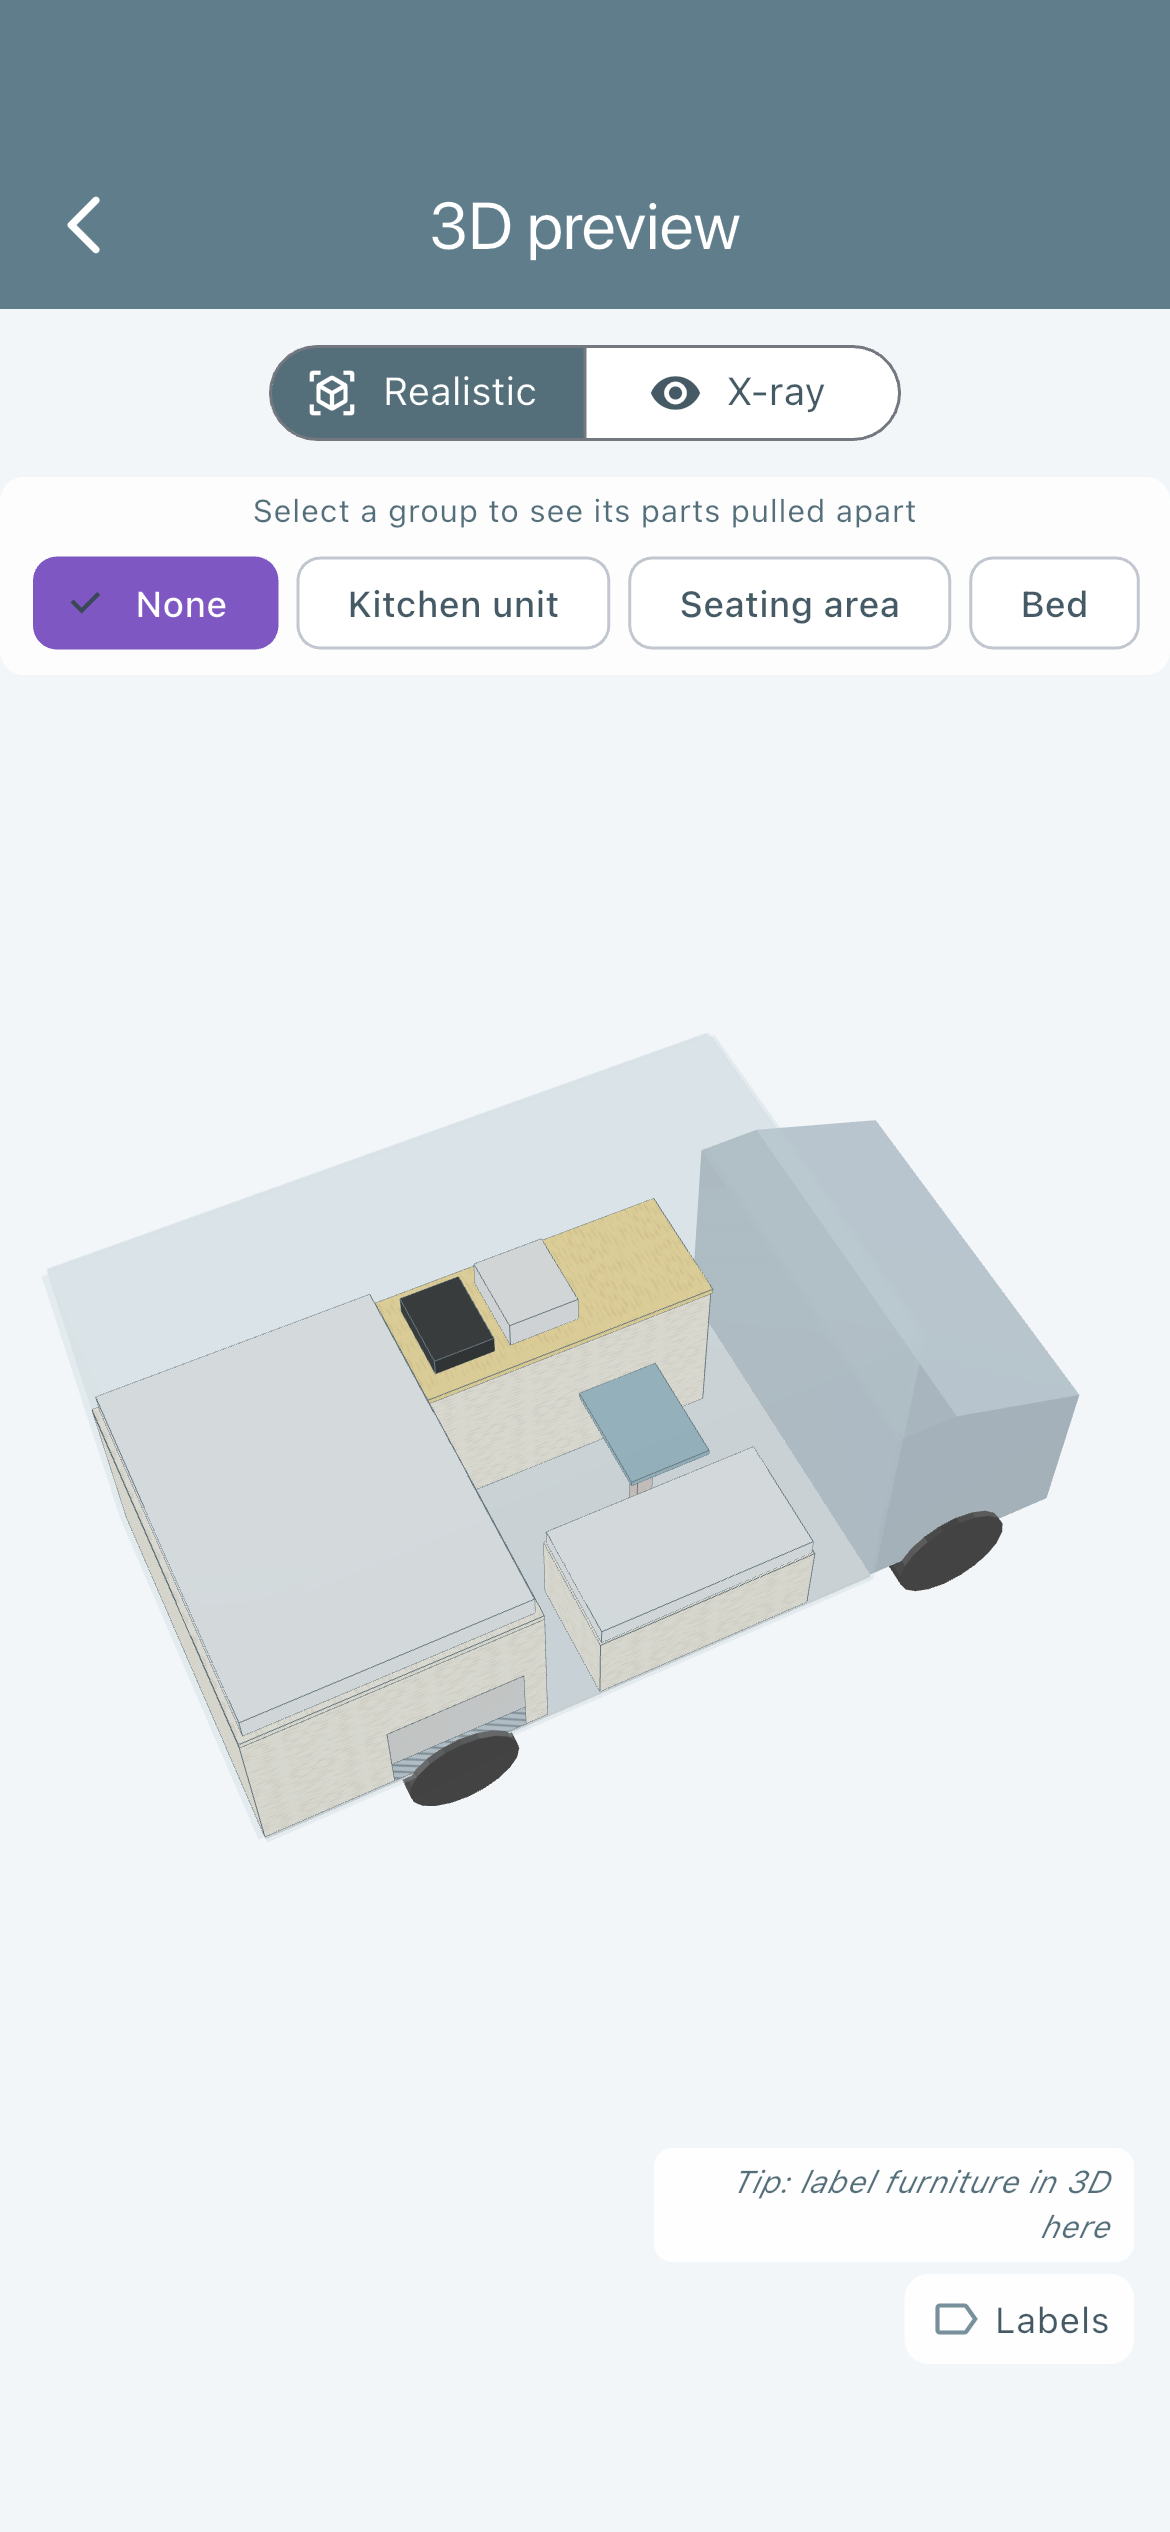
The same floor plan in 3D.
The catch: your height has to fit the vehicle width. Panel vans have 1.78 to 1.87 m of load width — after cladding and insulation that’s often less than 1.80 m. Up to about 1.75 m body height, a transverse bed is the single most efficient solution. Above that it gets tight, and you end up with wall bump-outs or a different layout type.
What it does to axle load: the bed and storage sit at the rear, so far back. That loads the rear axle. In the example plan it stays uncritical, because the vehicle is short and the kitchen pulls weight forward.
Type 2: Longitudinal Bed with Aisle
The bed lies lengthwise against one wall, leaving a continuous aisle beside it. That takes body height off the table entirely — a longitudinal bed can easily be built 2.00 m long, or 2.10 m for tall people.
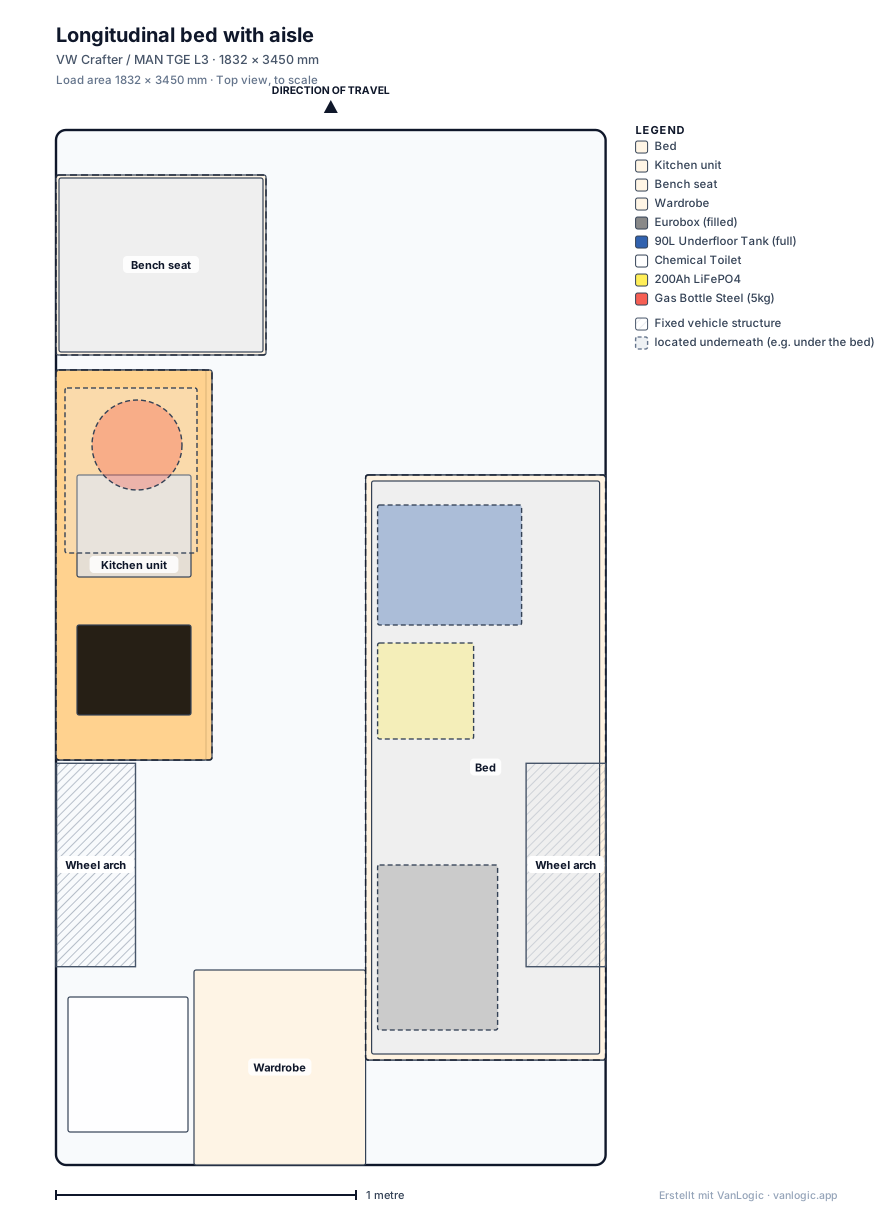
Longitudinal bed in the Crafter L3: continuous aisle, kitchen and cabinet on the opposite side.
Click for the full-size original
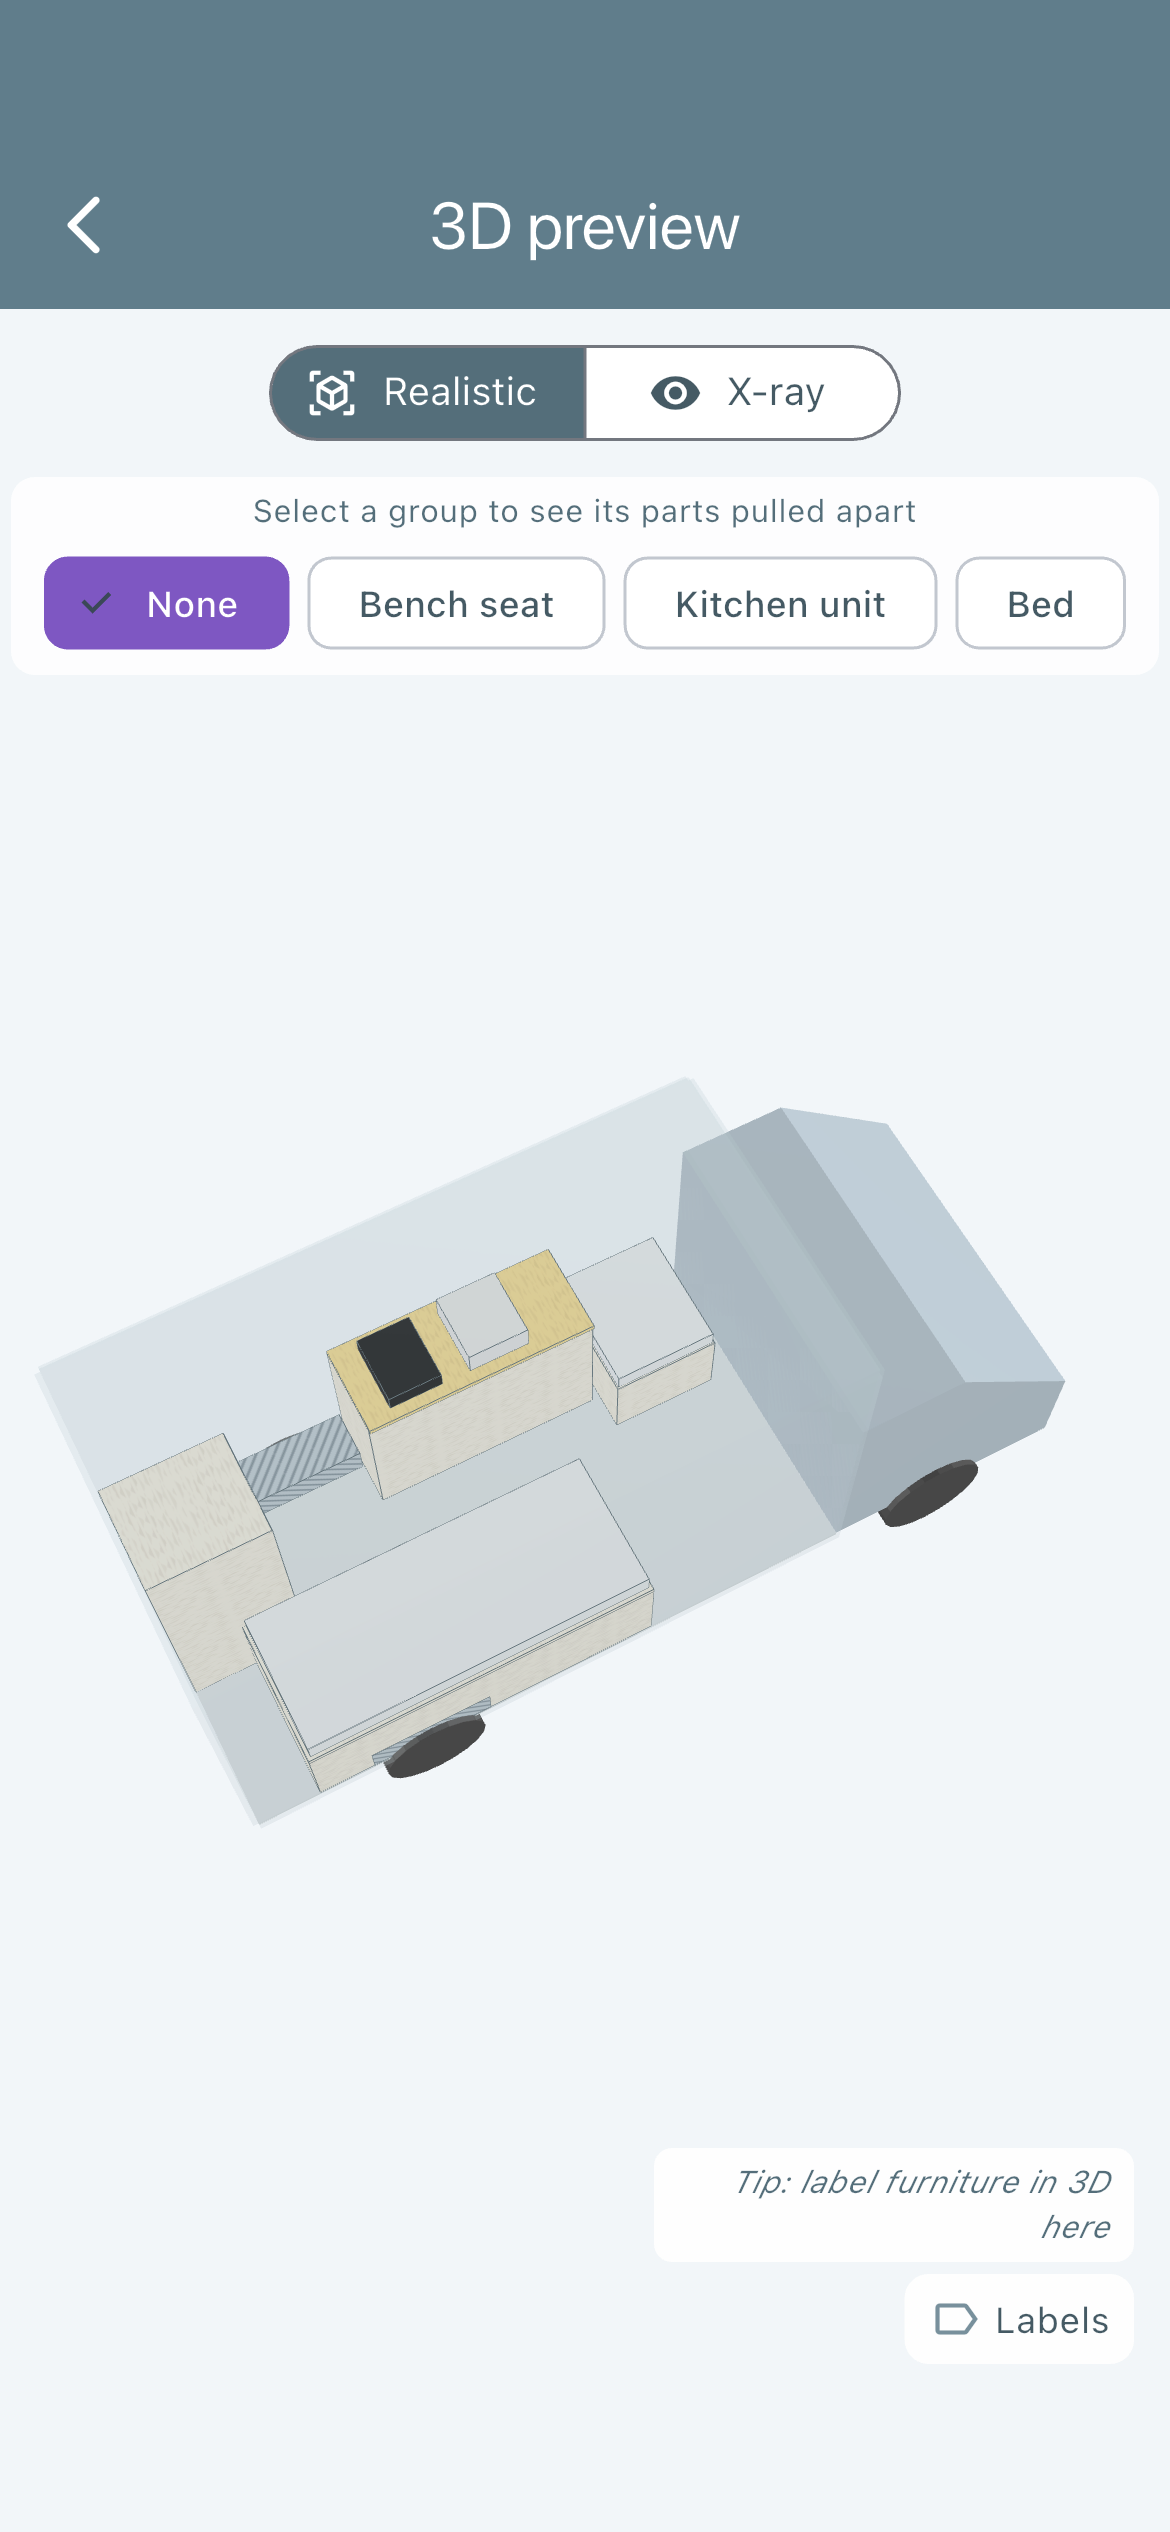
The same floor plan in 3D.
The price: the bed and aisle together need the full vehicle width. That leaves only the other side for kitchen, cabinet and bench seat — and that side is narrow. In a 1.83 m wide Crafter it works out to: 80 cm bed, 50 cm kitchen, 53 cm aisle.
What it does to axle load: weight is spread across the full length — the most balanced of the five types.
Type 3: High Bed over a Rear Garage
The bed sits crosswise, but noticeably higher — underneath fits a drive-through garage for bikes, surfboards or tool boxes. This is the type for anyone whose hobby needs space.
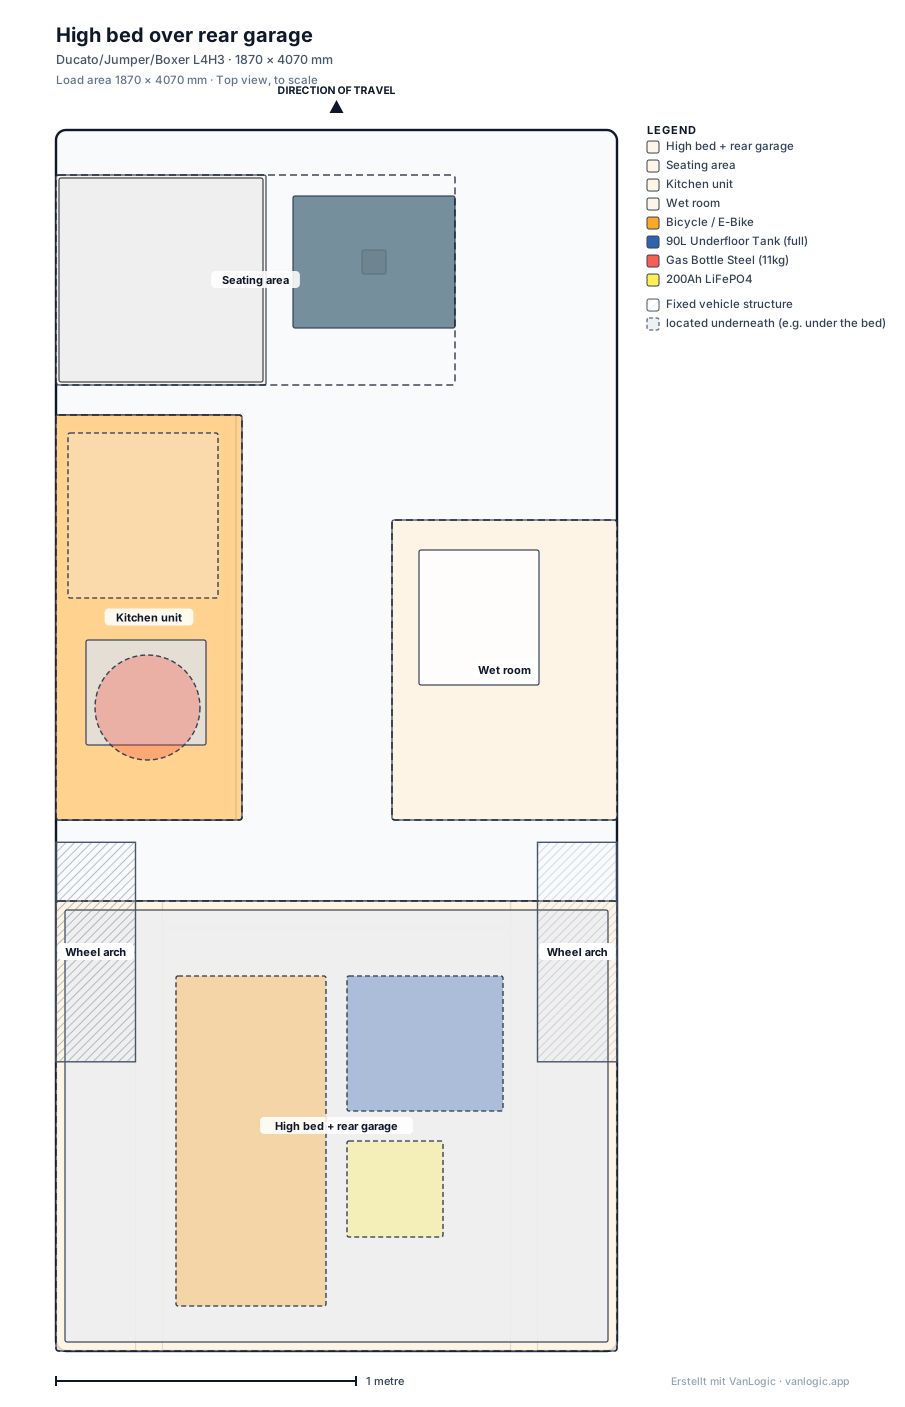
High bed over a rear garage in the Ducato L4H3: drive-through storage under the bed.
Click for the full-size original
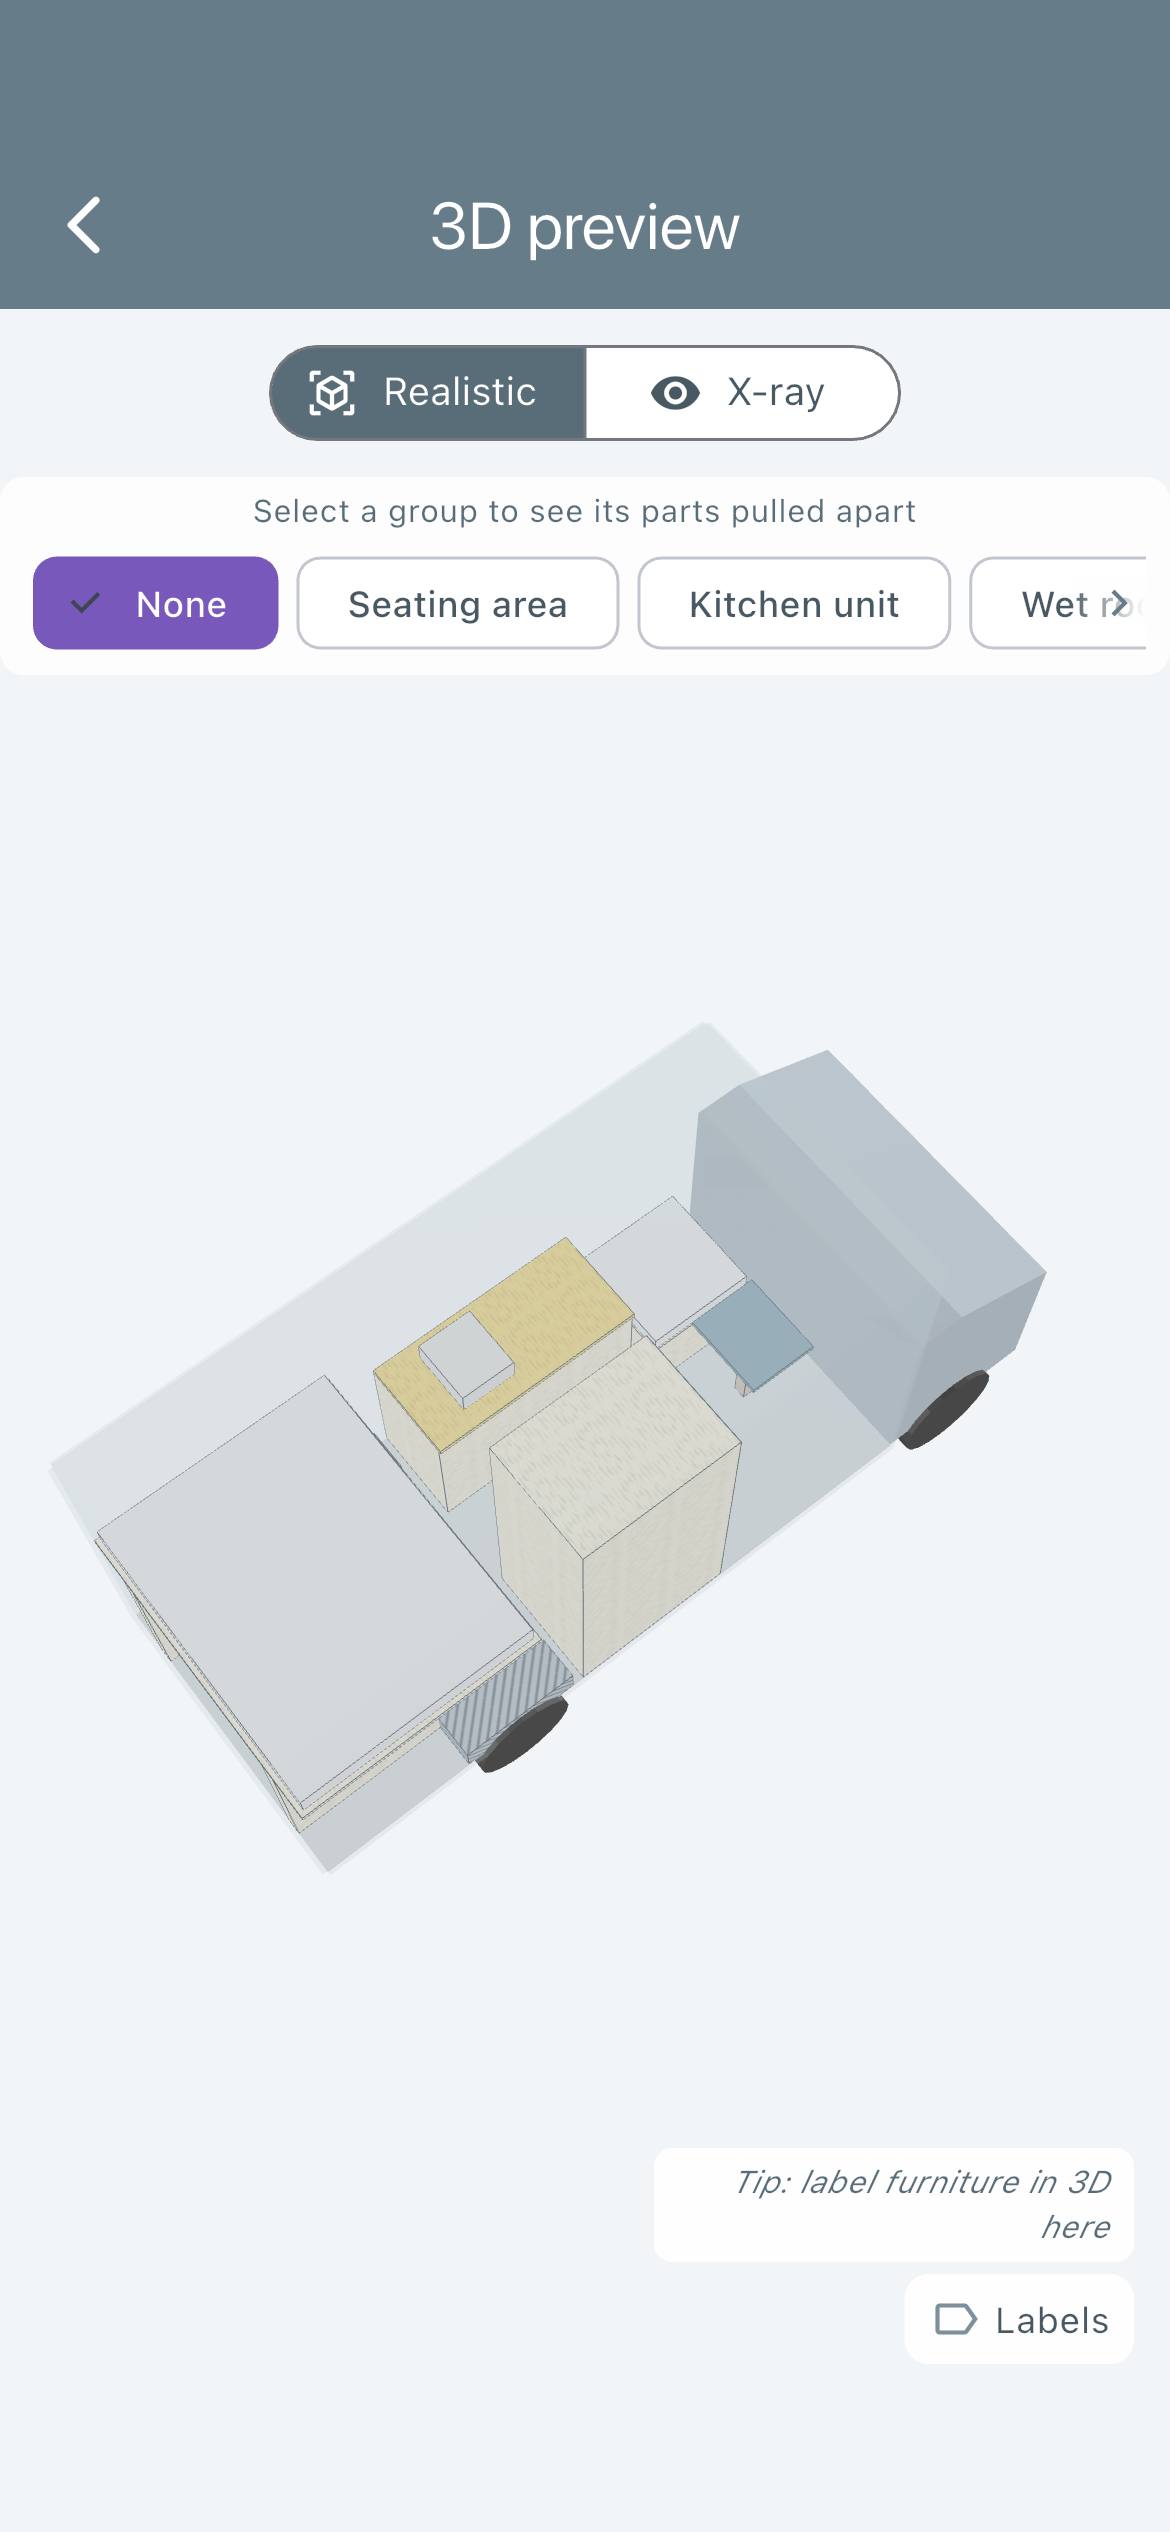
The same floor plan in 3D.
Requirement: a high-roof vehicle. Between the garage ceiling and the vehicle roof, about 1.00 m needs to remain for the sleeping surface, or you’ll sleep with your nose against the roof.
What it does to axle load: this is the most critical type. The garage sits behind the rear axle, and that’s where it gets loaded heavily. Every kilogram there acts twice: it loads the rear axle and relieves the front axle at the same time.
Type 4: Floor Plan with a Fixed Wet Bath
Transverse bed at the rear, a fixed wet bath on one side, kitchen opposite. This is the classic full conversion — and the only type that makes you independent of campsites.
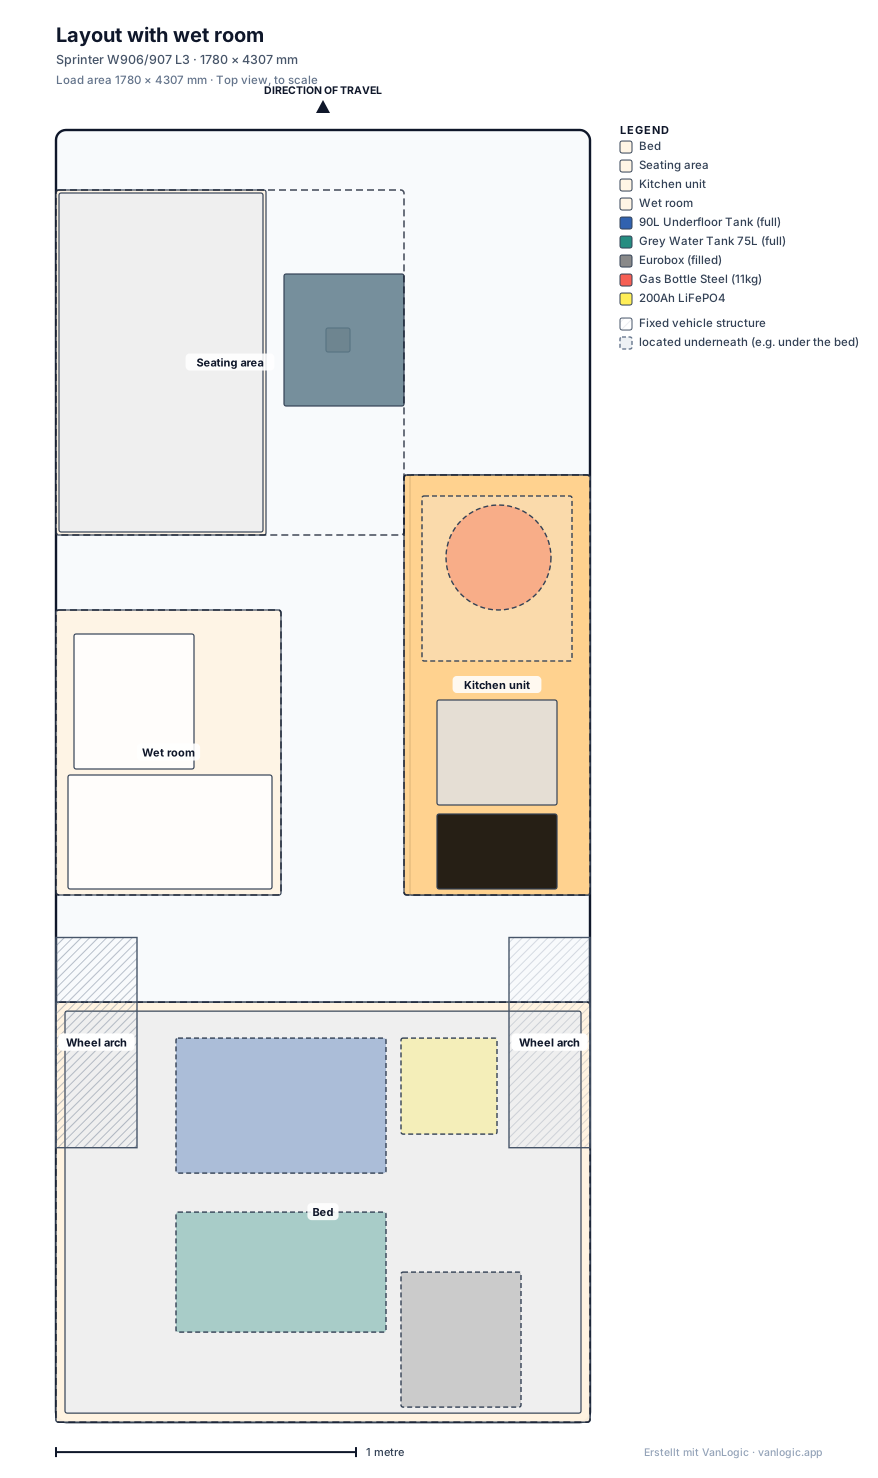
Full conversion with a fixed wet bath in the Sprinter L3: bathroom and kitchen share the width.
Click for the full-size original
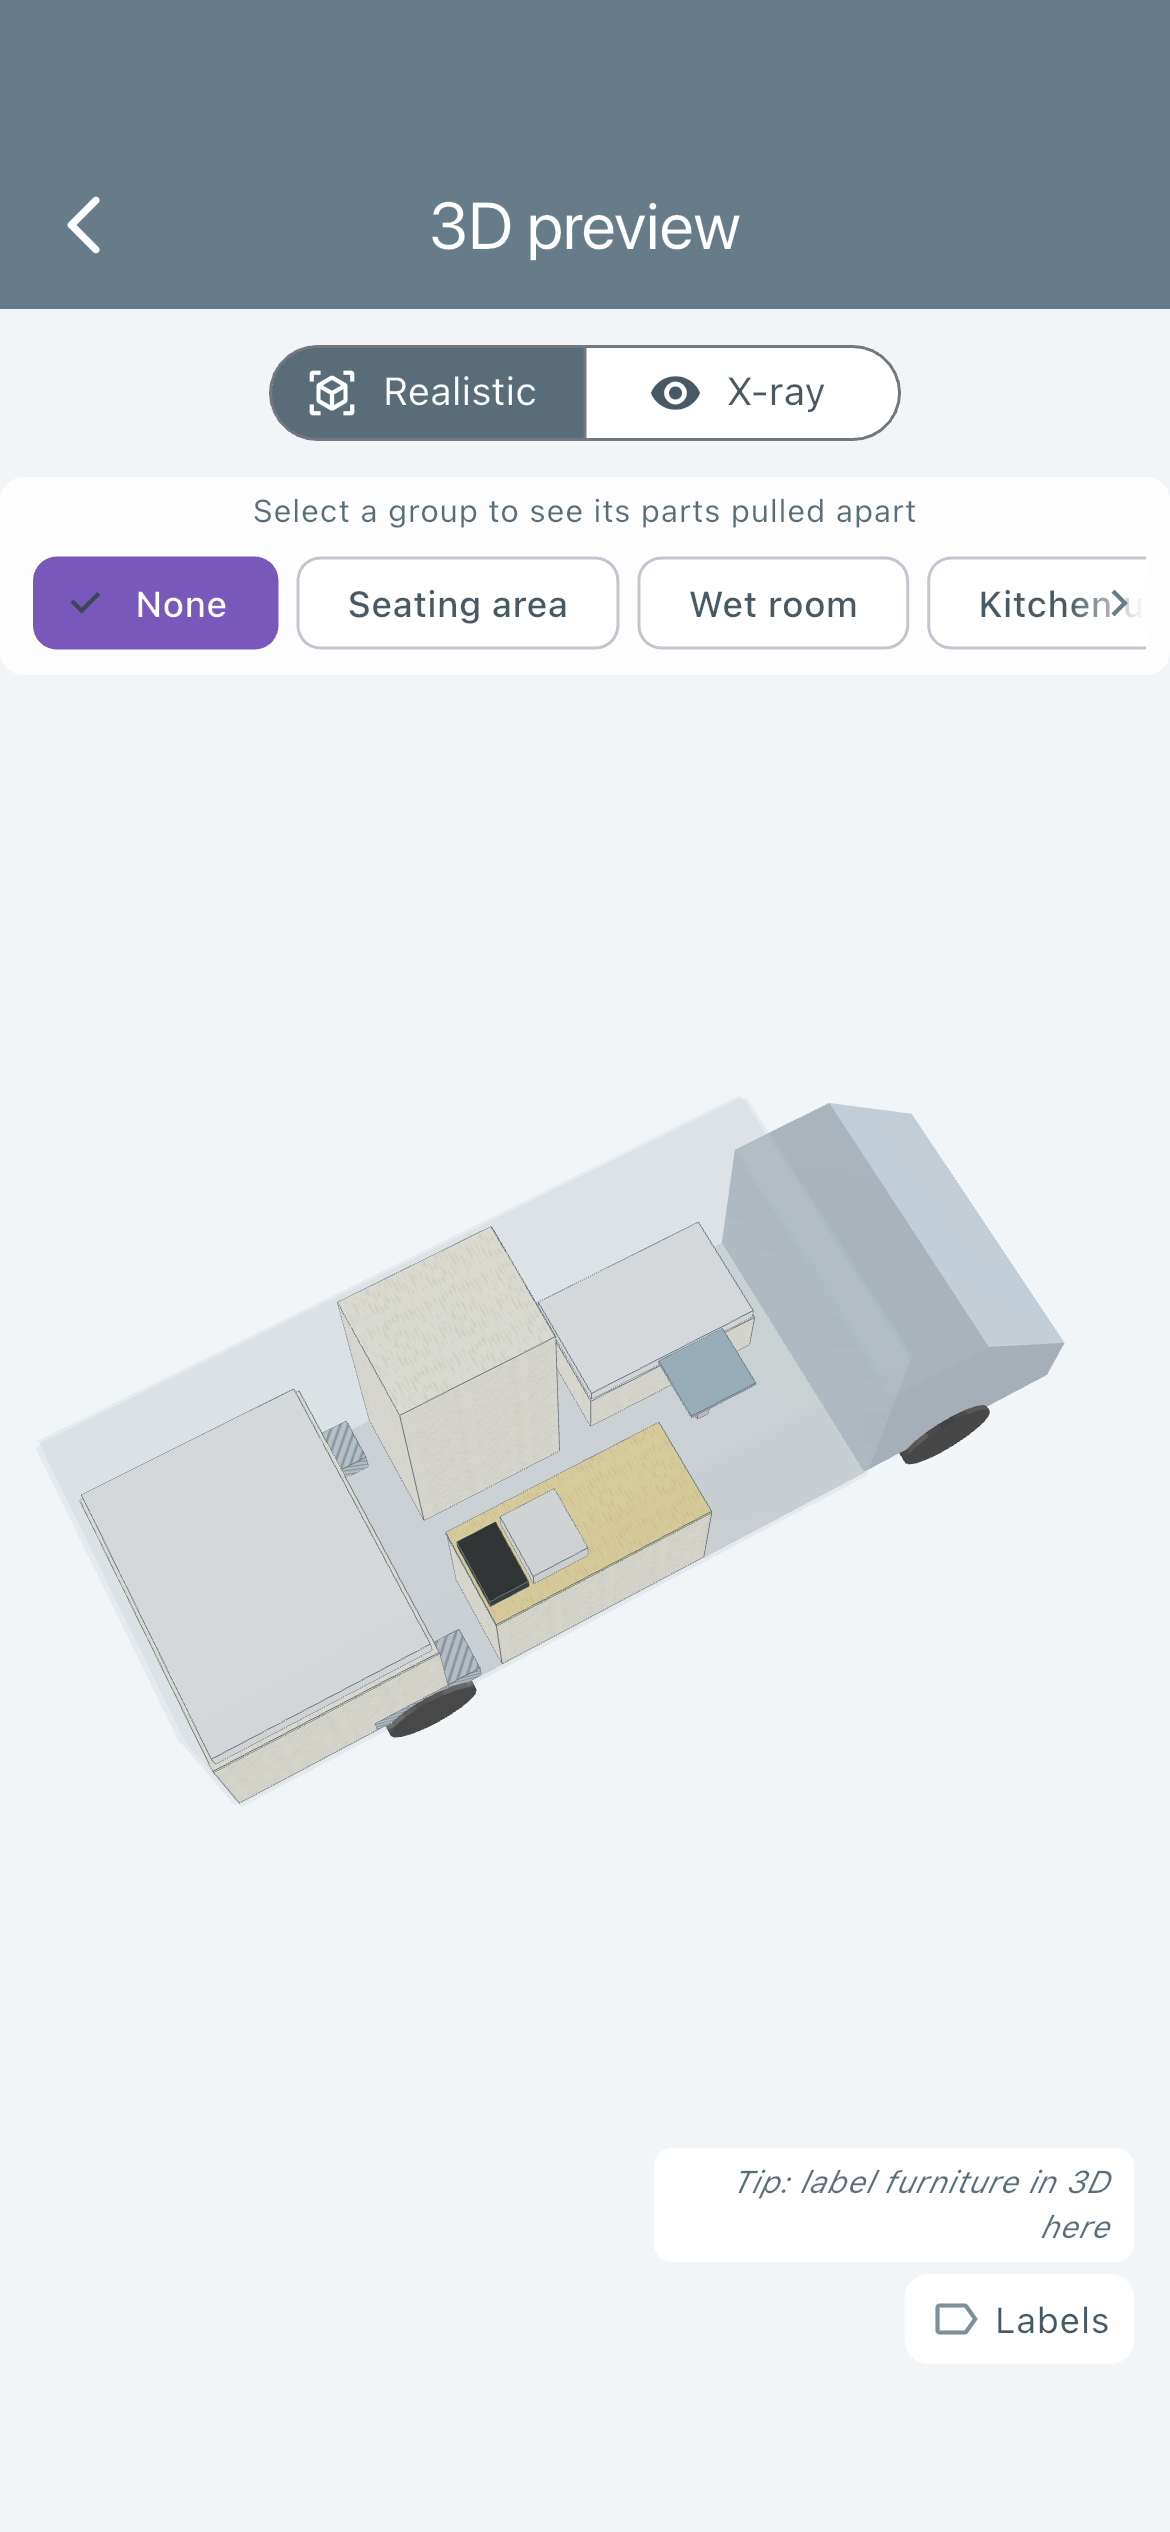
The same floor plan in 3D.
The price is length. Under 6 m of vehicle length it gets very tight, because the bathroom and kitchen side by side need the full width, and the aisle between them shrinks to 43 to 50 cm.
What it does to axle load: bathroom, bed, tanks — in the example plan, nearly everything sits in the rear third. It’s the only one of the five floor plans where the rear axle carries more than the front axle. That’s not wrong, but you need to know it and place your tanks accordingly.
Type 5: Drop-Down Bed over the Seating Area
The bed hangs under the roof during the day and gets lowered at night. The space underneath is usable twice: seating during the day, sleeping at night.
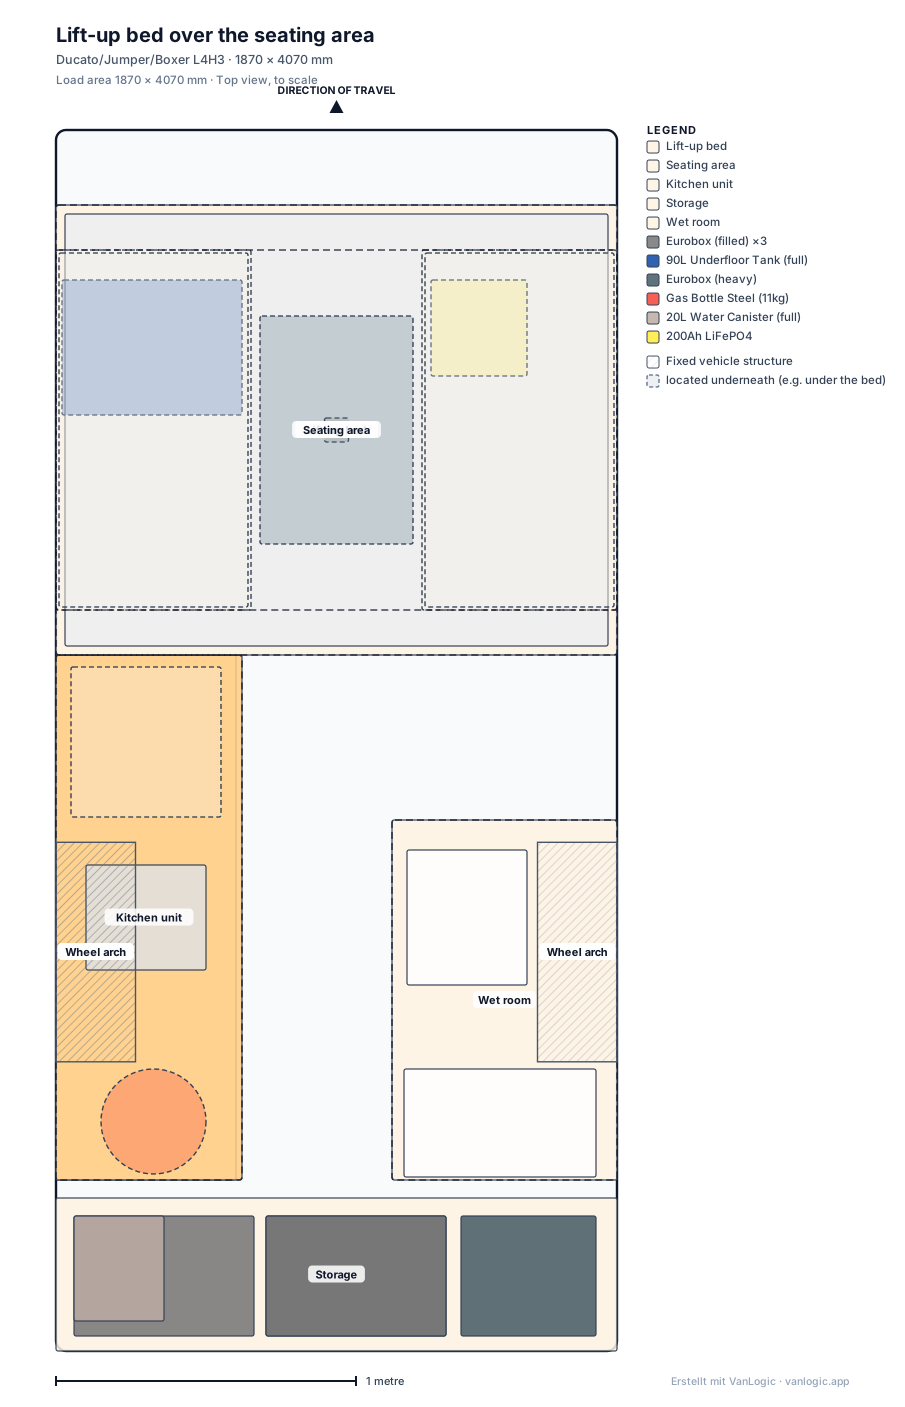
Drop-down bed over the seating area in the Ducato L4H3: sitting and sleeping on the same footprint.
Click for the full-size original
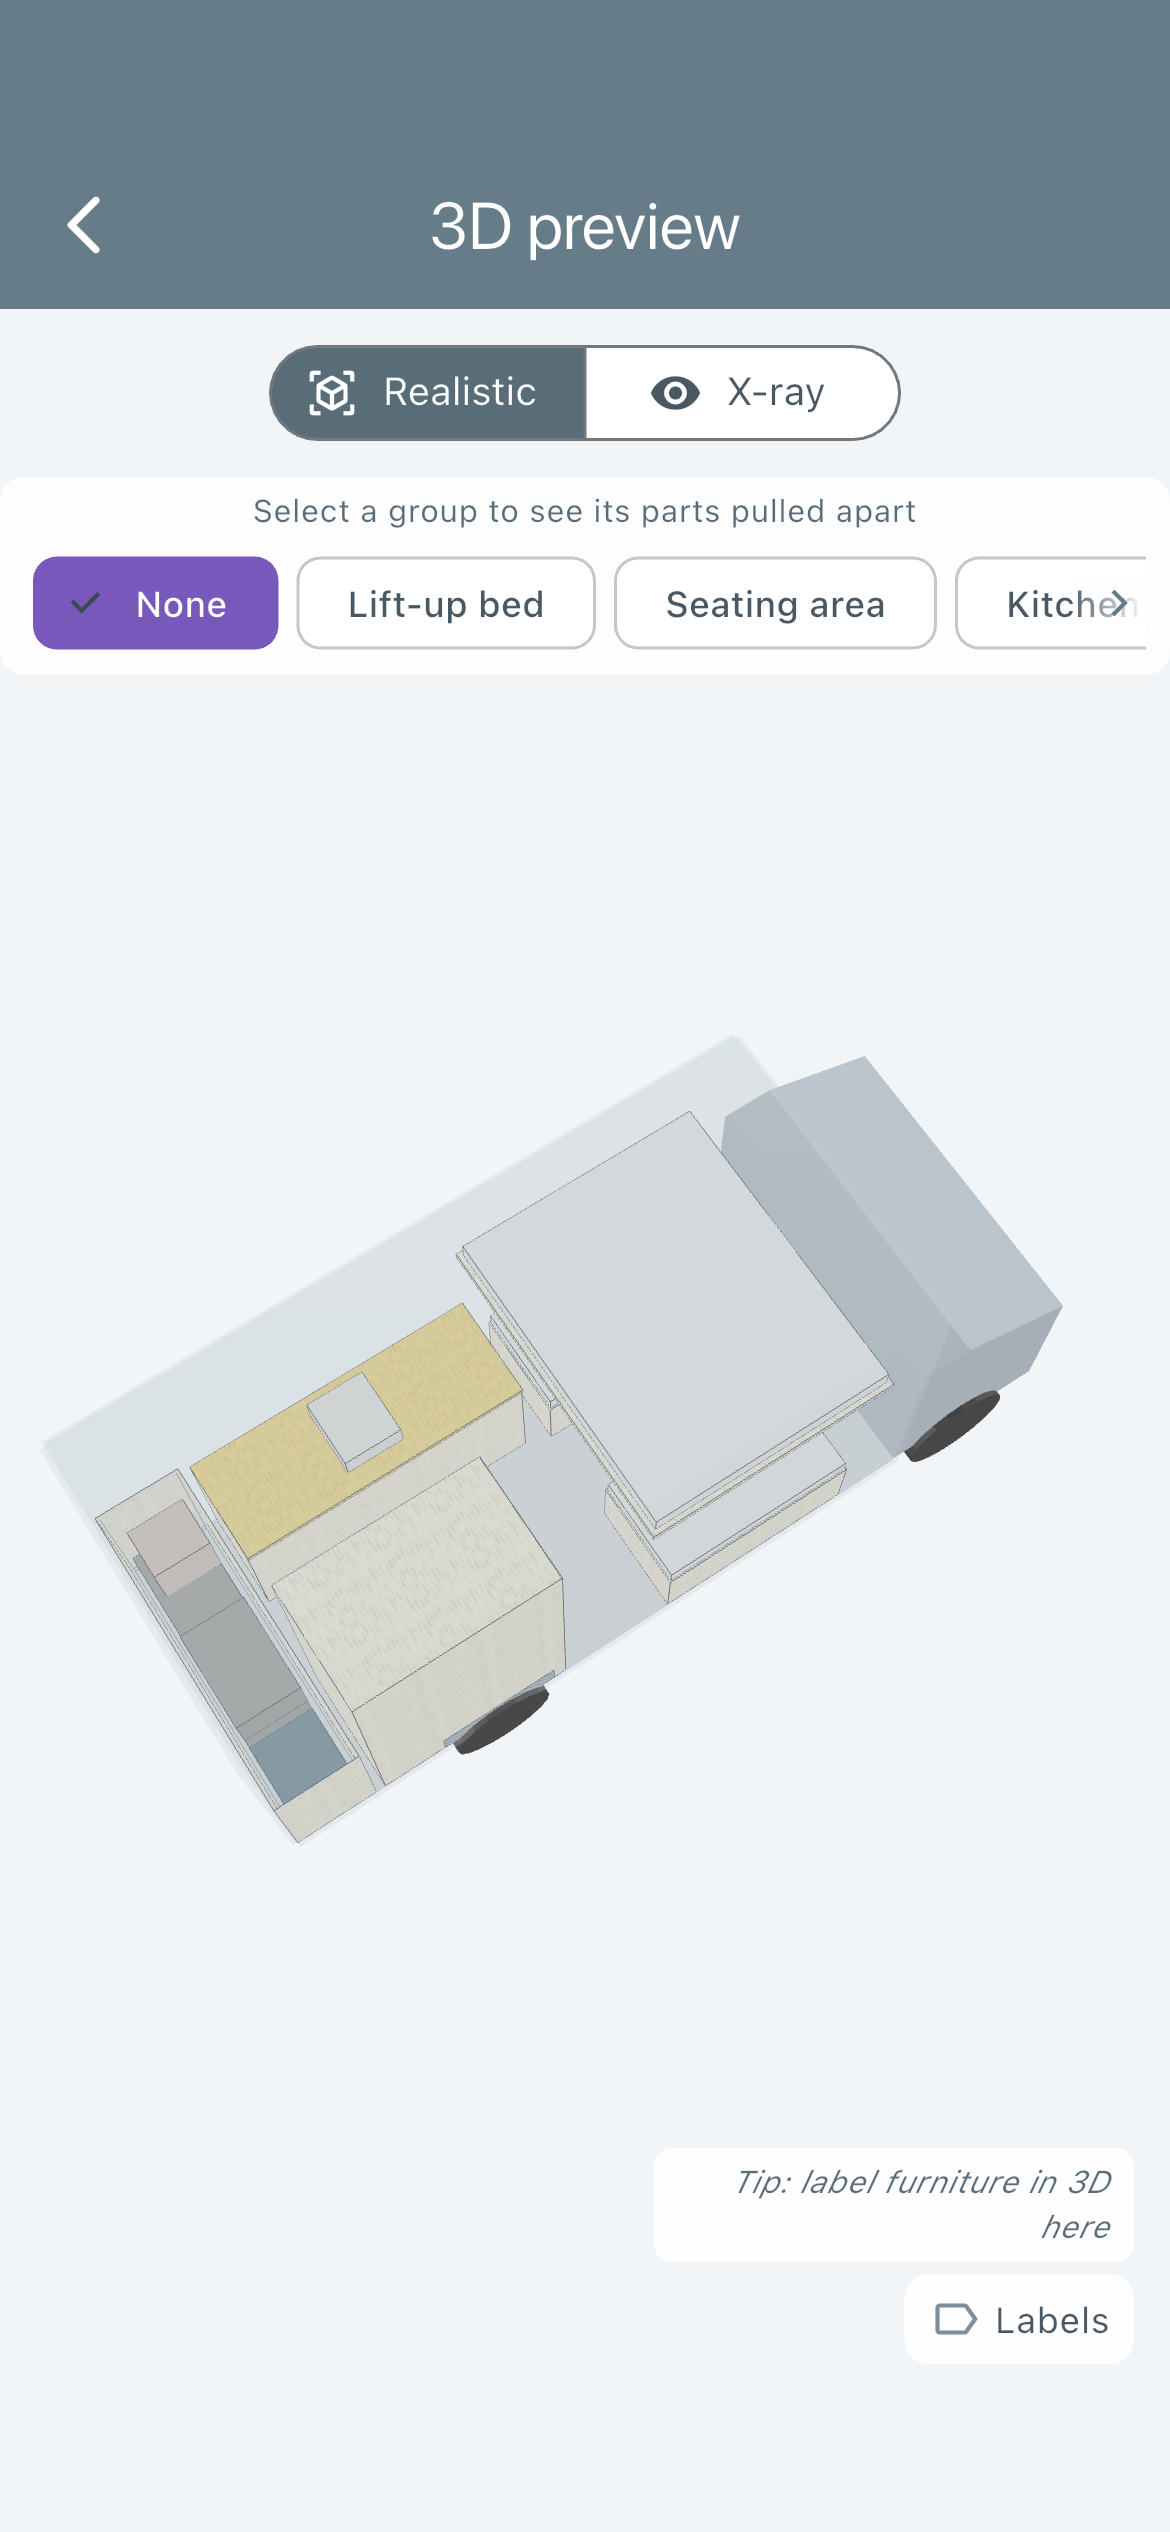
The same floor plan in 3D.
Requirement: also a high-roof vehicle, plus an honest self-assessment — a bed you lower every evening is more comfortable to plan than to actually live with.
What it does to axle load: the bed sits far forward and high up. Far forward is good for distribution, high up is bad for the centre of gravity — more on that in Chapter 5.
The Five Compared Side by Side
All values from the fully calculated plans, each on the vehicle stated:
| Floor Plan | Vehicle | Build Weight | Front Axle | Rear Axle | Remaining Payload |
|---|---|---|---|---|---|
| Transverse Bed | Ducato L2H2 | 357 kg | 1,313 kg | 1,044 kg | 943 kg |
| Longitudinal Bed with Aisle | Crafter L3 | 328 kg | 1,353 kg | 1,074 kg | 1,072 kg |
| High Bed over Rear Garage | Ducato L4H3 | 375 kg | 1,459 kg | 1,166 kg | 875 kg |
| Floor Plan with Wet Bath | Sprinter L3 | 509 kg | 1,368 kg | 1,491 kg | 641 kg |
| Drop-Down Bed over Seating Area | Ducato L4H3 | 531 kg | 1,519 kg | 1,262 kg | 719 kg |
Two things stand out here. First: a full conversion with a wet bath costs about 150 kg more build weight than a simple weekend layout — and later, that 150 kg is missing when it comes to water, luggage and passengers. Second: the floor plan doesn’t just shift total weight, it shifts distribution. In the wet-bath layout, the balance tips toward the rear axle.
Try it now in the web app – free, no account needed In the sandbox, every feature is unlocked: load eight ready-made build templates, add 27 pre-built furniture assemblies, and have axle load and centre of gravity calculated live. No time limit — only permanent saving and export stay Pro.
3. The Measurements Floor Plans Fail On
Most floor plans don’t fail on the concept — they fail on four or five centimetres. This table is the collection of measurements that actually matter in a van:
| Measurement | Practical value | Lower limit |
|---|---|---|
| Aisle between two rows of furniture | 60–70 cm | 50 cm at full height, 45 cm between bench seat and kitchen |
| Kitchen work height | 89–92 cm | by body height, not by a standard |
| Kitchen depth | 50–60 cm | 38 cm with a fold-out extension |
| Bench seat height | 45–50 cm | including cushion |
| Bench seat depth | 45–60 cm | below 45 cm you’re no longer sitting, you’re perching |
| Bed length, longitudinal | 200 cm | 210 cm from about 1.90 m body height |
| Bed width for two | 130–150 cm | 120 cm becomes uncomfortable long-term |
| Standing height | 189–200 cm | 205–210 cm for tall people |
The lower limits are exactly that: limits. A 45 cm aisle works between a bench seat and a kitchen block, because you’re only passing through. At full height between two cabinets, the same value becomes a daily annoyance.
Two things the floor plan from above doesn’t show
A top-down view shows width and length. What it doesn’t show: anything to do with height — and that’s exactly where two of the most common planning mistakes happen.
The wheel arch isn’t a rectangle — and it’s in the way. In a panel van it intrudes roughly 26 cm into the width and 60 to 95 cm into the length. A floor-standing cabinet can’t stand there. There are exactly three clean solutions: the furniture ends in front of it or behind it. Or it sits as a hollow carcass above it, so the wheel arch disappears into its cavity — in which case the floor at that spot needs to be recessed or raised. Or the furniture is tall enough anyway, like a bed at 90 cm.
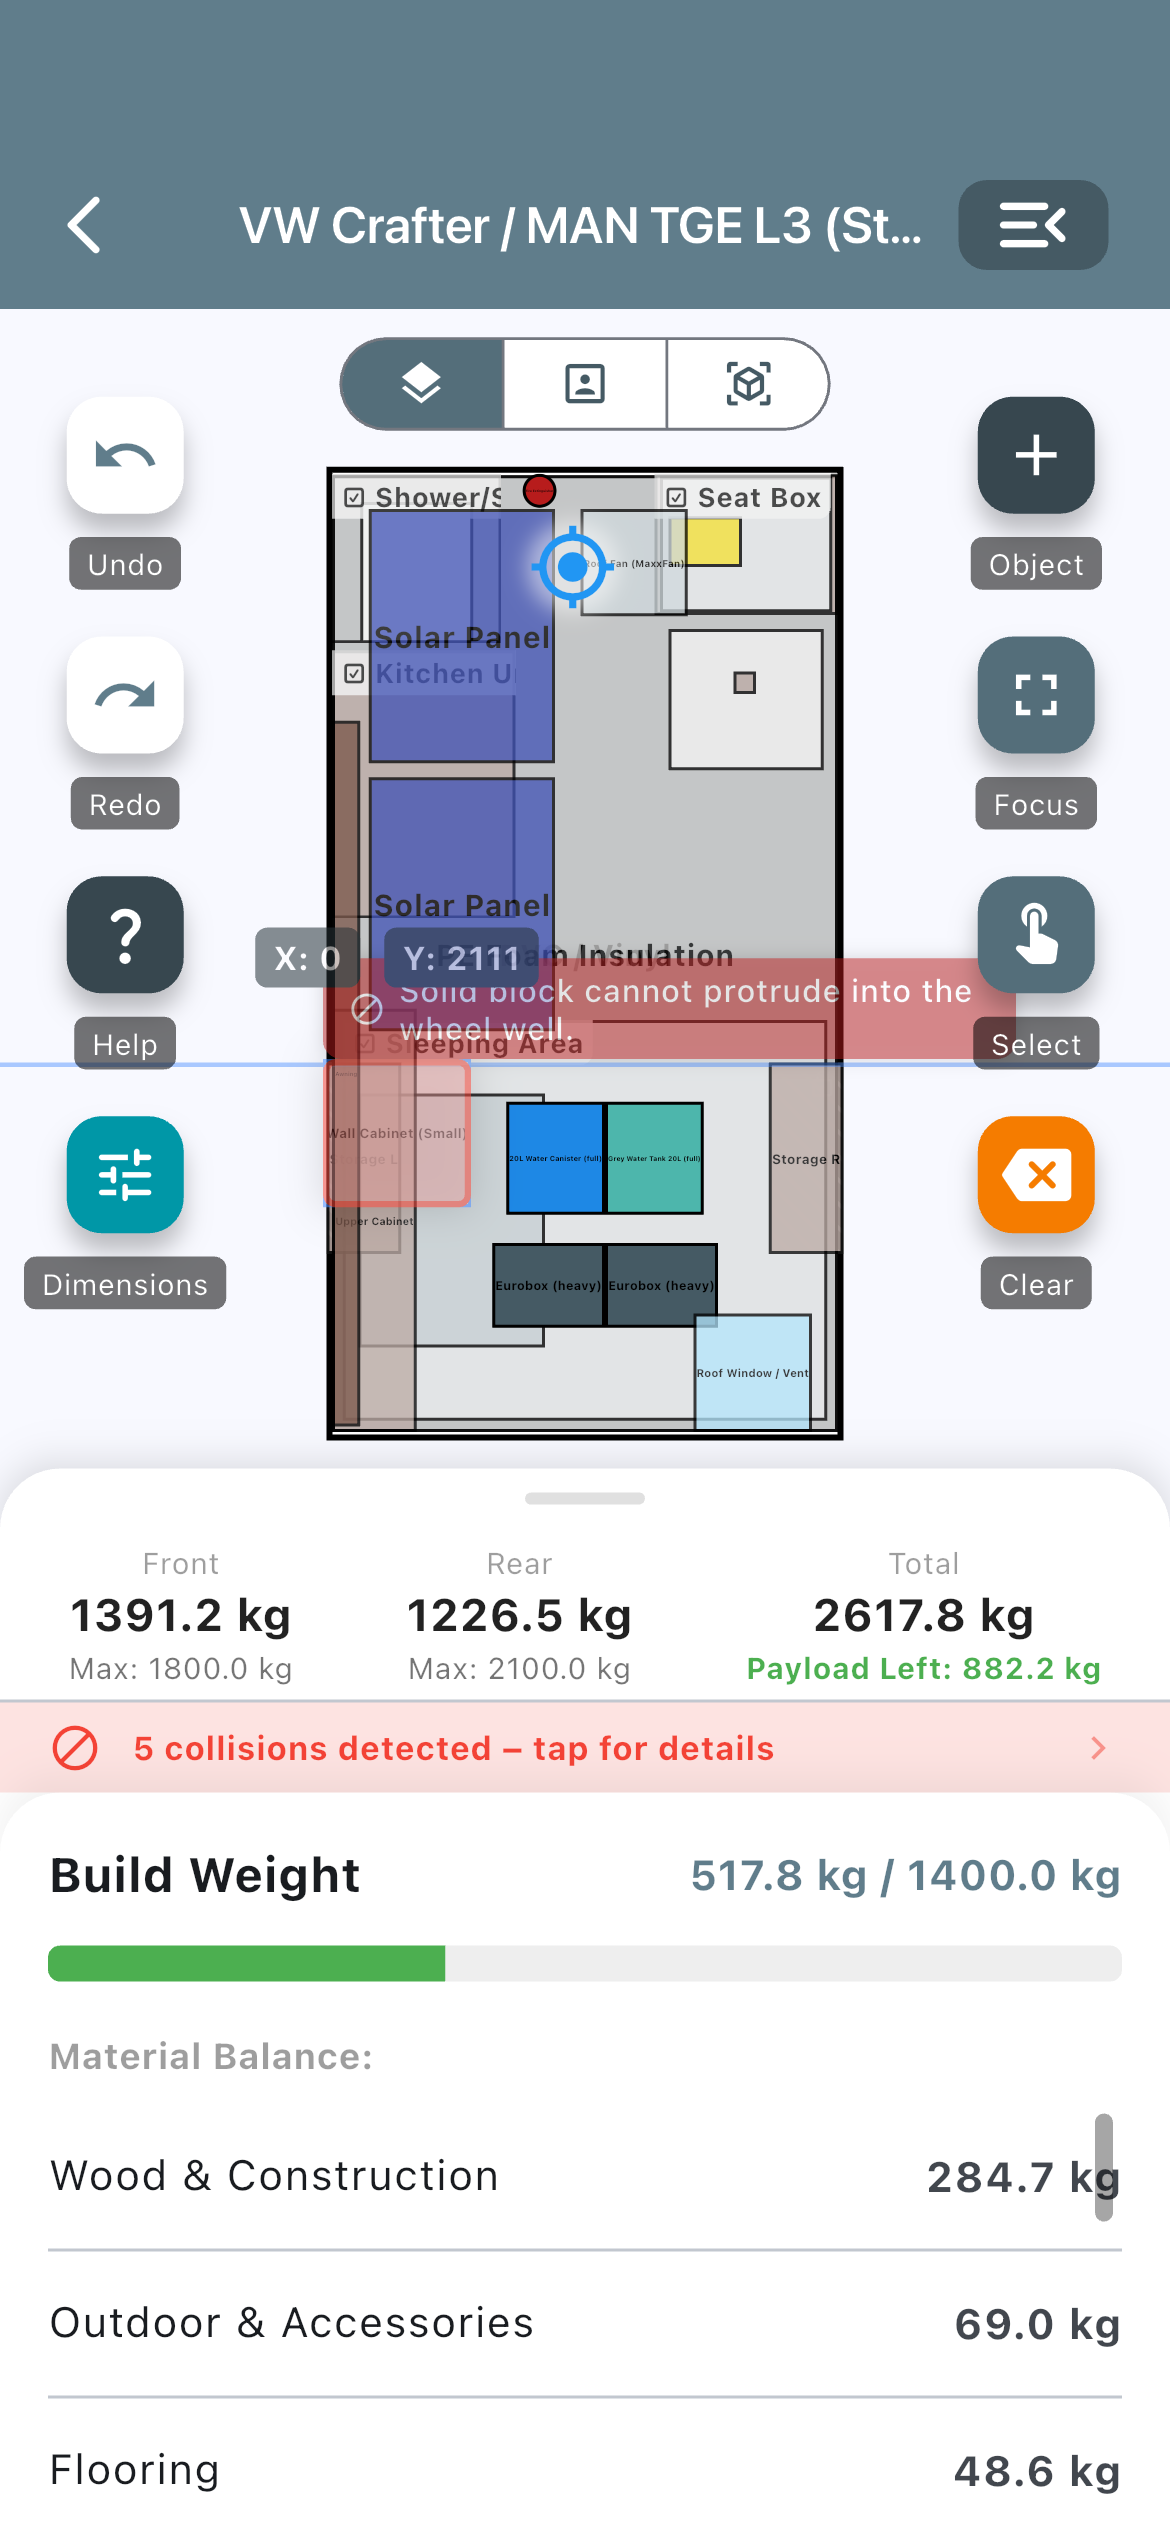
Collision with the wheel arch is detected instantly — while you're still dragging the object.
That’s not a detail you deal with later, by the way. It decides where the kitchen starts.
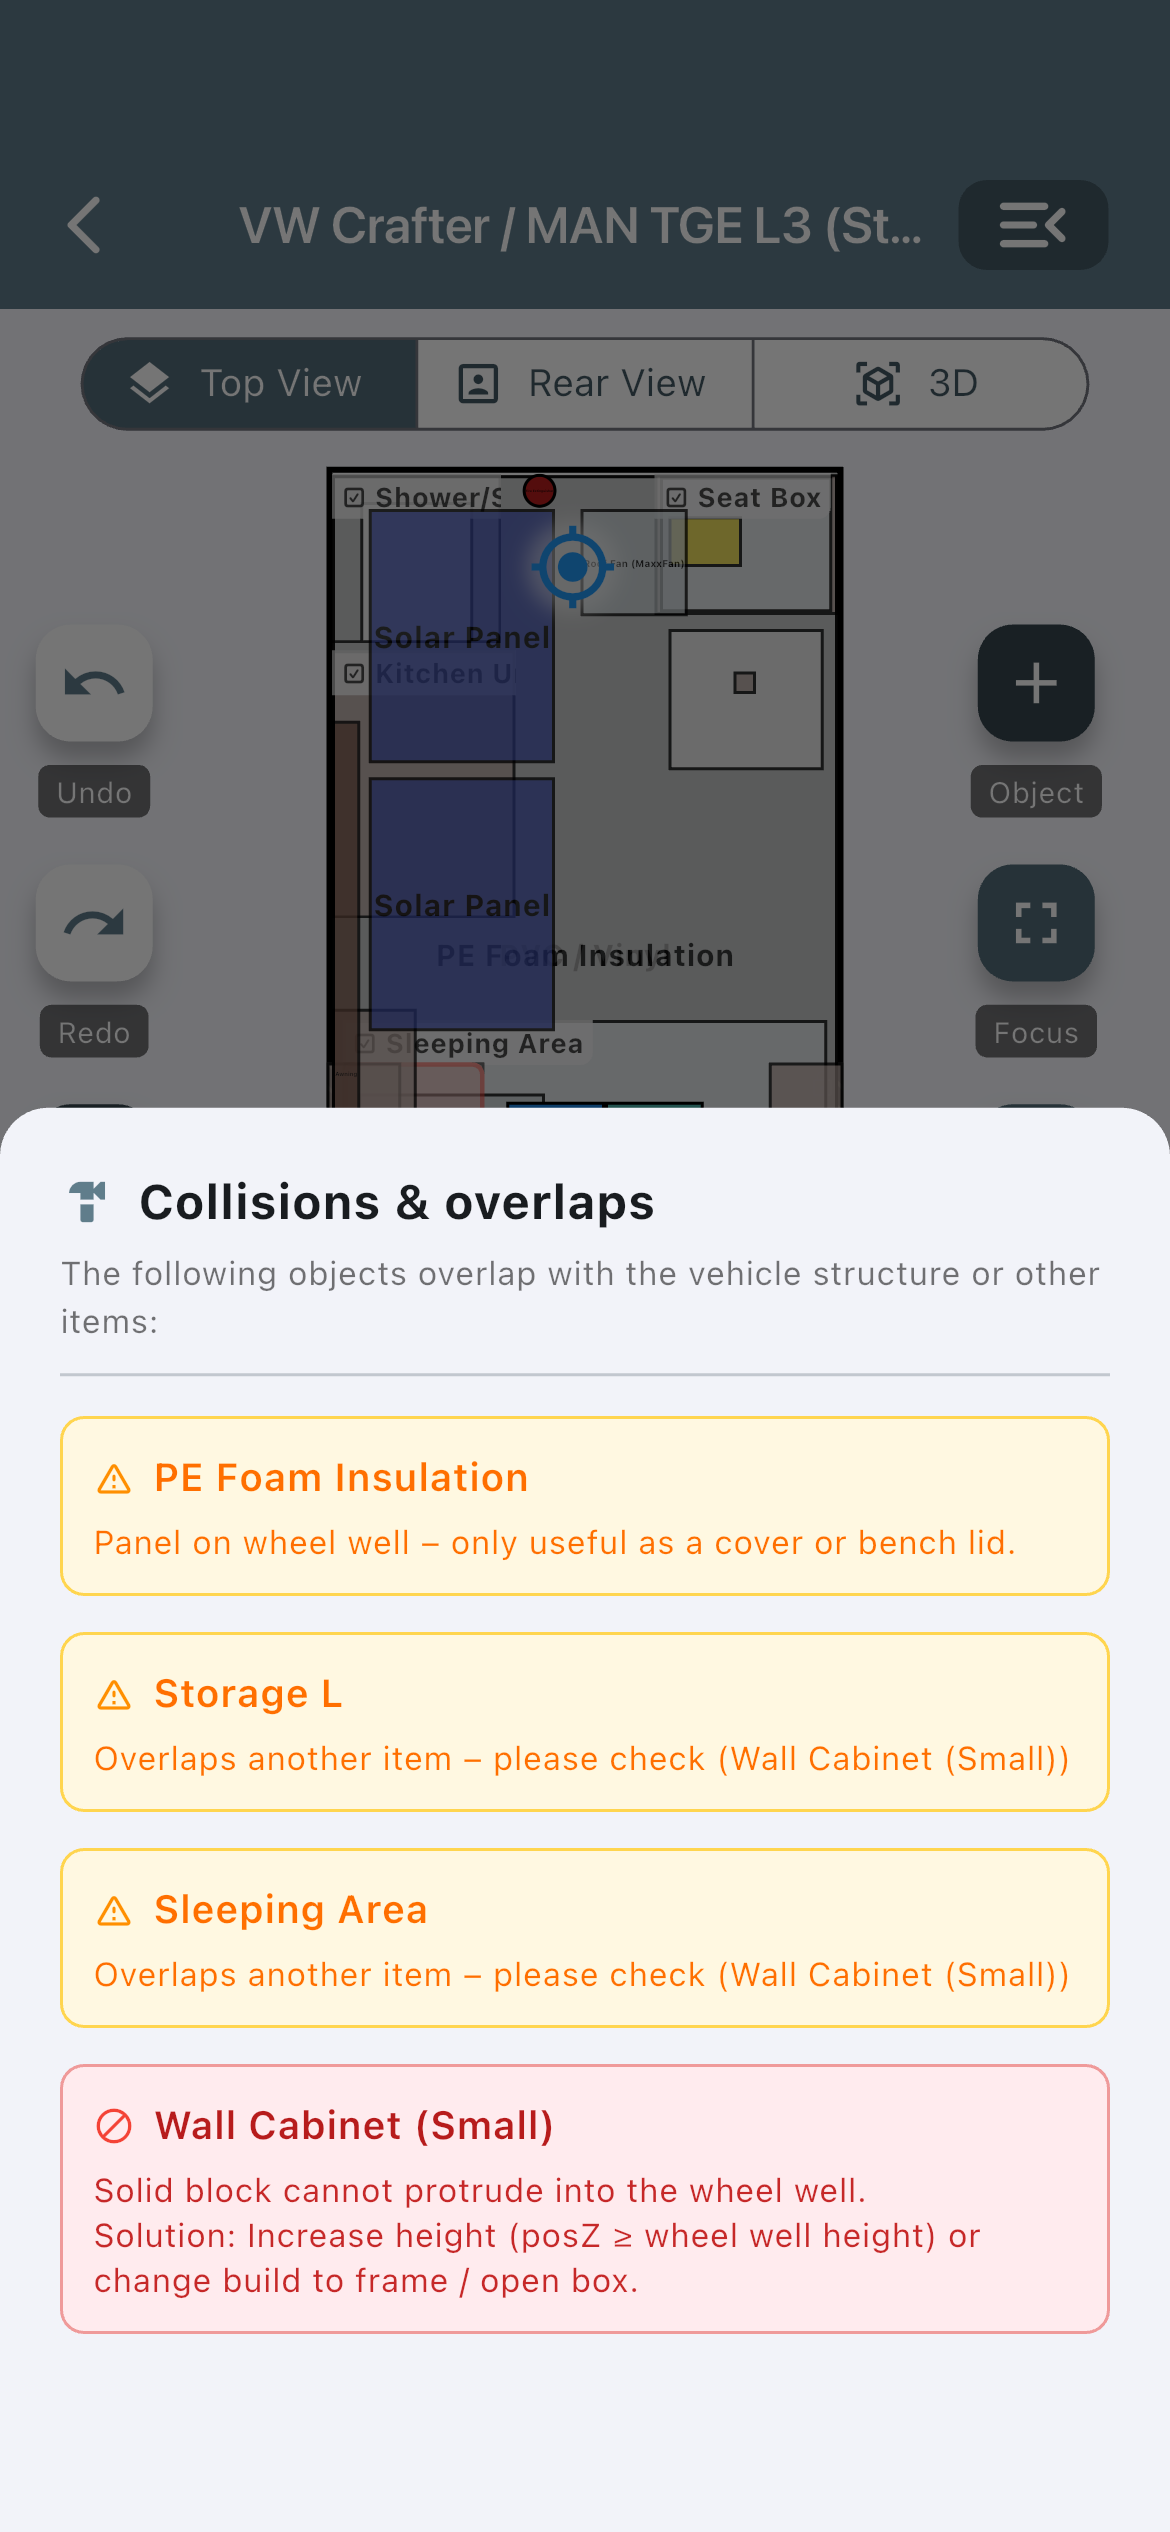
Detail view: which object collides where and why — including a fix suggestion.
There’s more calculation behind that second solution — the hollow carcass over the wheel arch — than you’d think at first glance: the collision check recognises hollow cavities. A hollow carcass that only overhangs the wheel arch on the outside, while genuinely leaving it free on the inside, is correctly recognised as collision-free — no false alarm just because two outlines overlap on screen. As far as we know, no other floor plan tool offers this kind of hollow-cavity-aware collision check.
The roof taper eats into cabinet depth. The wall of a panel van is narrower at the top than at the bottom. An upper cabinet that fits with 35 cm of depth at the bottom hits the roof at the top. You don’t see any of this in a top-down view — you only see it in the rear cross-section.
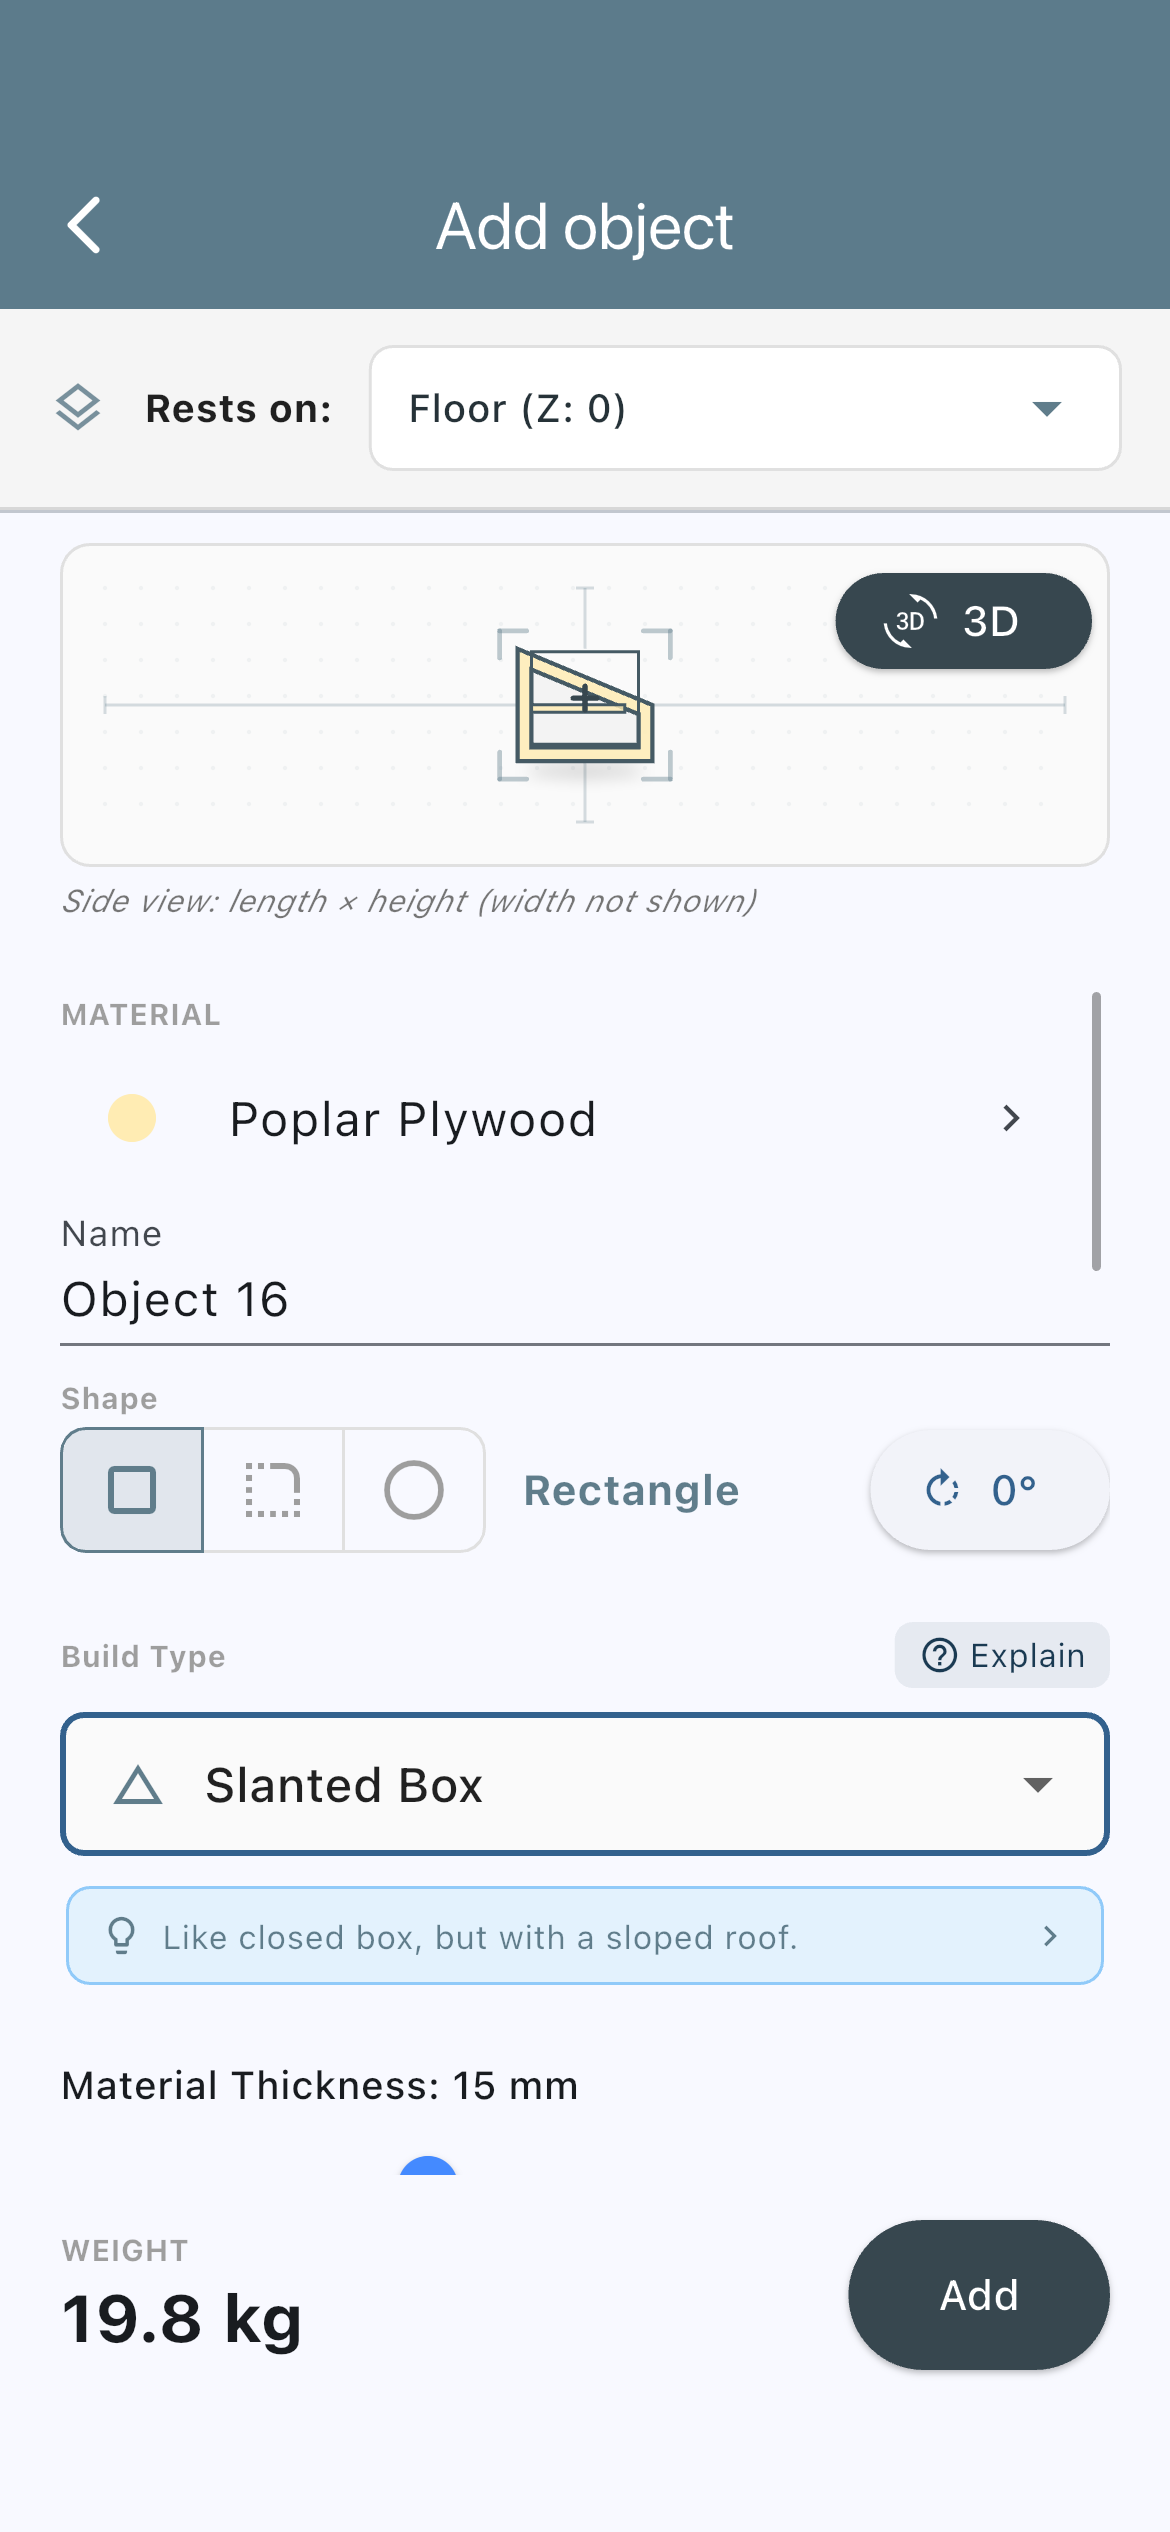
“Slanted box” build method in the object editor: the taper is already visible in the 2D preview.
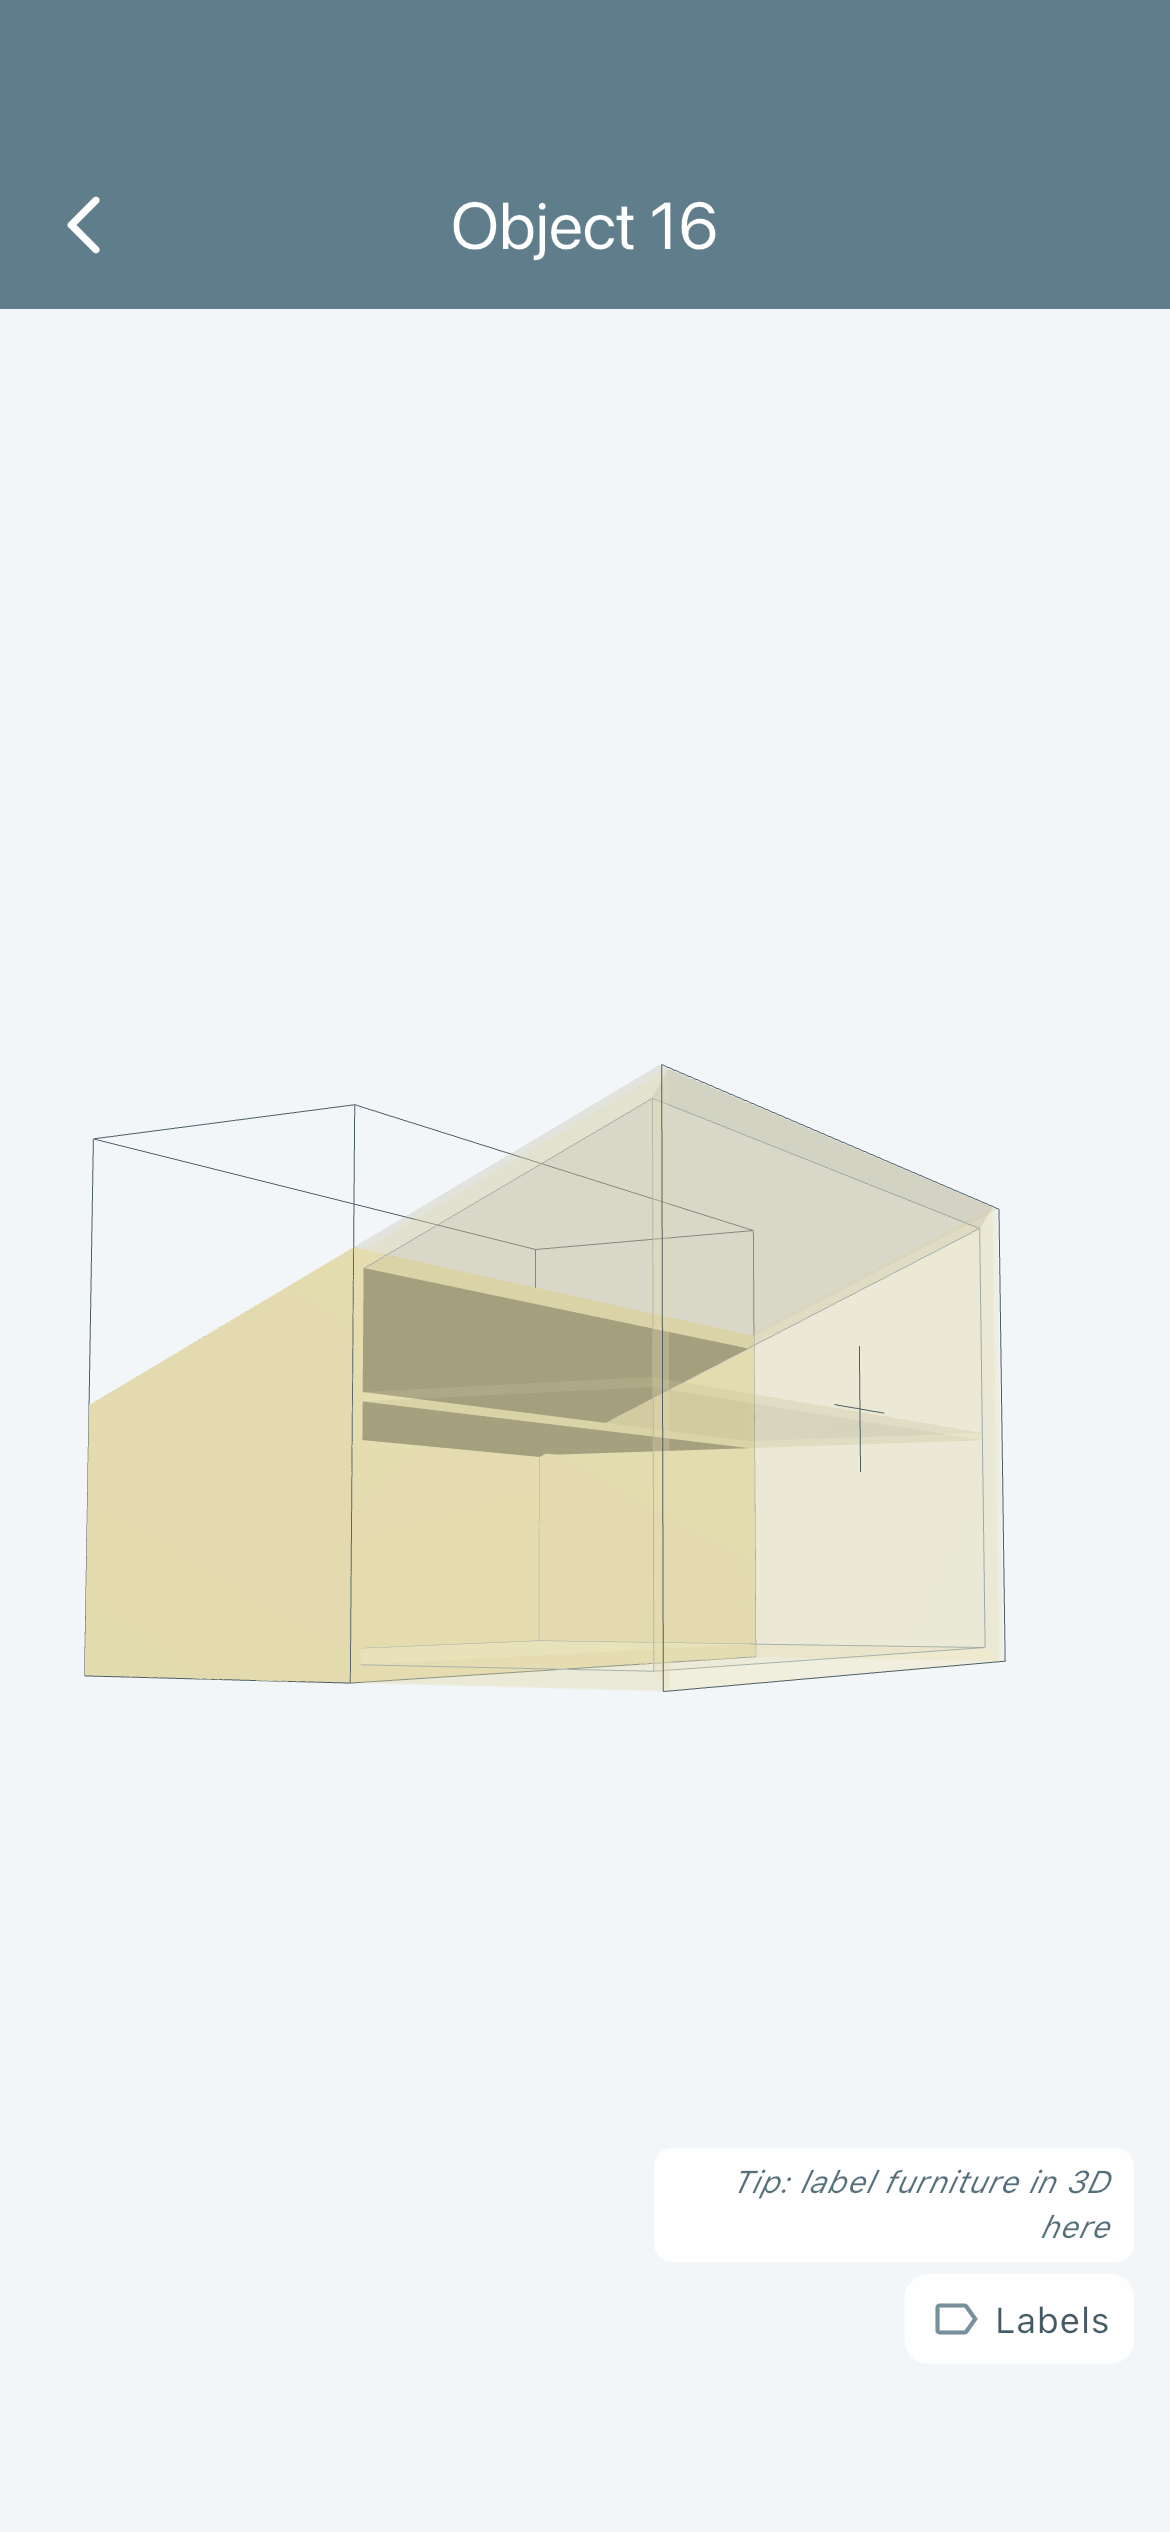
In 3D you can see why: the shelves get narrower toward the taper.
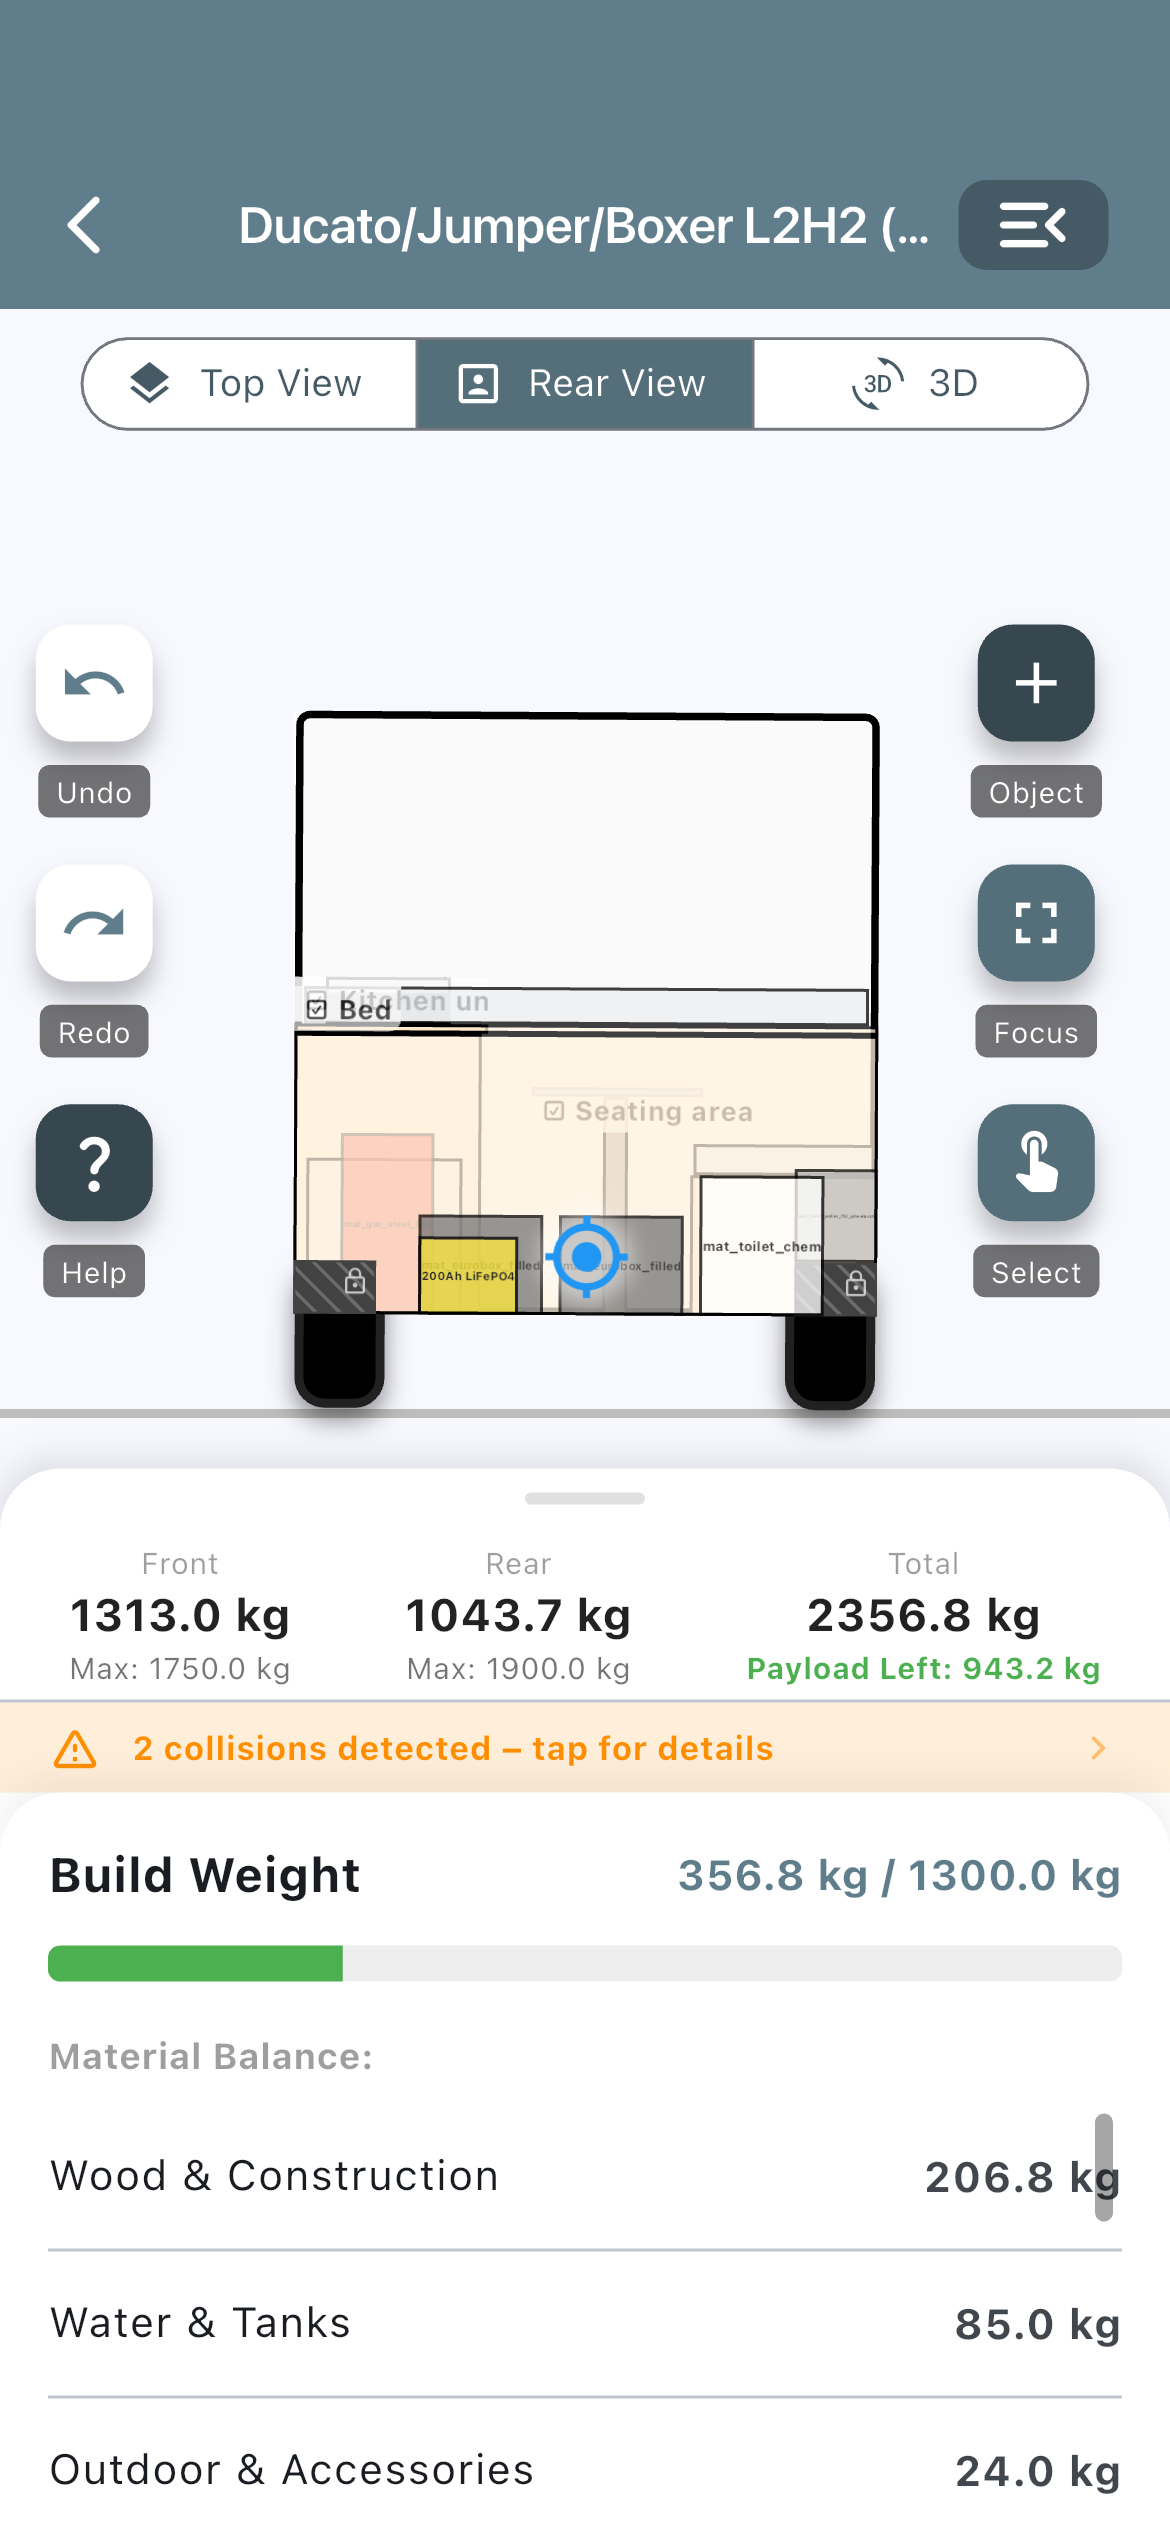
The rear cross-section shows what the top-down view hides: build heights, wheel arch, and whether everything actually clears.
What this means for planning
You can account for these measurements in a drawing. But you need to be able to check them, and in all three directions: width, length and height. A floor plan seen from above shows two of them.
4. From Floor Plan to Weight: the Build Method Decides
Up to this point it’s been about area: what stands where, how wide the aisle is, where the wheel arch is. Now comes the number that ultimately decides whether your van passes inspection.
And it depends less on the dimensions than most people think.
Take a kitchen base cabinet, 80 cm wide, 60 cm deep, 85 cm tall. One shelf, 15 mm birch plywood. None of those figures change even once in the table below. What changes is only how the cabinet is built:
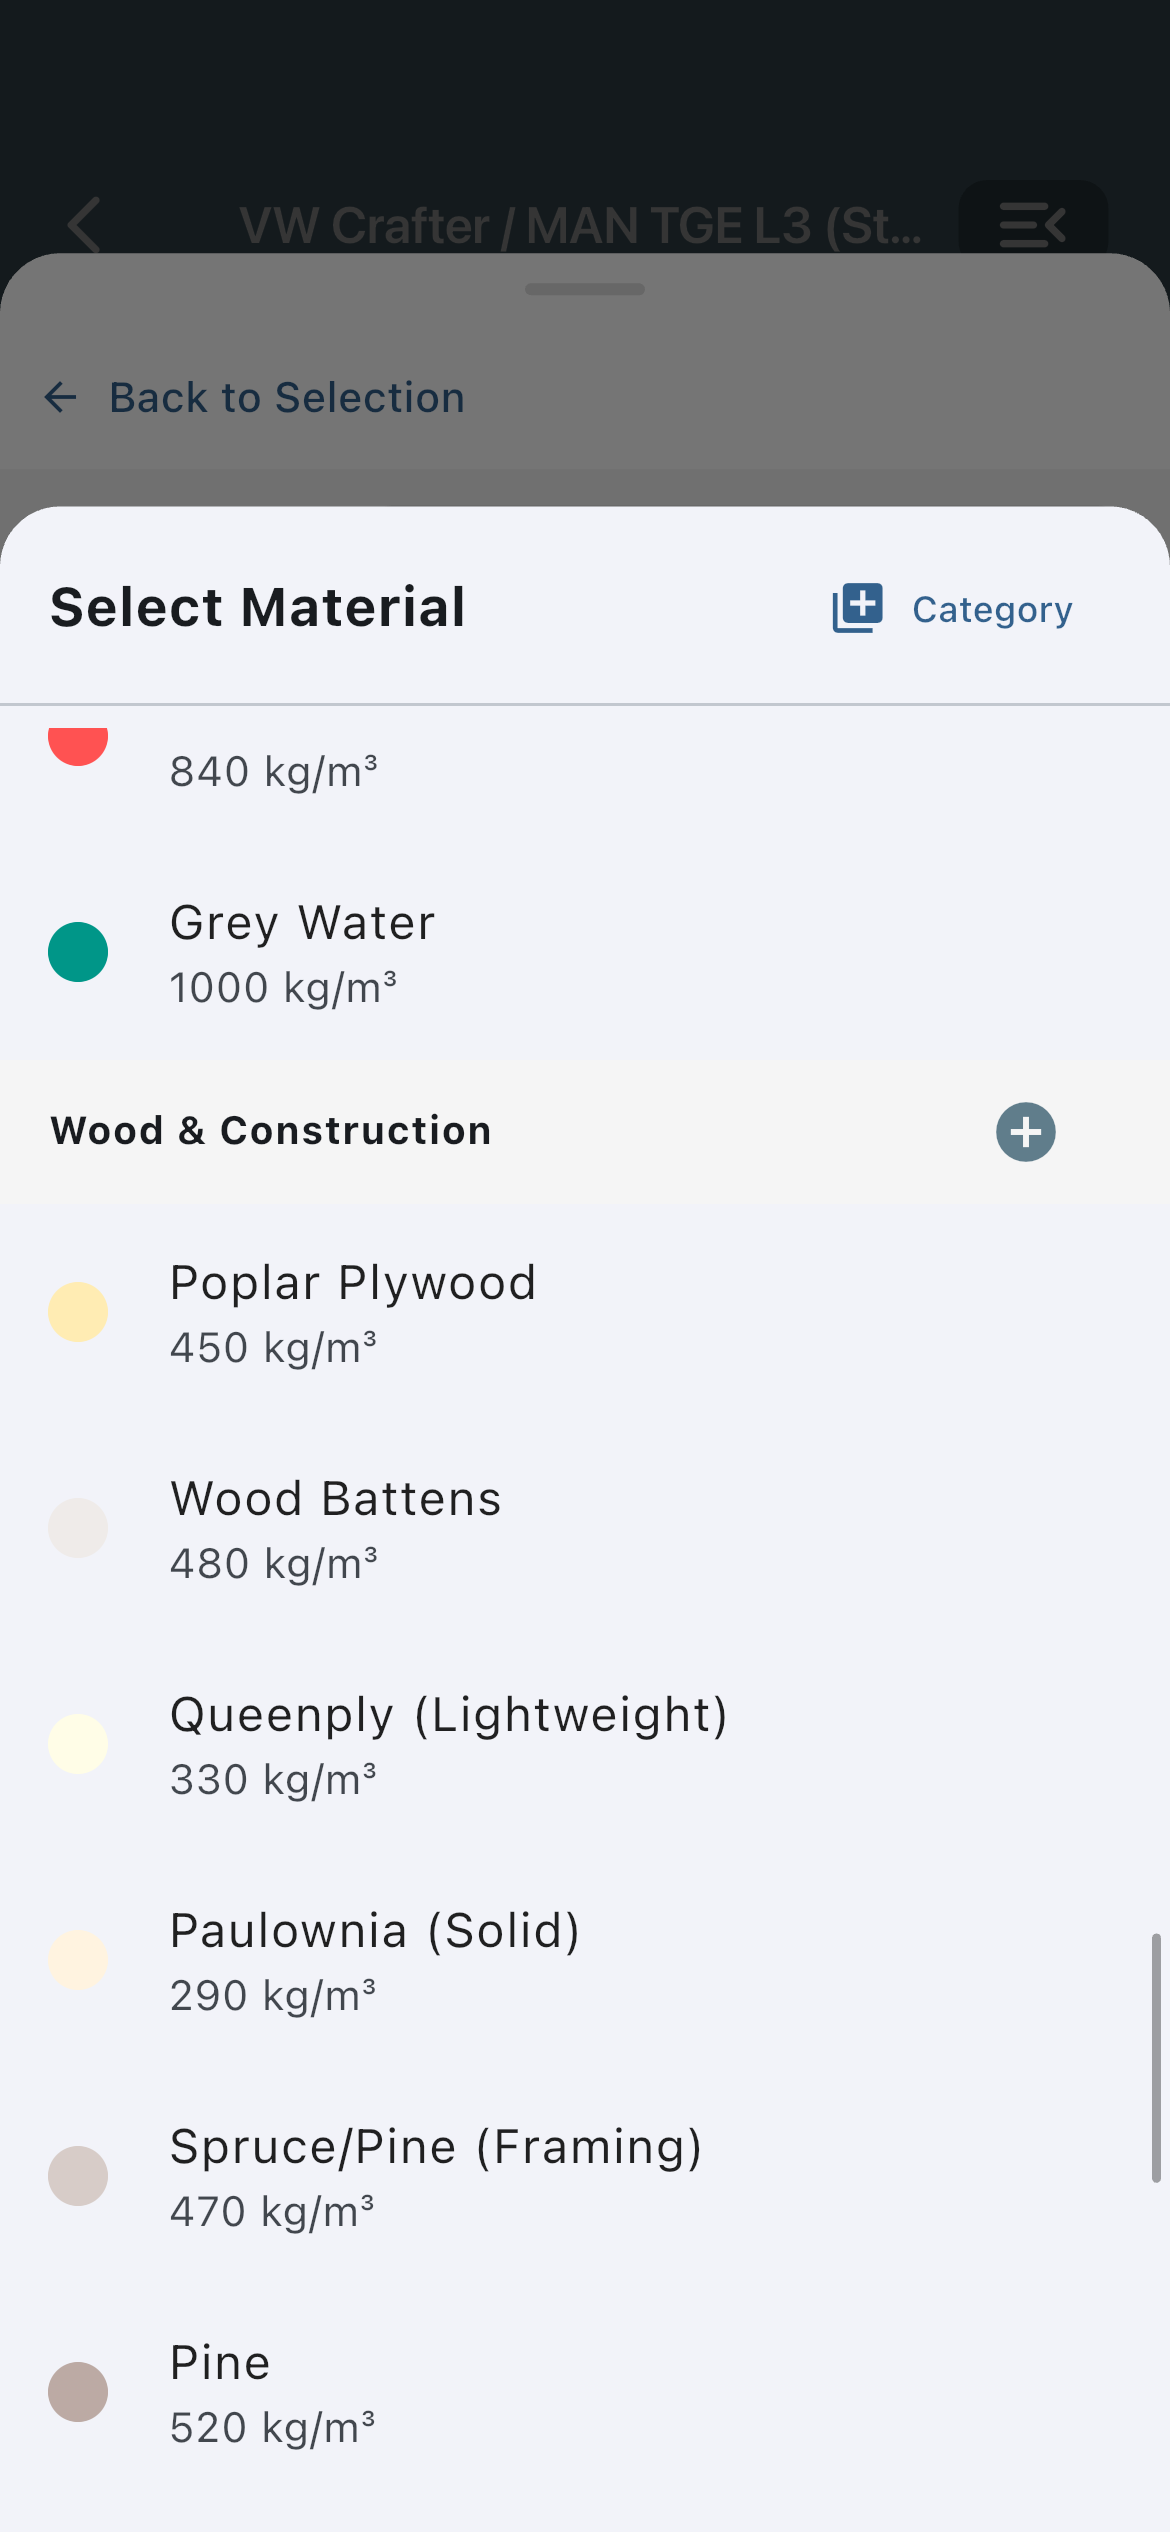
Choose a material with real density — the weight calculates itself automatically.
| Build method | Weight |
|---|---|
| Closed Box | 40.1 kg |
| Open Box | 35.1 kg |
| Frame + Panelling (5 mm skin) | 33.9 kg |
| Frame (closed) | 30.0 kg |
| Frame (open) | 22.2 kg |
Same dimensions, same wood, an 18 kg difference. With eight pieces of furniture in the van, that’s over 140 kilograms — roughly two adult passengers you’re then no longer allowed to take along.
What the build methods physically mean
The difference isn’t a calculation trick — it’s simply the amount of wood you buy and screw together:
- Closed Box — floor, lid, four sides. All at full material thickness. This is the cabinet you build when you don’t think any further.
- Open Box — the same without a lid. Saves exactly one panel.
- Frame + Panelling — a slim stud frame made of battens carries the load, a thin outer skin covers it. In real van builds, this is by far the most common build method.
- Frame (closed) — four continuous walls, no floor, no lid. The classic bed base.
- Frame (open) — just posts and cross braces, no surface in between. A shelving frame.
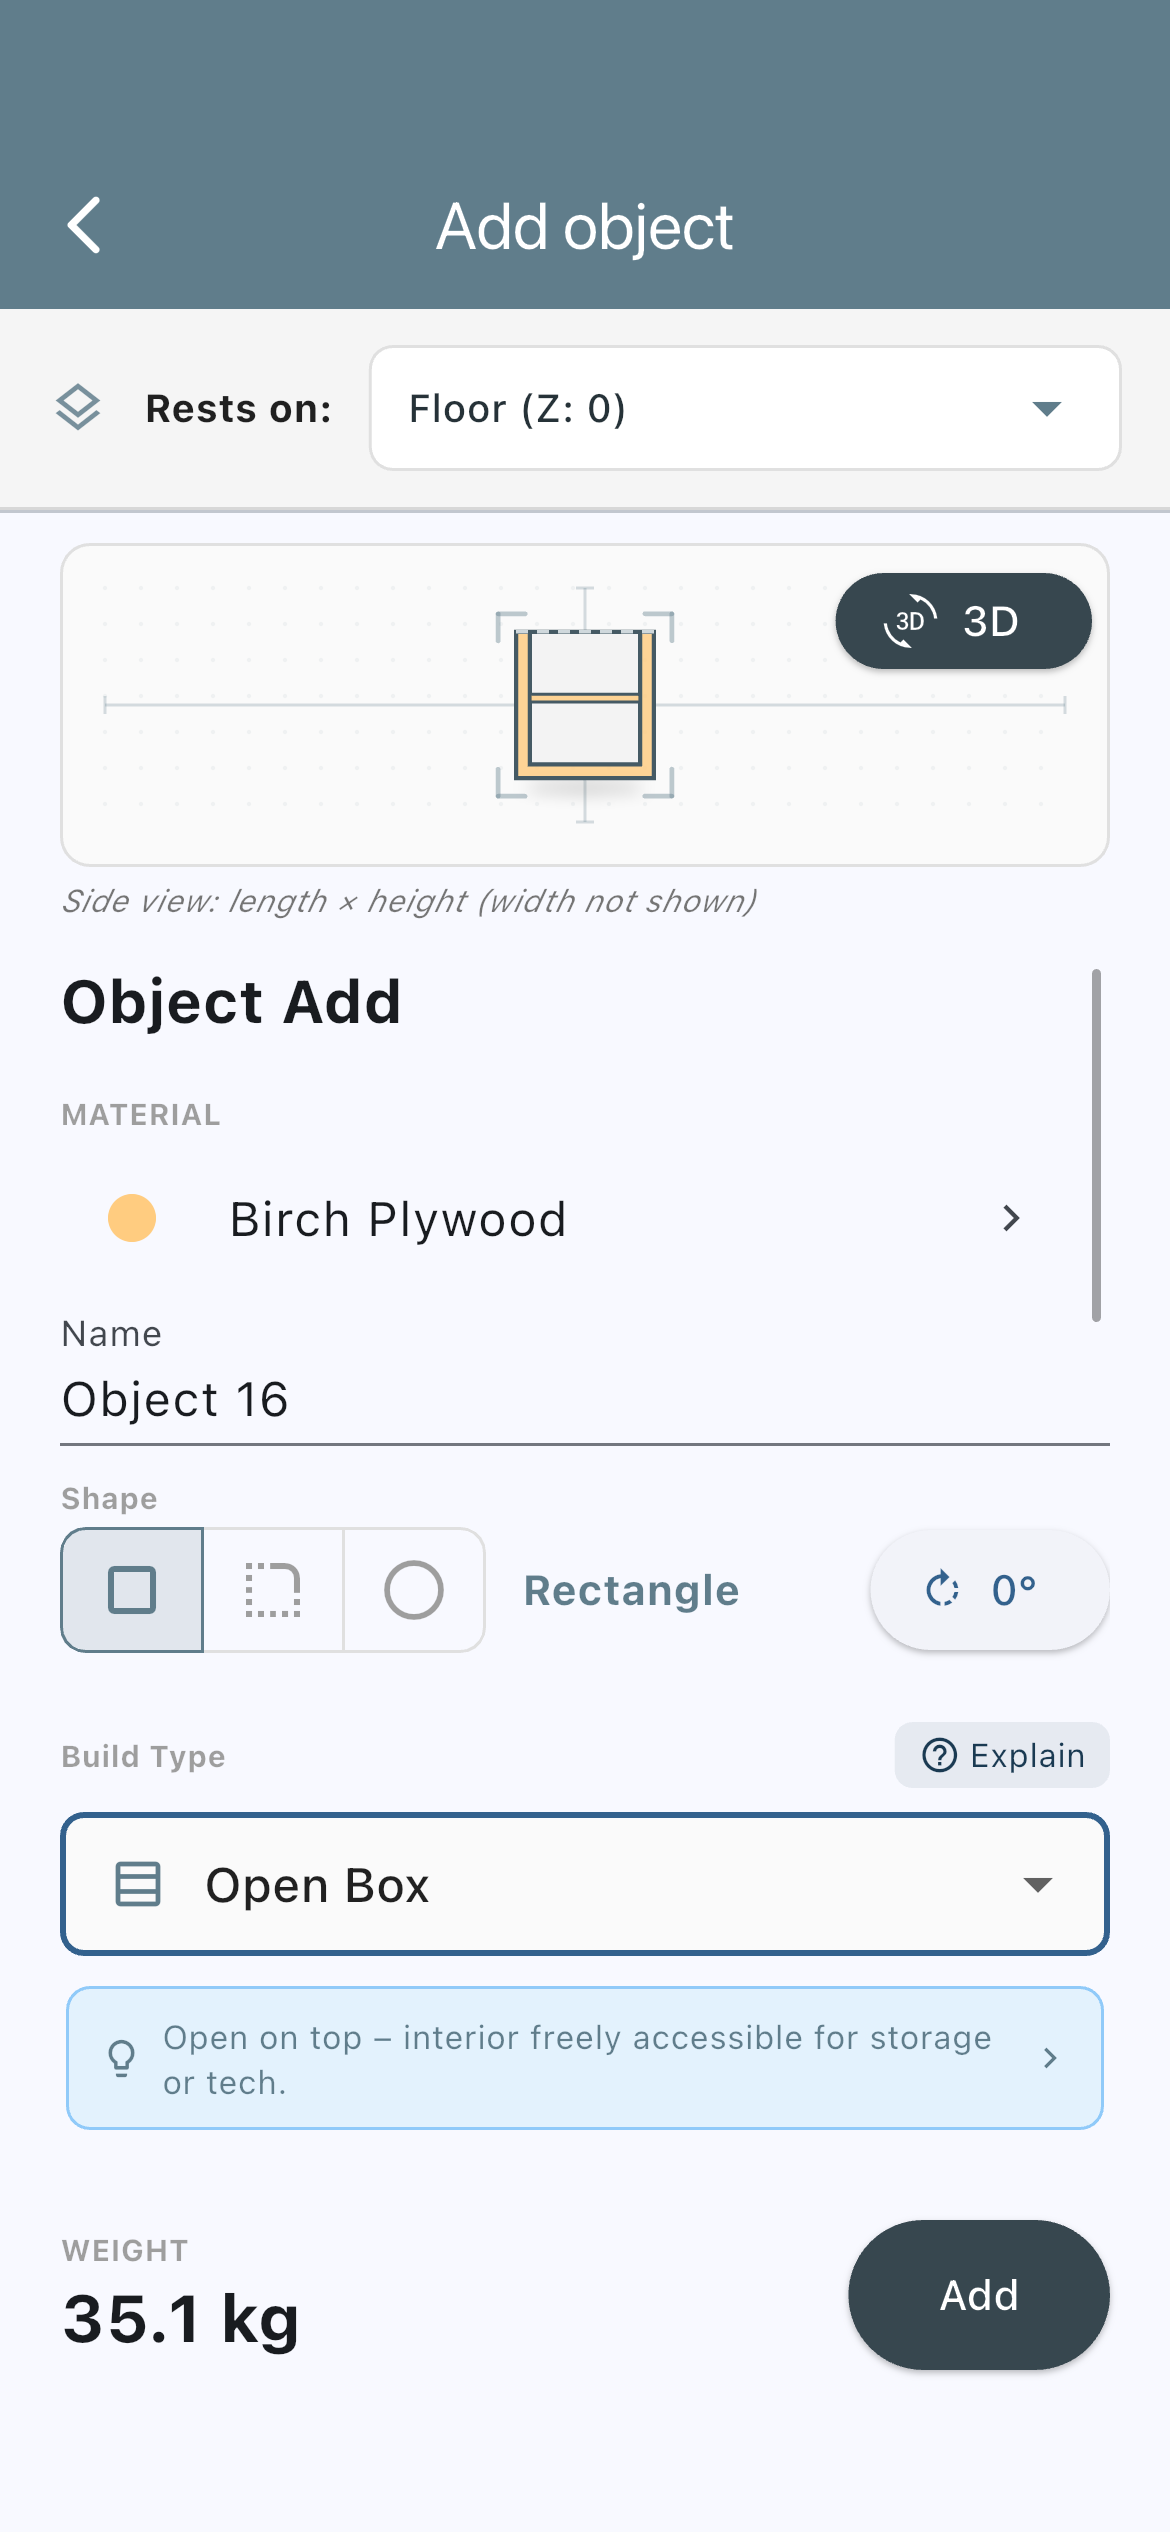
“Open Box” build method in the object editor – 35.1 kg, exactly the value from the table above.
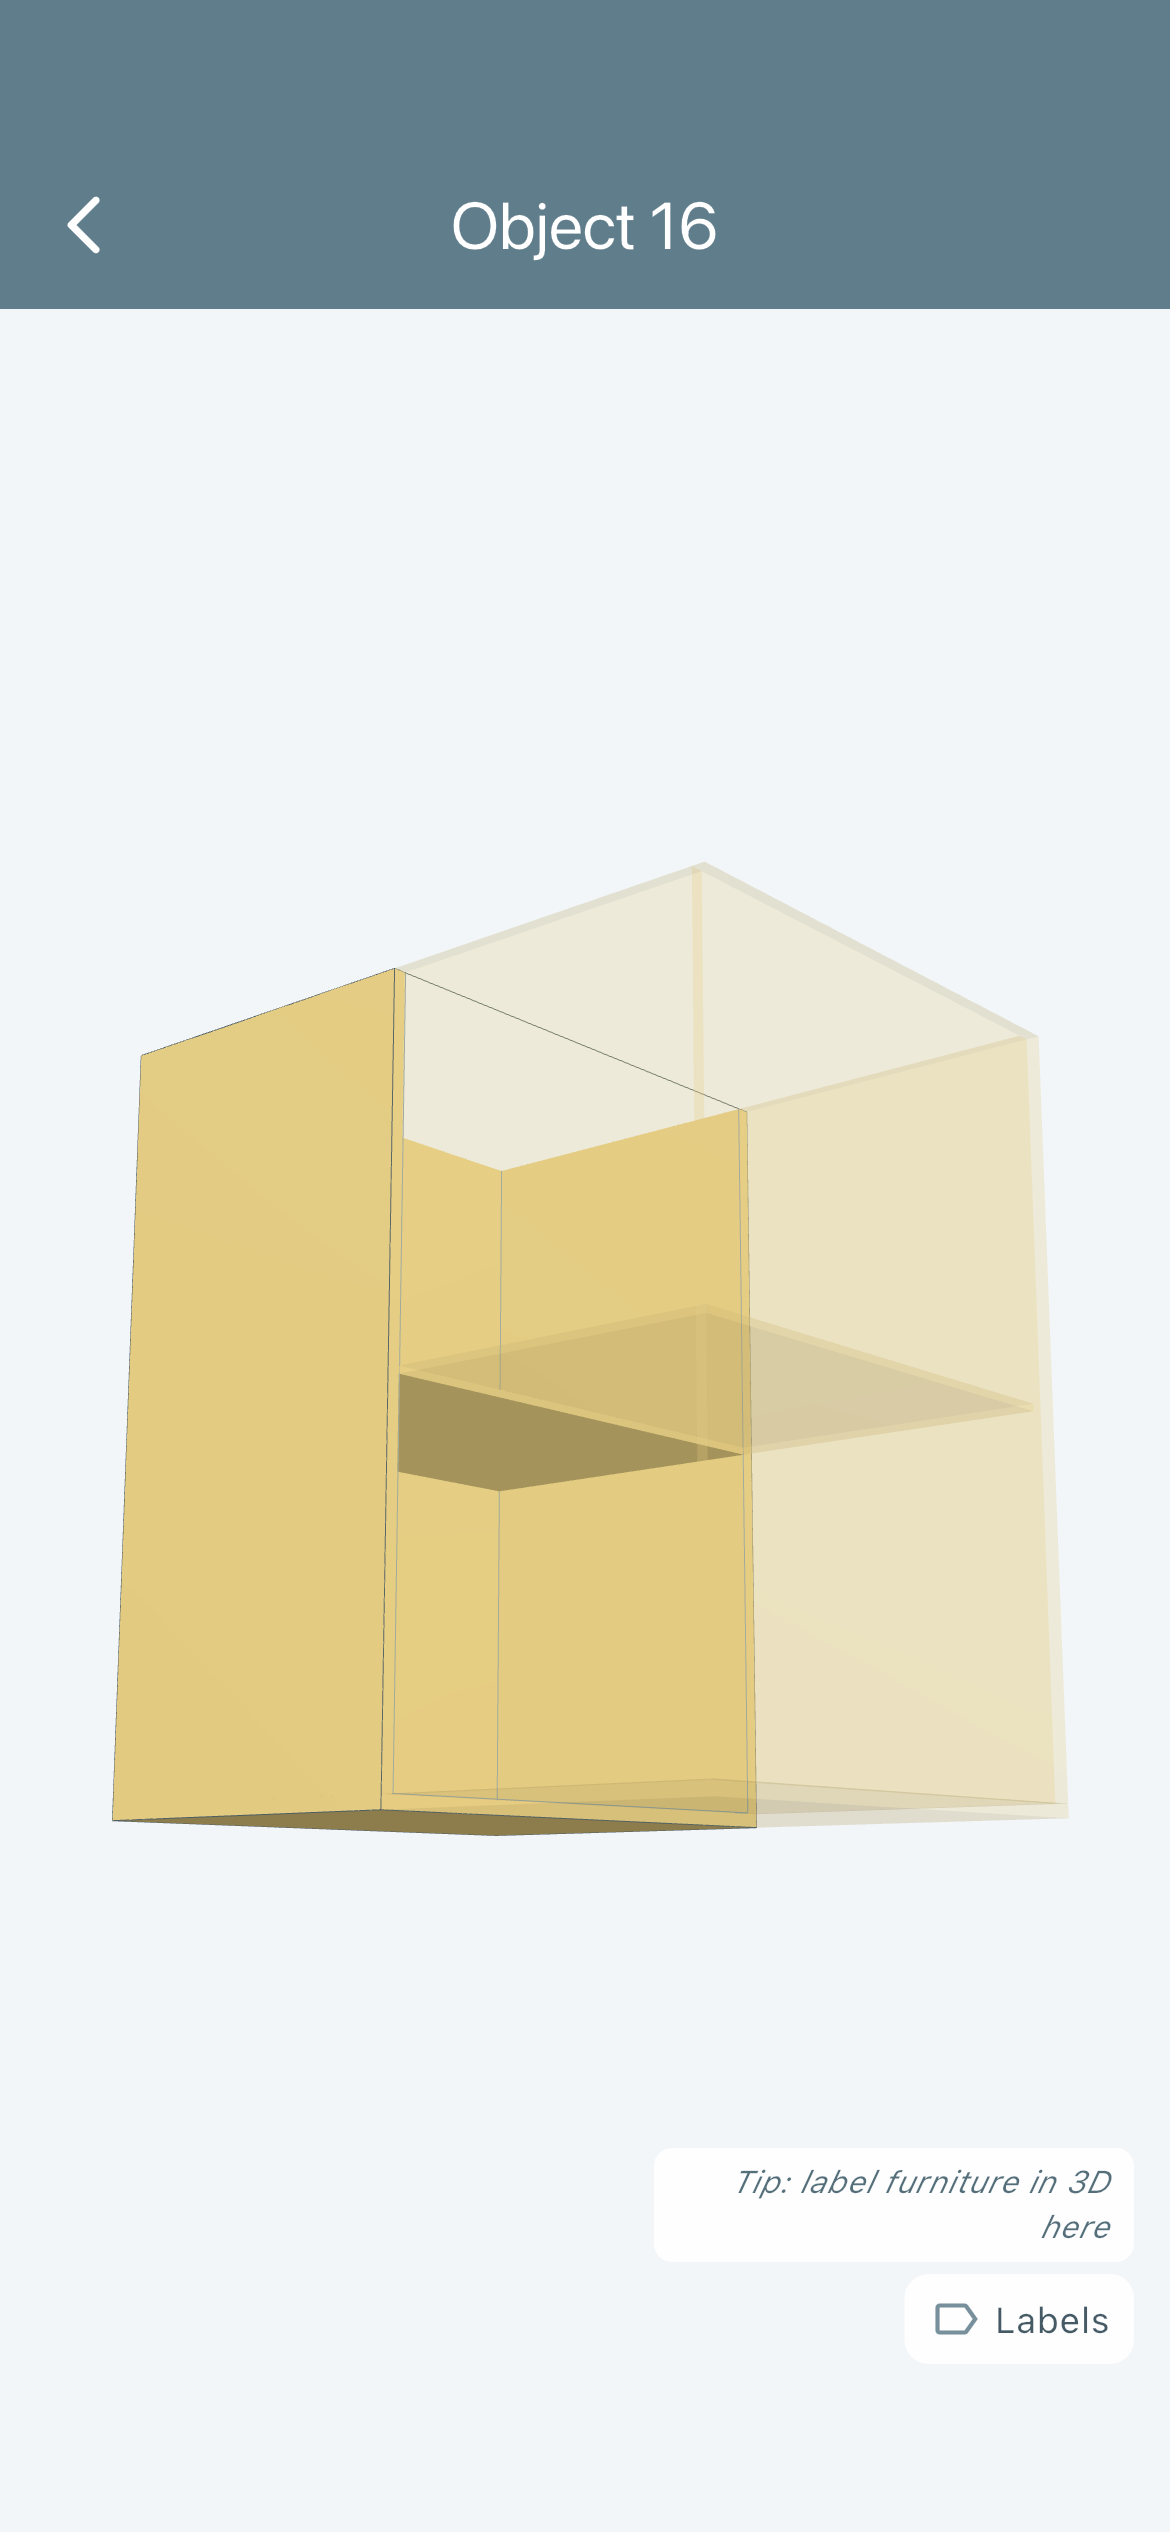
The same box in 3D: no lid, the interior stays freely accessible.
Quick math Don’t think in kilograms per piece of furniture, think in kilograms per square metre. 15 mm birch plywood weighs about 10.5 kg/m². Built as a closed box, the cabinet above has 3.8 m² of panel area — hence the 40 kilograms. Once you have that one number in your head, you can estimate any piece of furniture before you even draw it.
The real potential for savings is in the material
With “Frame + Panelling” you can choose different materials for the stud frame and the skin — and that’s exactly what experienced builders do. Spruce/pine battens for the frame, 5 mm poplar plywood for the panelling:
22.4 kg instead of 40.1 kg. The same cabinet, the same size, the same usability — 44 percent lighter.
That’s the point where a build’s total weight actually gets decided. Not in the question of whether the bed is 5 cm longer.
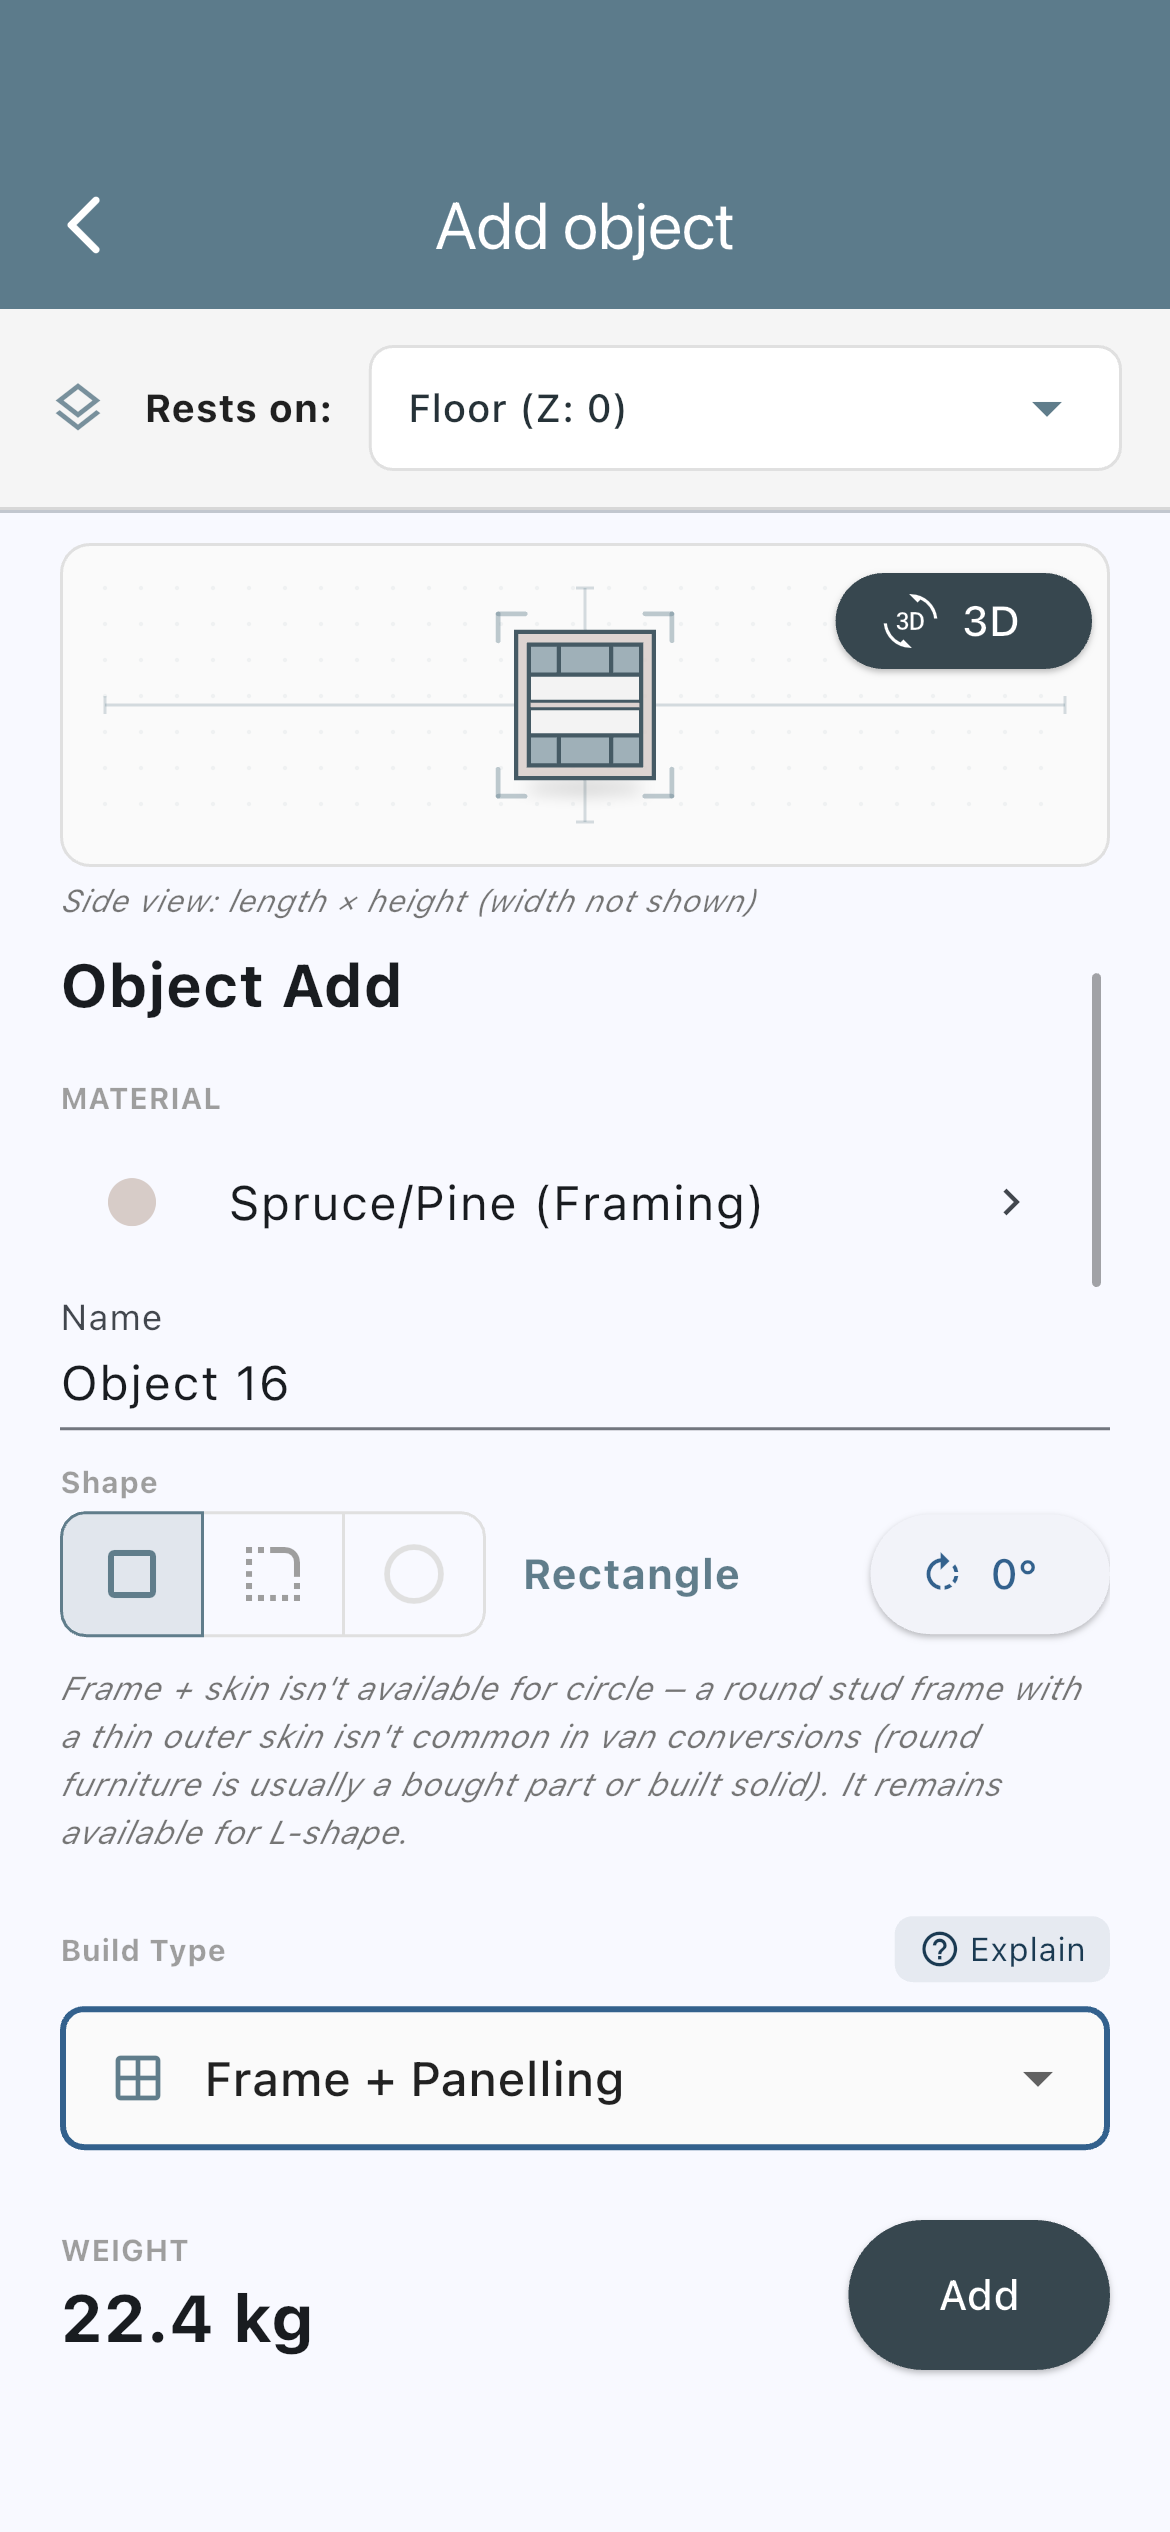
“Frame + Panelling” build method in the object editor – 22.4 kg, exactly the value above, with spruce/pine as the frame material.
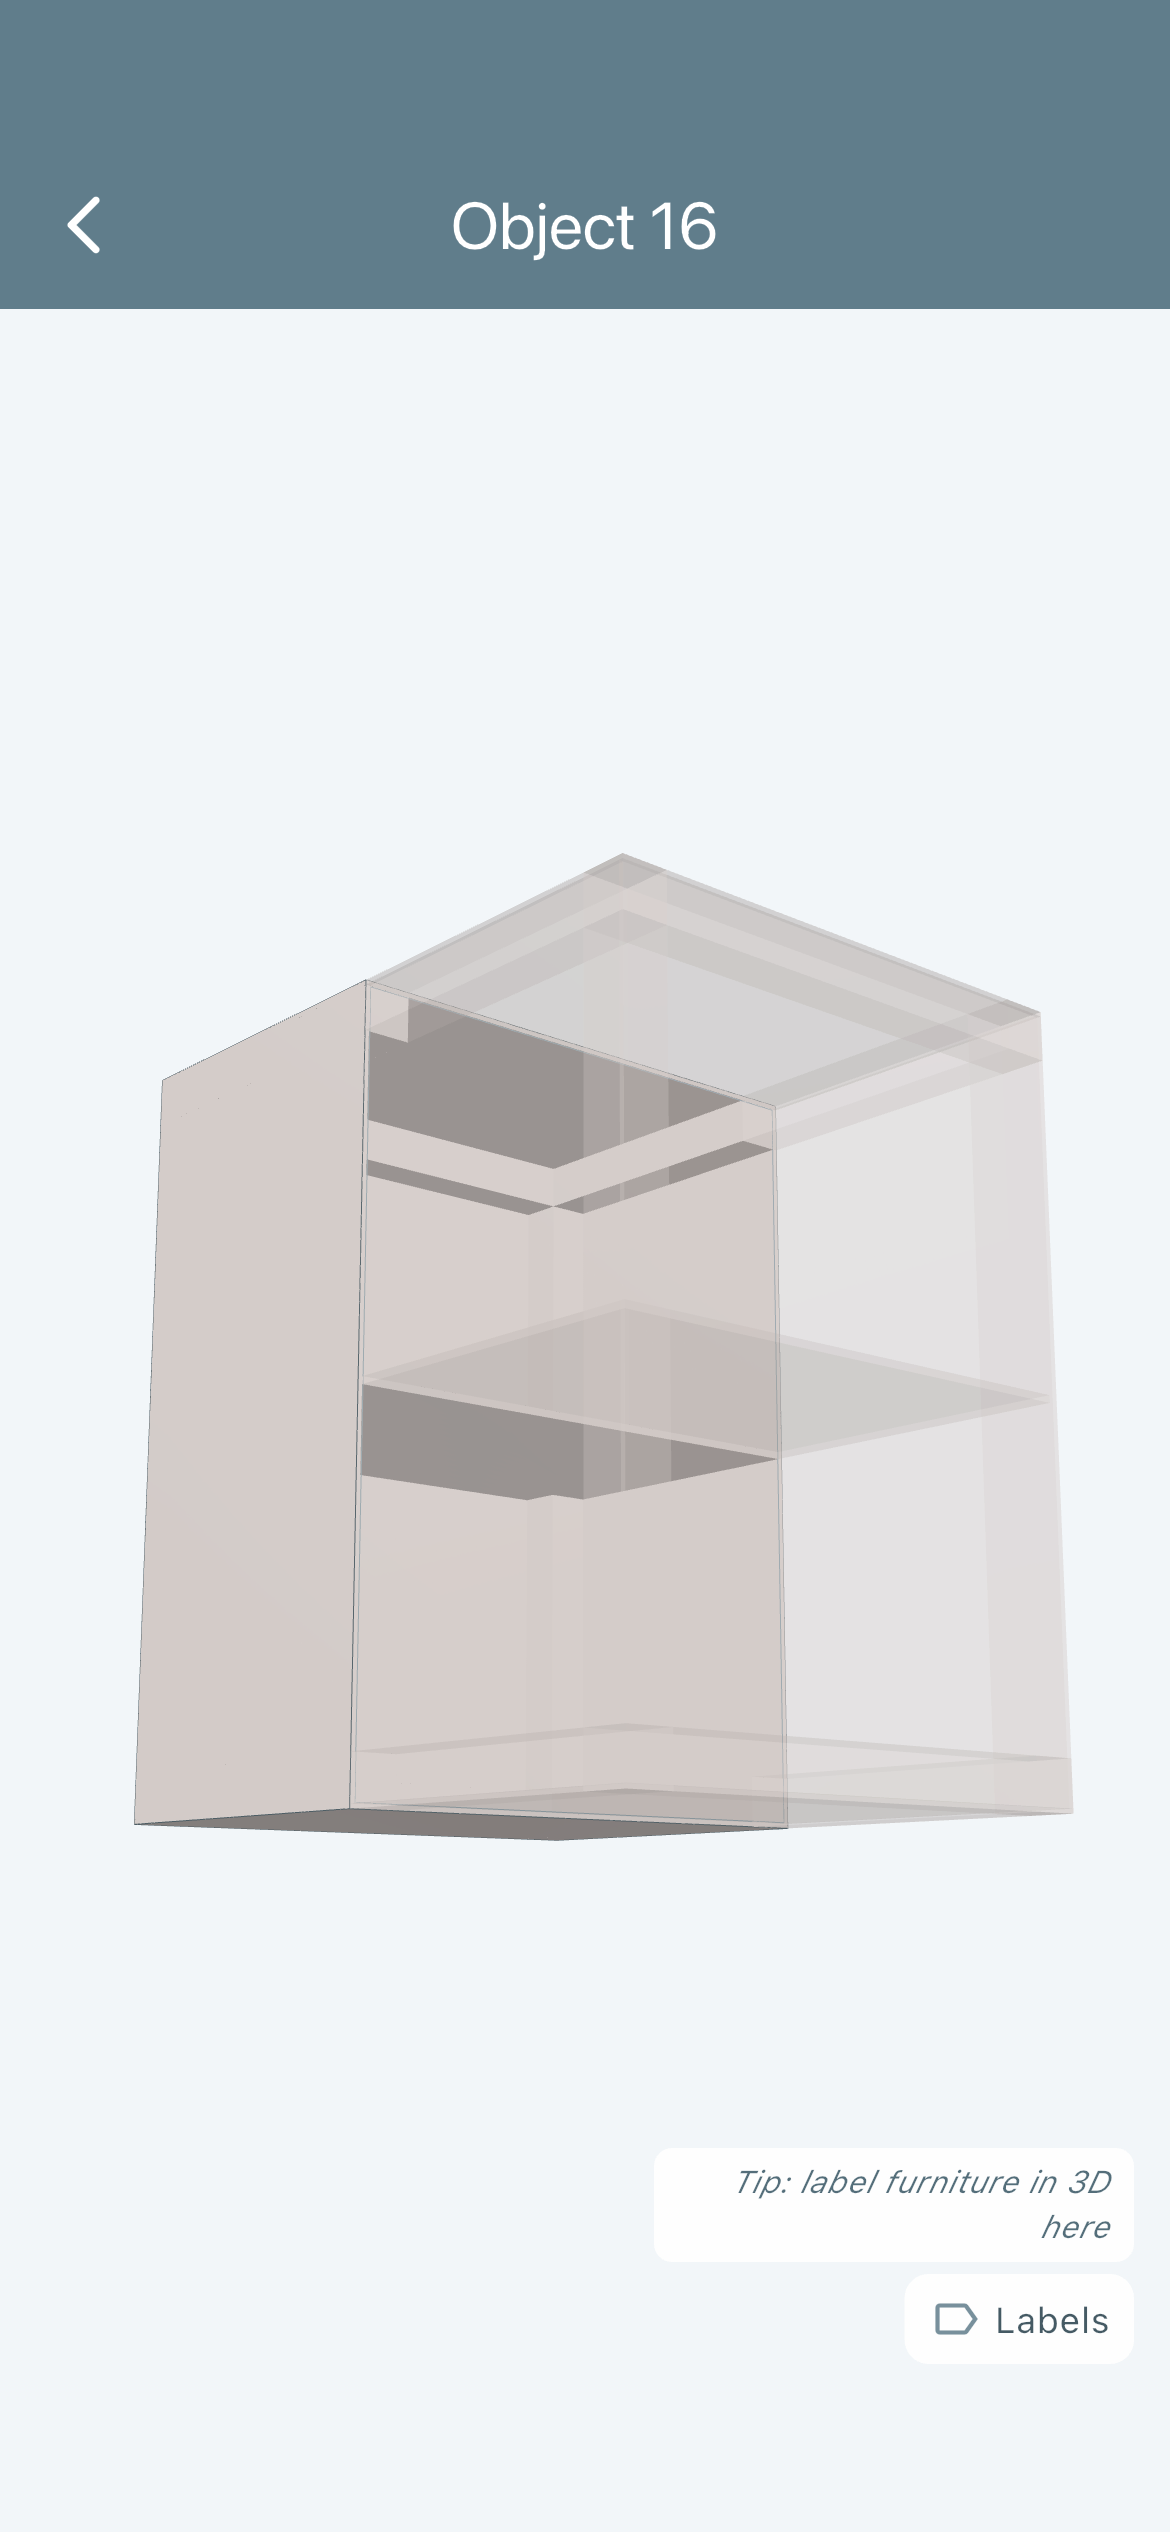
The same construction in 3D: the slim stud frame carries the load, the thin skin panels it.
“Frame + Panelling” is coming in one of the next app updates — already testable in the web app.
Where these numbers come from
A quick note on this, since tables like this often seem to appear out of thin air online: these values don’t come from an estimate — they come from the same formula VanLogic uses to calculate every object, panel by panel, like a cutting list. We checked it against an independently calculated cutting list, with a 0.0% deviation, and cross-checked it against a commercially available kitchen module made of 12 mm birch: the carcass matches, and the difference to the manufacturer’s weight is exactly the hardware, the sink and the fittings — things VanLogic tracks separately with their actual weight.
Two things worth knowing when reading the table: the “Closed Box” includes a full front panel, so it corresponds to a carcass with a door. And the “Open Box” leaves off the lid, not the front — so for a cabinet that’s actually open at the front, it calculates a few percent heavier than reality. Both are intentional, but it’s worth knowing rather than being confused by a difference later.
Why this is barely plannable without a tool
Eight pieces of furniture, each with four to five sensible build methods, plus two to three materials — that’s more combinations than you’d work through with a calculator. And each one shifts not just the total weight, but also the axle load, because each piece of furniture stands somewhere different in the vehicle.
That’s exactly what VanLogic calculates automatically, from shape, dimensions, material and build method. You never enter an estimated kilogram — you choose the build method, and the number below updates with it.
The full formulas for every build method are in the Detailed Help, Chapter 7.
Run your own cabinet through it – weight, axle load and centre of gravity, live
5. What the Floor Plan Physically Does
Up to this point, the floor plan has been a question of space. Now it becomes a question of physics. Three quantities decide whether your build is roadworthy and passes inspection — and all three depend on where you build something, not just how heavy it is.
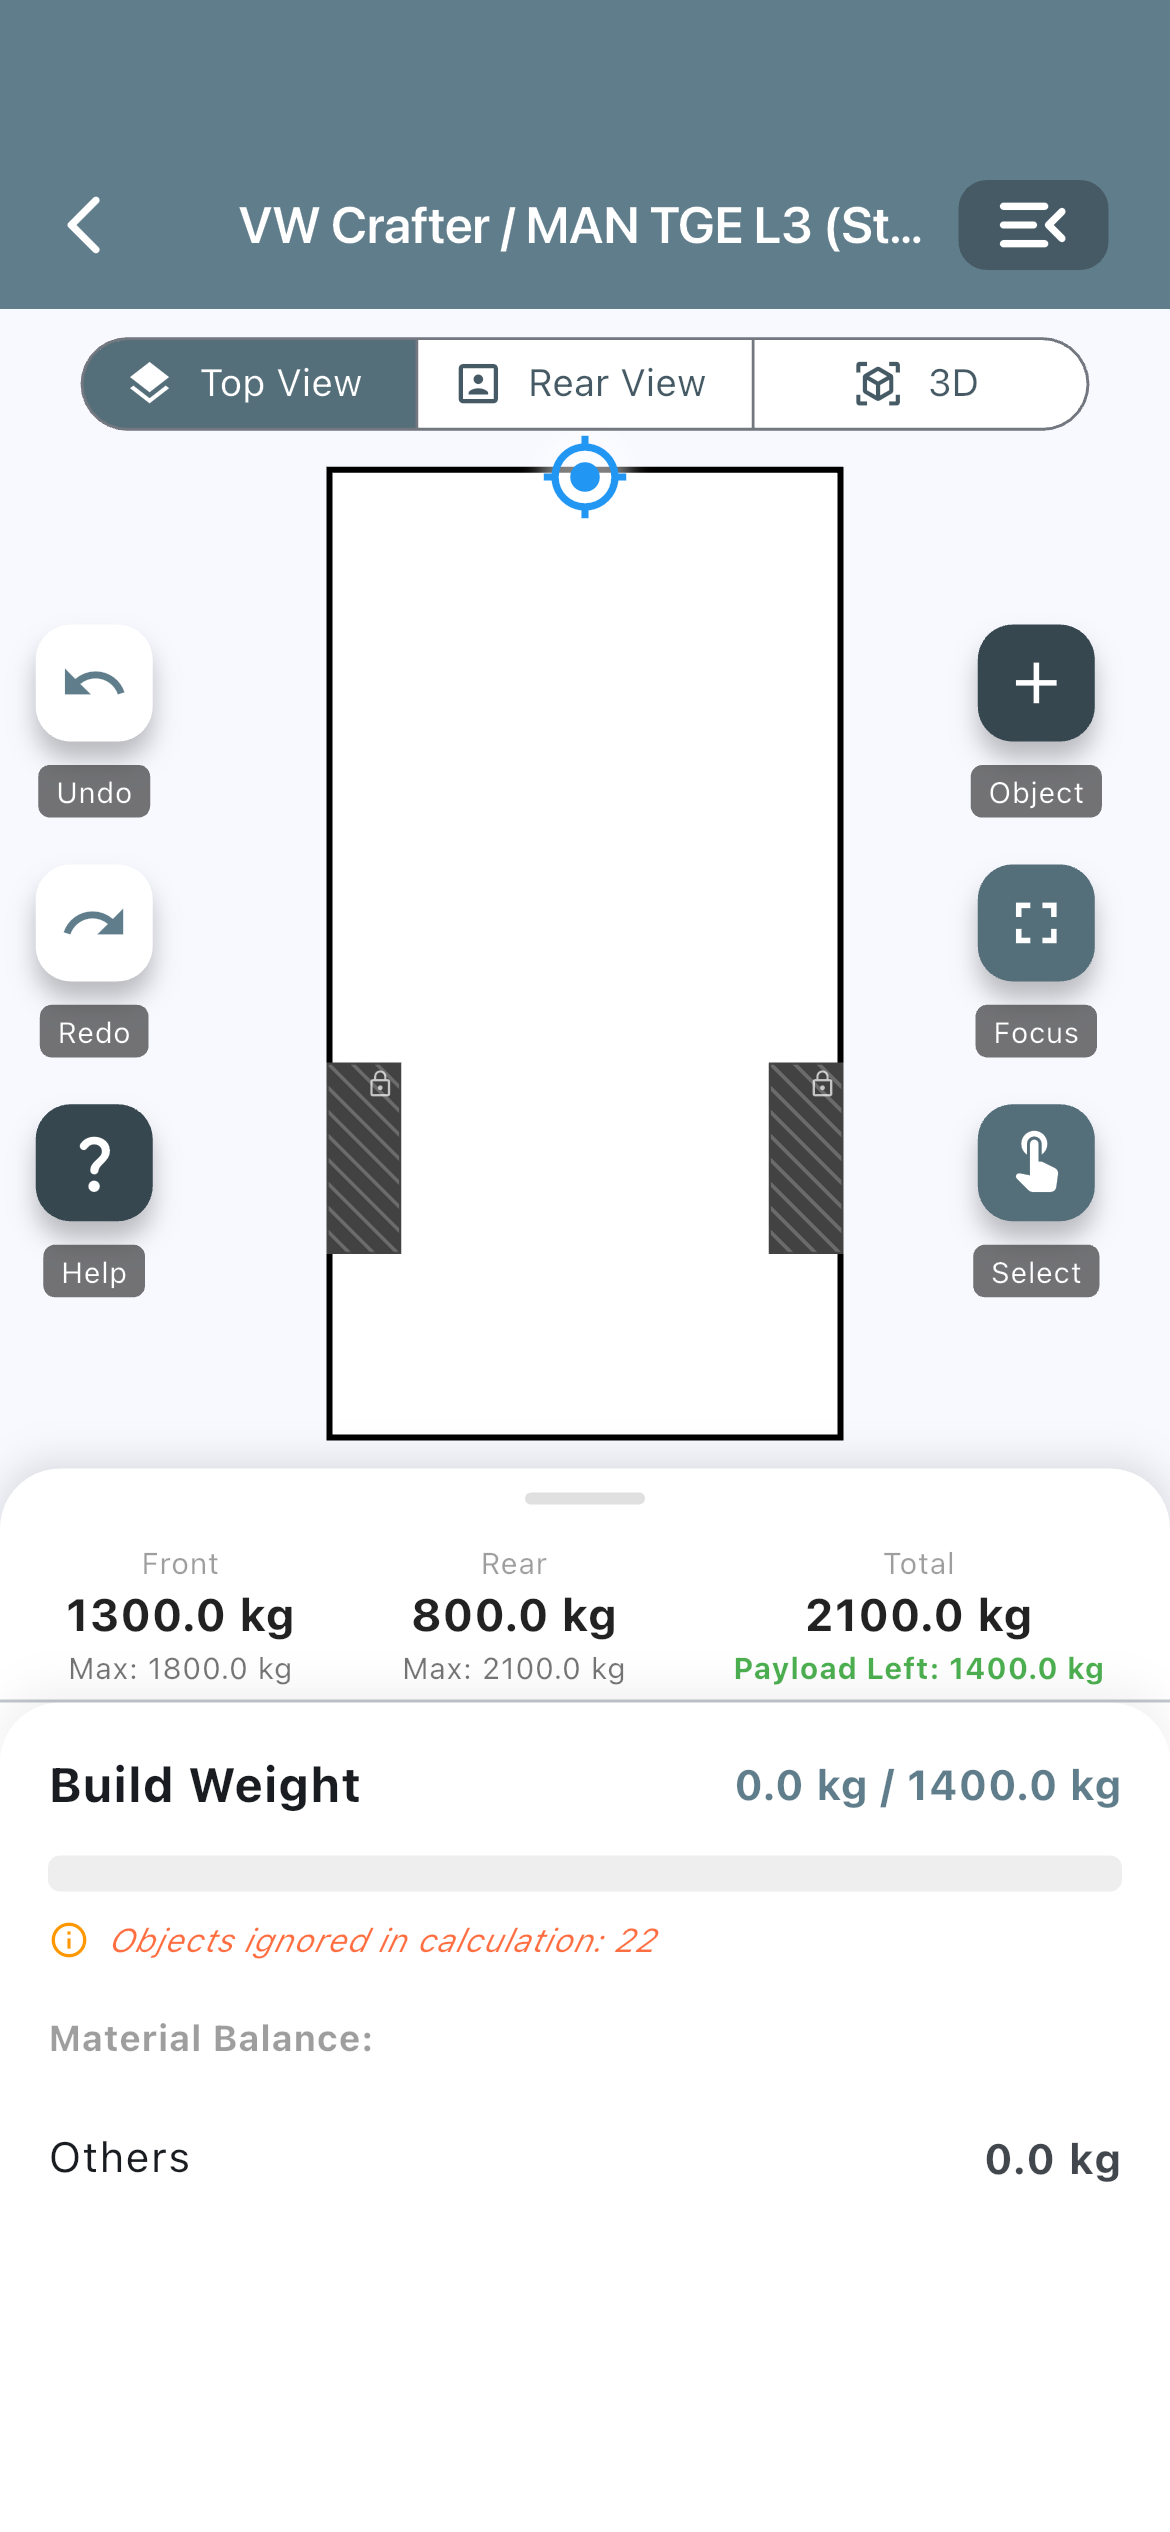
Starting point for the examples below: vehicle with no build, 0 kg build weight. Every object added from here on changes axle load and centre of gravity live.
Axle load: every metre counts
A 90-litre fresh water tank weighs about 105 kg full. Move it one metre further back in the floor plan, and at a 3.45 m wheelbase, roughly 30 kg shifts from the front to the rear axle — with nothing changing about the total weight at all.
That’s the lever you can use to save a floor plan when one axle gets too heavy: not building less, but arranging it differently. Tanks should therefore go between the axles wherever possible, not into the rear.
For a detailed breakdown of how build weight adds up, and what to watch out for specifically in a Sprinter or Ducato, see Sprinter & Ducato: Calculating Payload and Weight the Right Way.
Centre of gravity: the height nobody thinks about
Axle load is in your documents, centre of gravity isn’t. That’s exactly why it gets overlooked.
Compare two decisions: 105 kg of water 30 cm above the floor — or a roof rack with 35 kg plus an 11 kg solar panel at 2.10 m height. The roof load is less than half the weight, but it sits seven times as high. For handling in corners, in crosswinds, and in an evasive manoeuvre, the second decision is the far more consequential one.
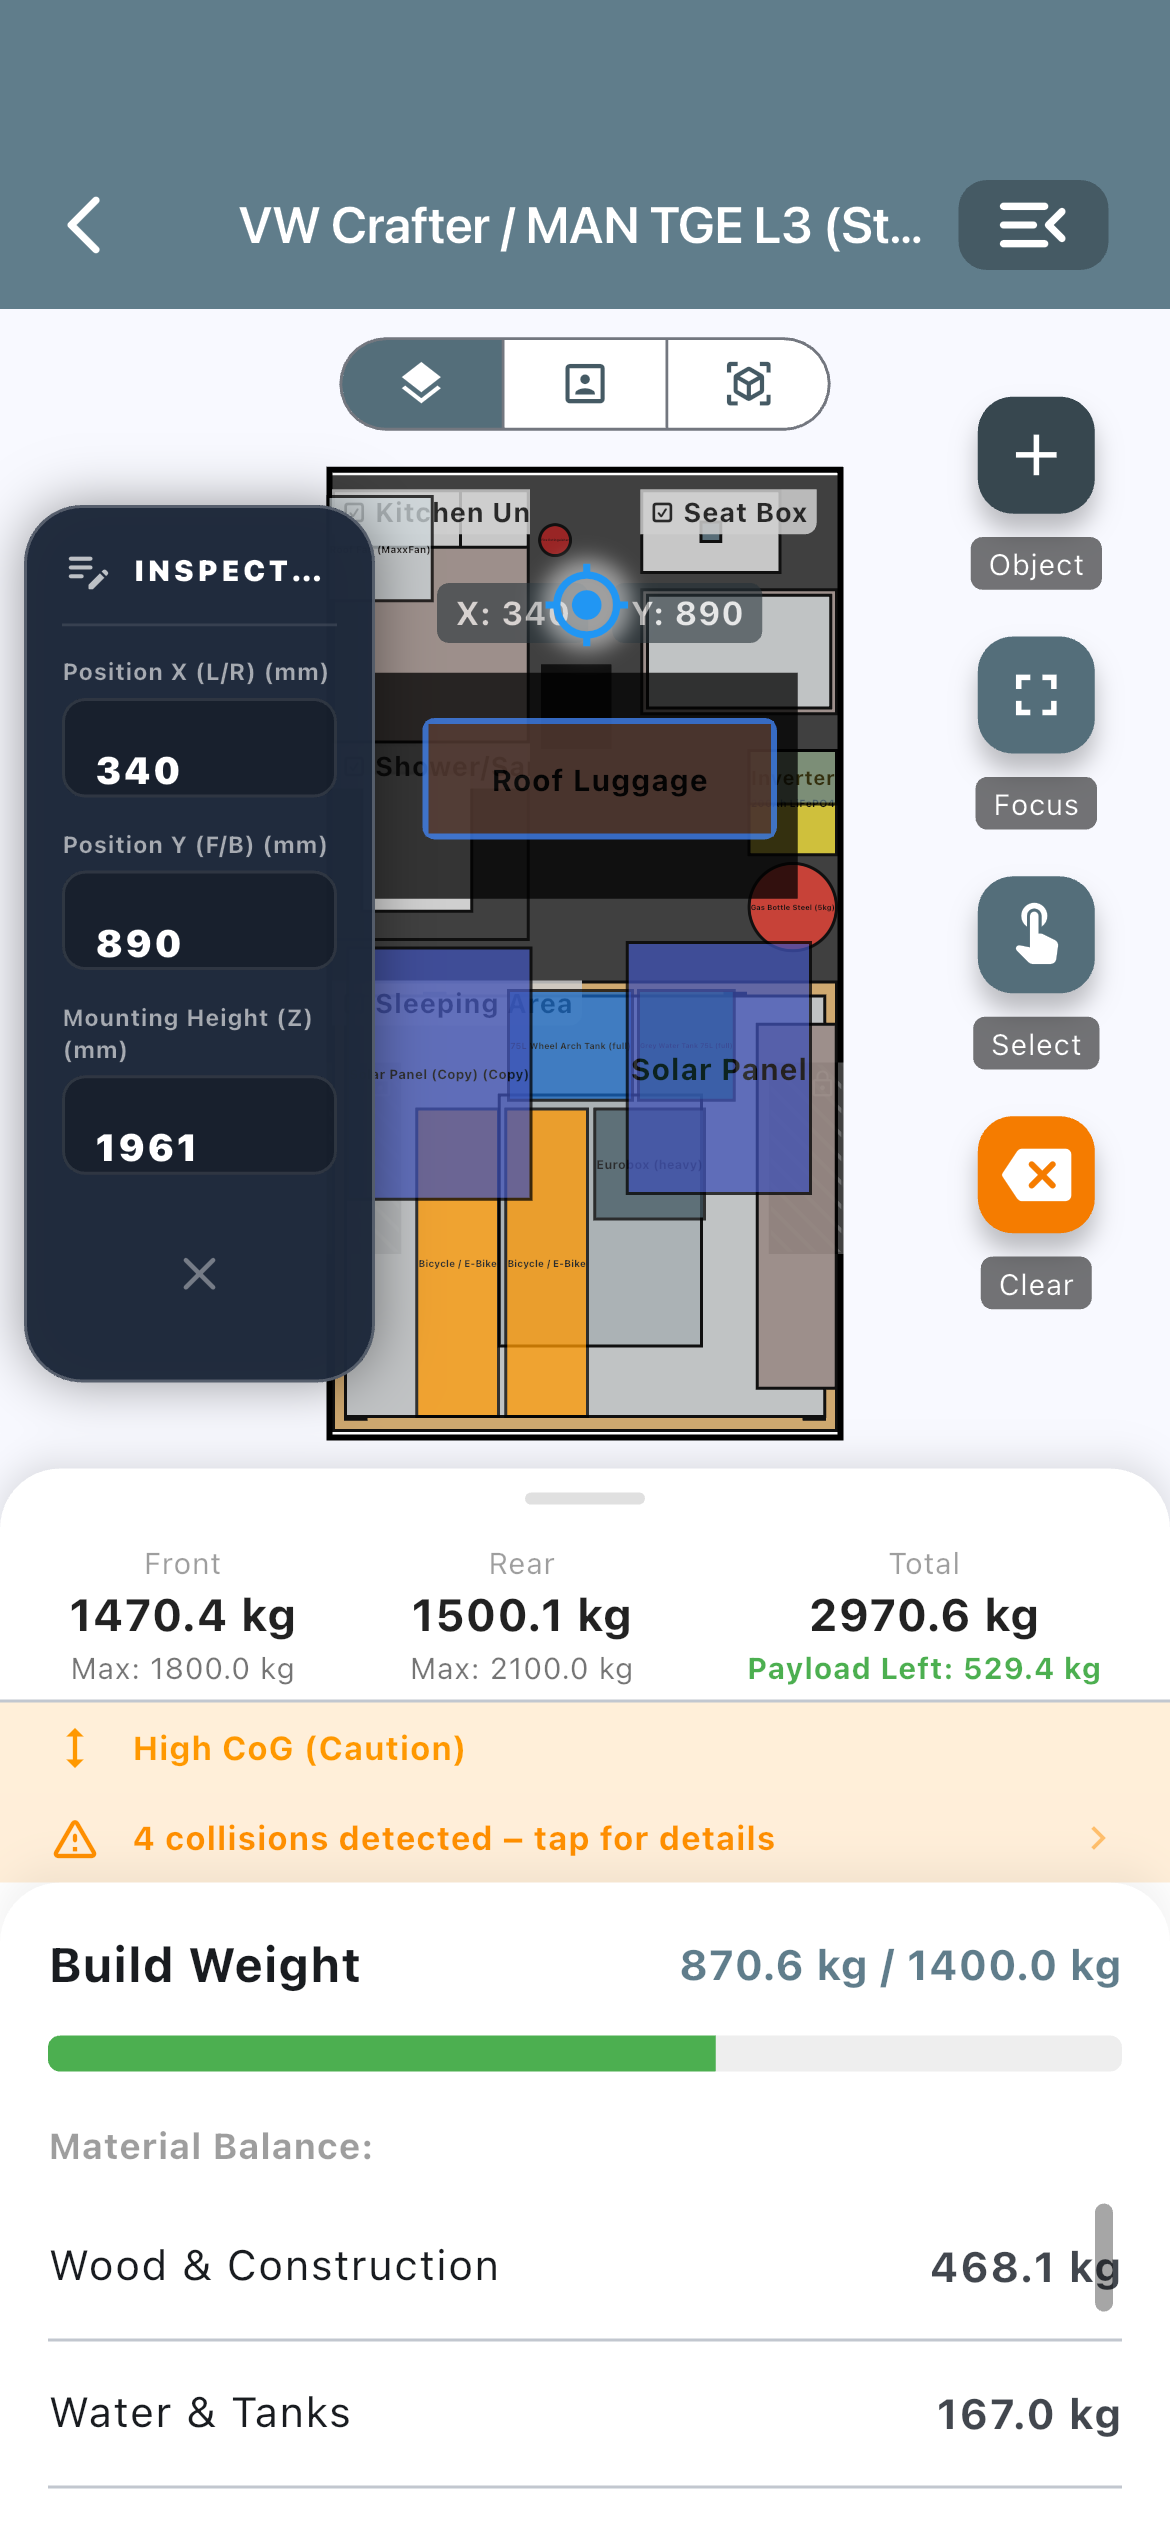
Position and height directly adjustable — the app warns live as soon as the centre of gravity climbs too high (High CoG).
The rule behind this is simple, and still gets broken constantly: heavy things low, light things high. Water, batteries and tools belong under the bed or close to the floor, not in the overhead cabinet.
For why a high centre of gravity changes handling and when it becomes critical, see Centre of gravity in a campervan.
Left and right: the forgotten axis
The third distribution almost always only shows up while driving. In most floor plans, the kitchen sits on one side — fridge, water tank, gas bottle and dishes. On the other side is the sliding door, so largely nothing. Twenty or thirty kilograms of lateral imbalance add up fast.
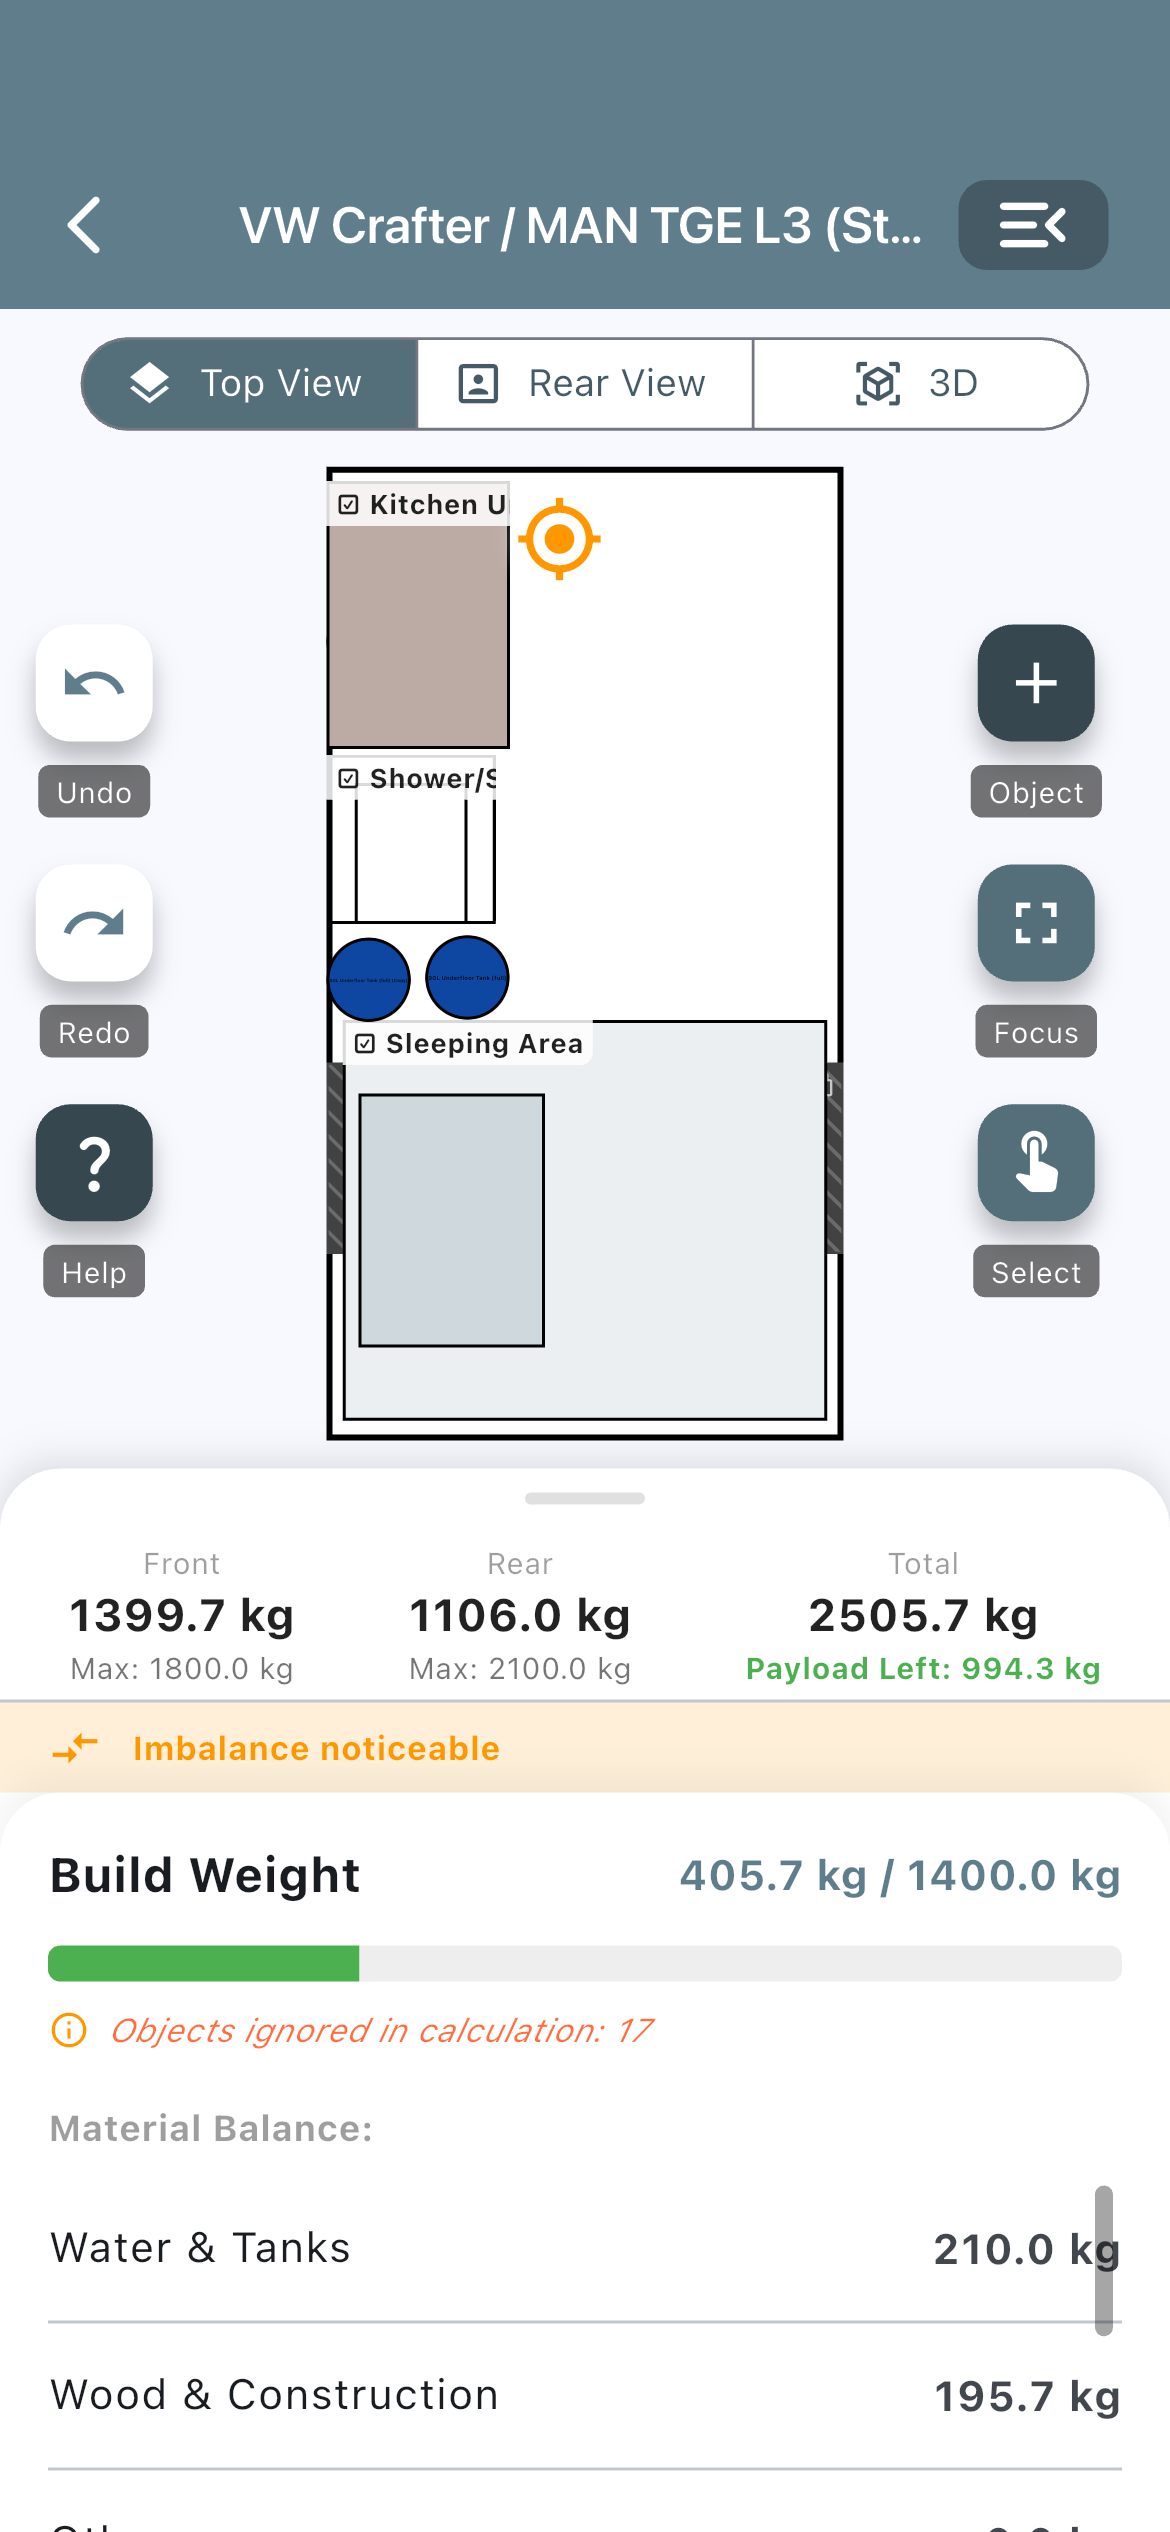
First warning level: imbalance detected.
That’s rarely dangerous, but it costs tyre life and becomes noticeable on uneven ground. When planning, it’s almost free to avoid: put the battery and grey water tank on the other side.
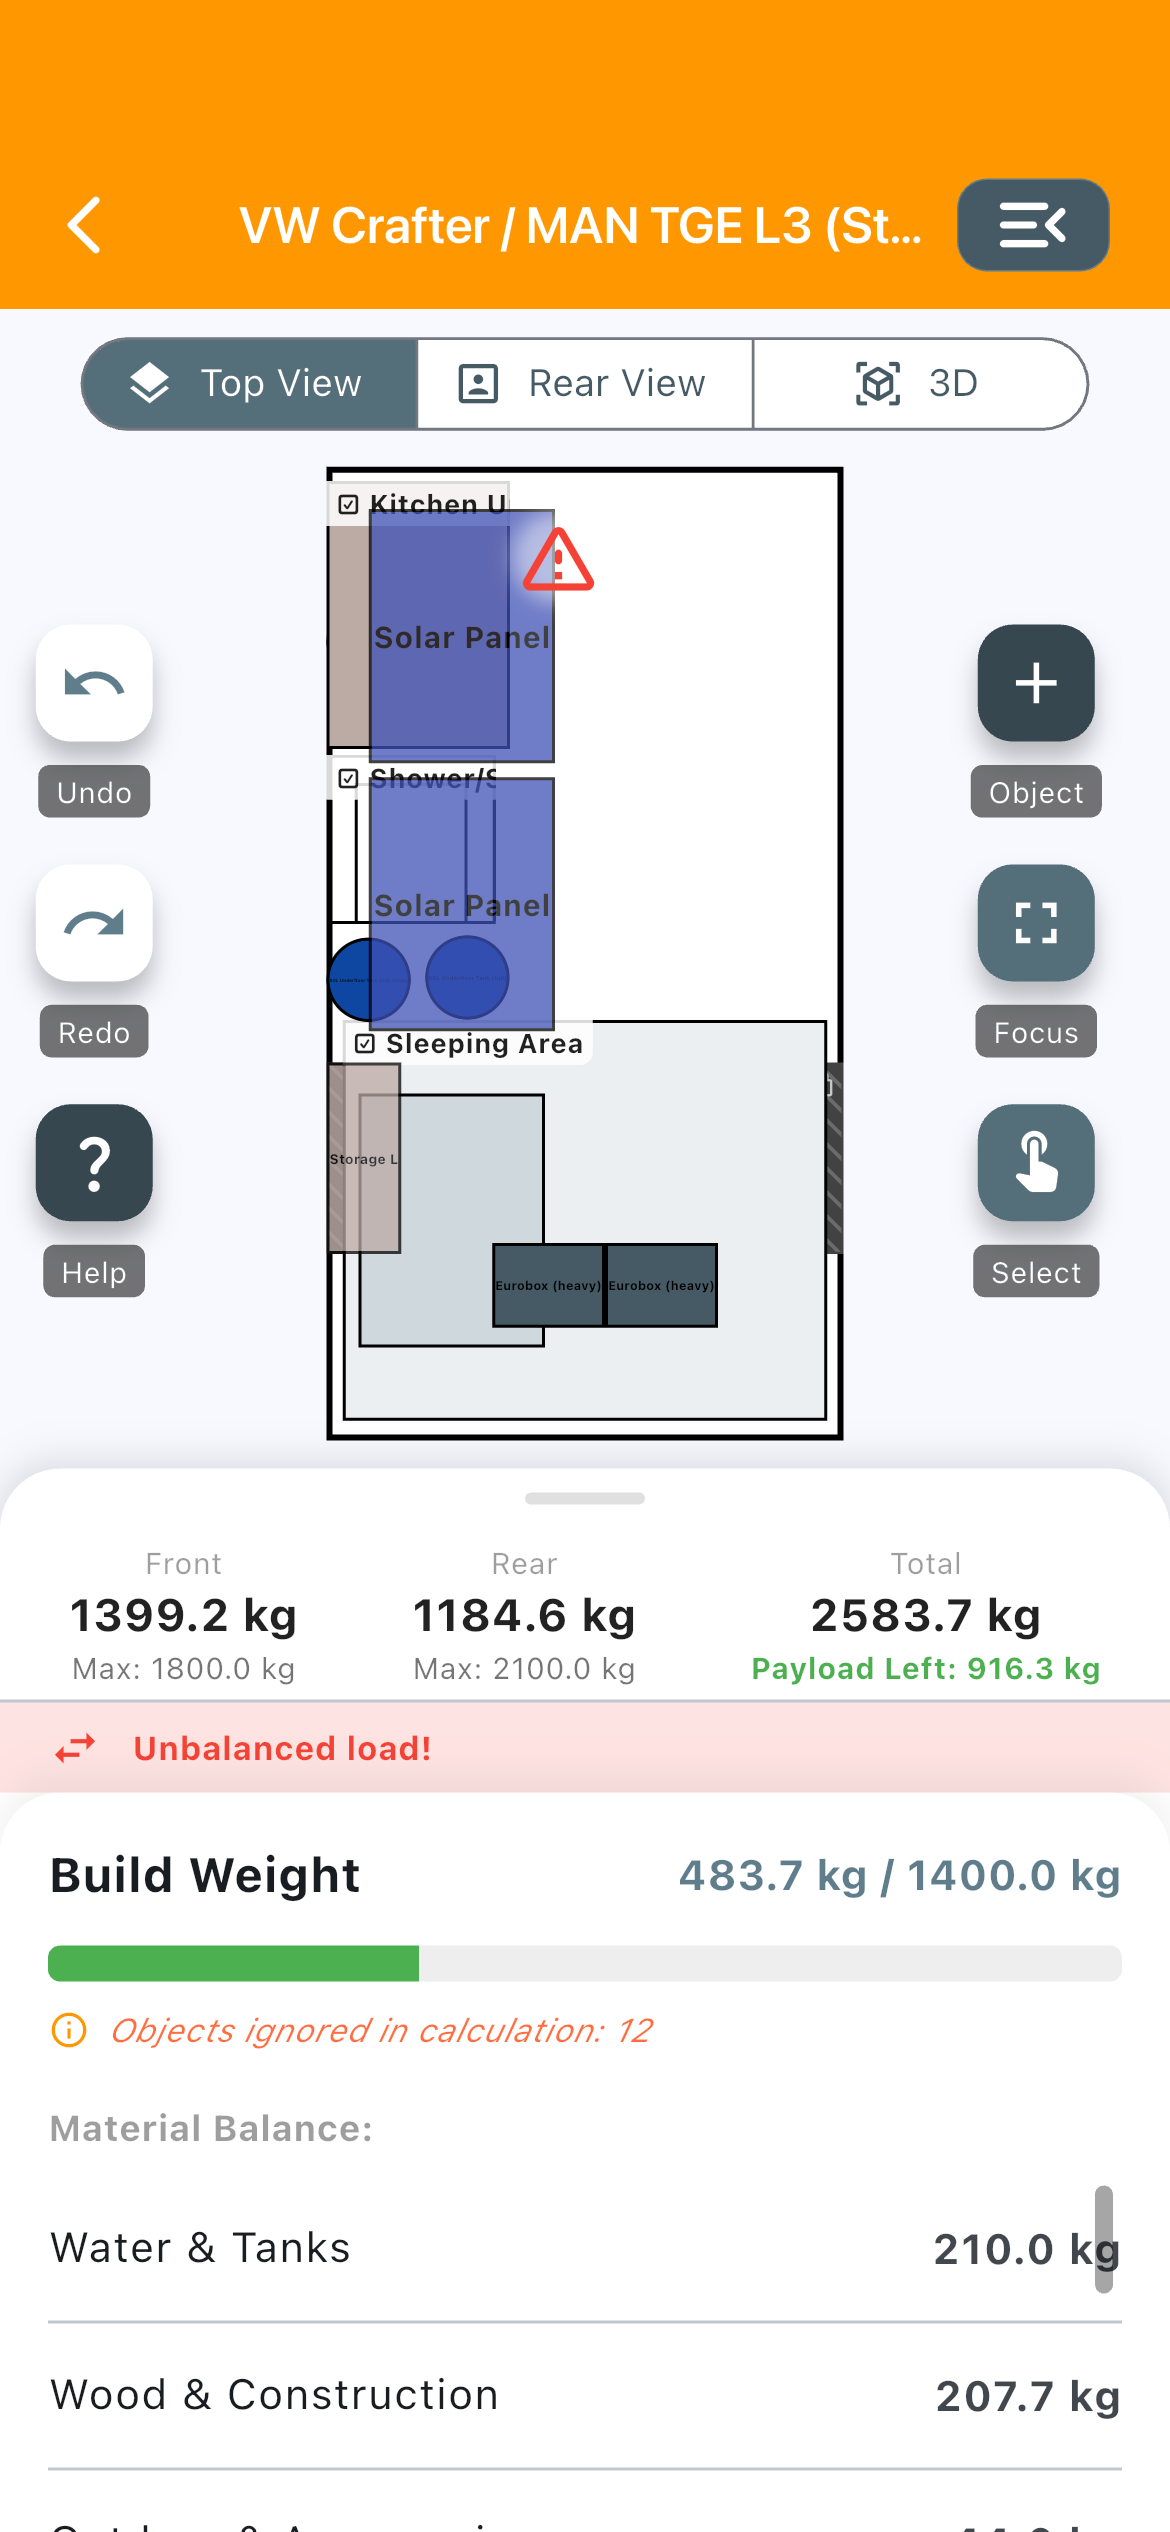
Critical imbalance: unbalanced loading.
6. Check It Before You Cut
A floor plan from above shows two of three directions. The third — height — is exactly where the expensive mistakes happen: the cabinet that hits the roof taper. The bed the planned tank doesn’t actually fit under. The drawer that catches on the wheel arch.
That’s why it’s worth running the finished floor plan through several checks before the first cut.
The rear cross-section shows the cross-section. Here you see at a glance whether your intermediate floor sits over the wheel arch, how much clearance remains between the bed platform and the roof, and whether an object is actually hanging in mid-air.
The 3D view shows proportions a drawing can’t convey — whether the aisle really feels like an aisle or like a gap.
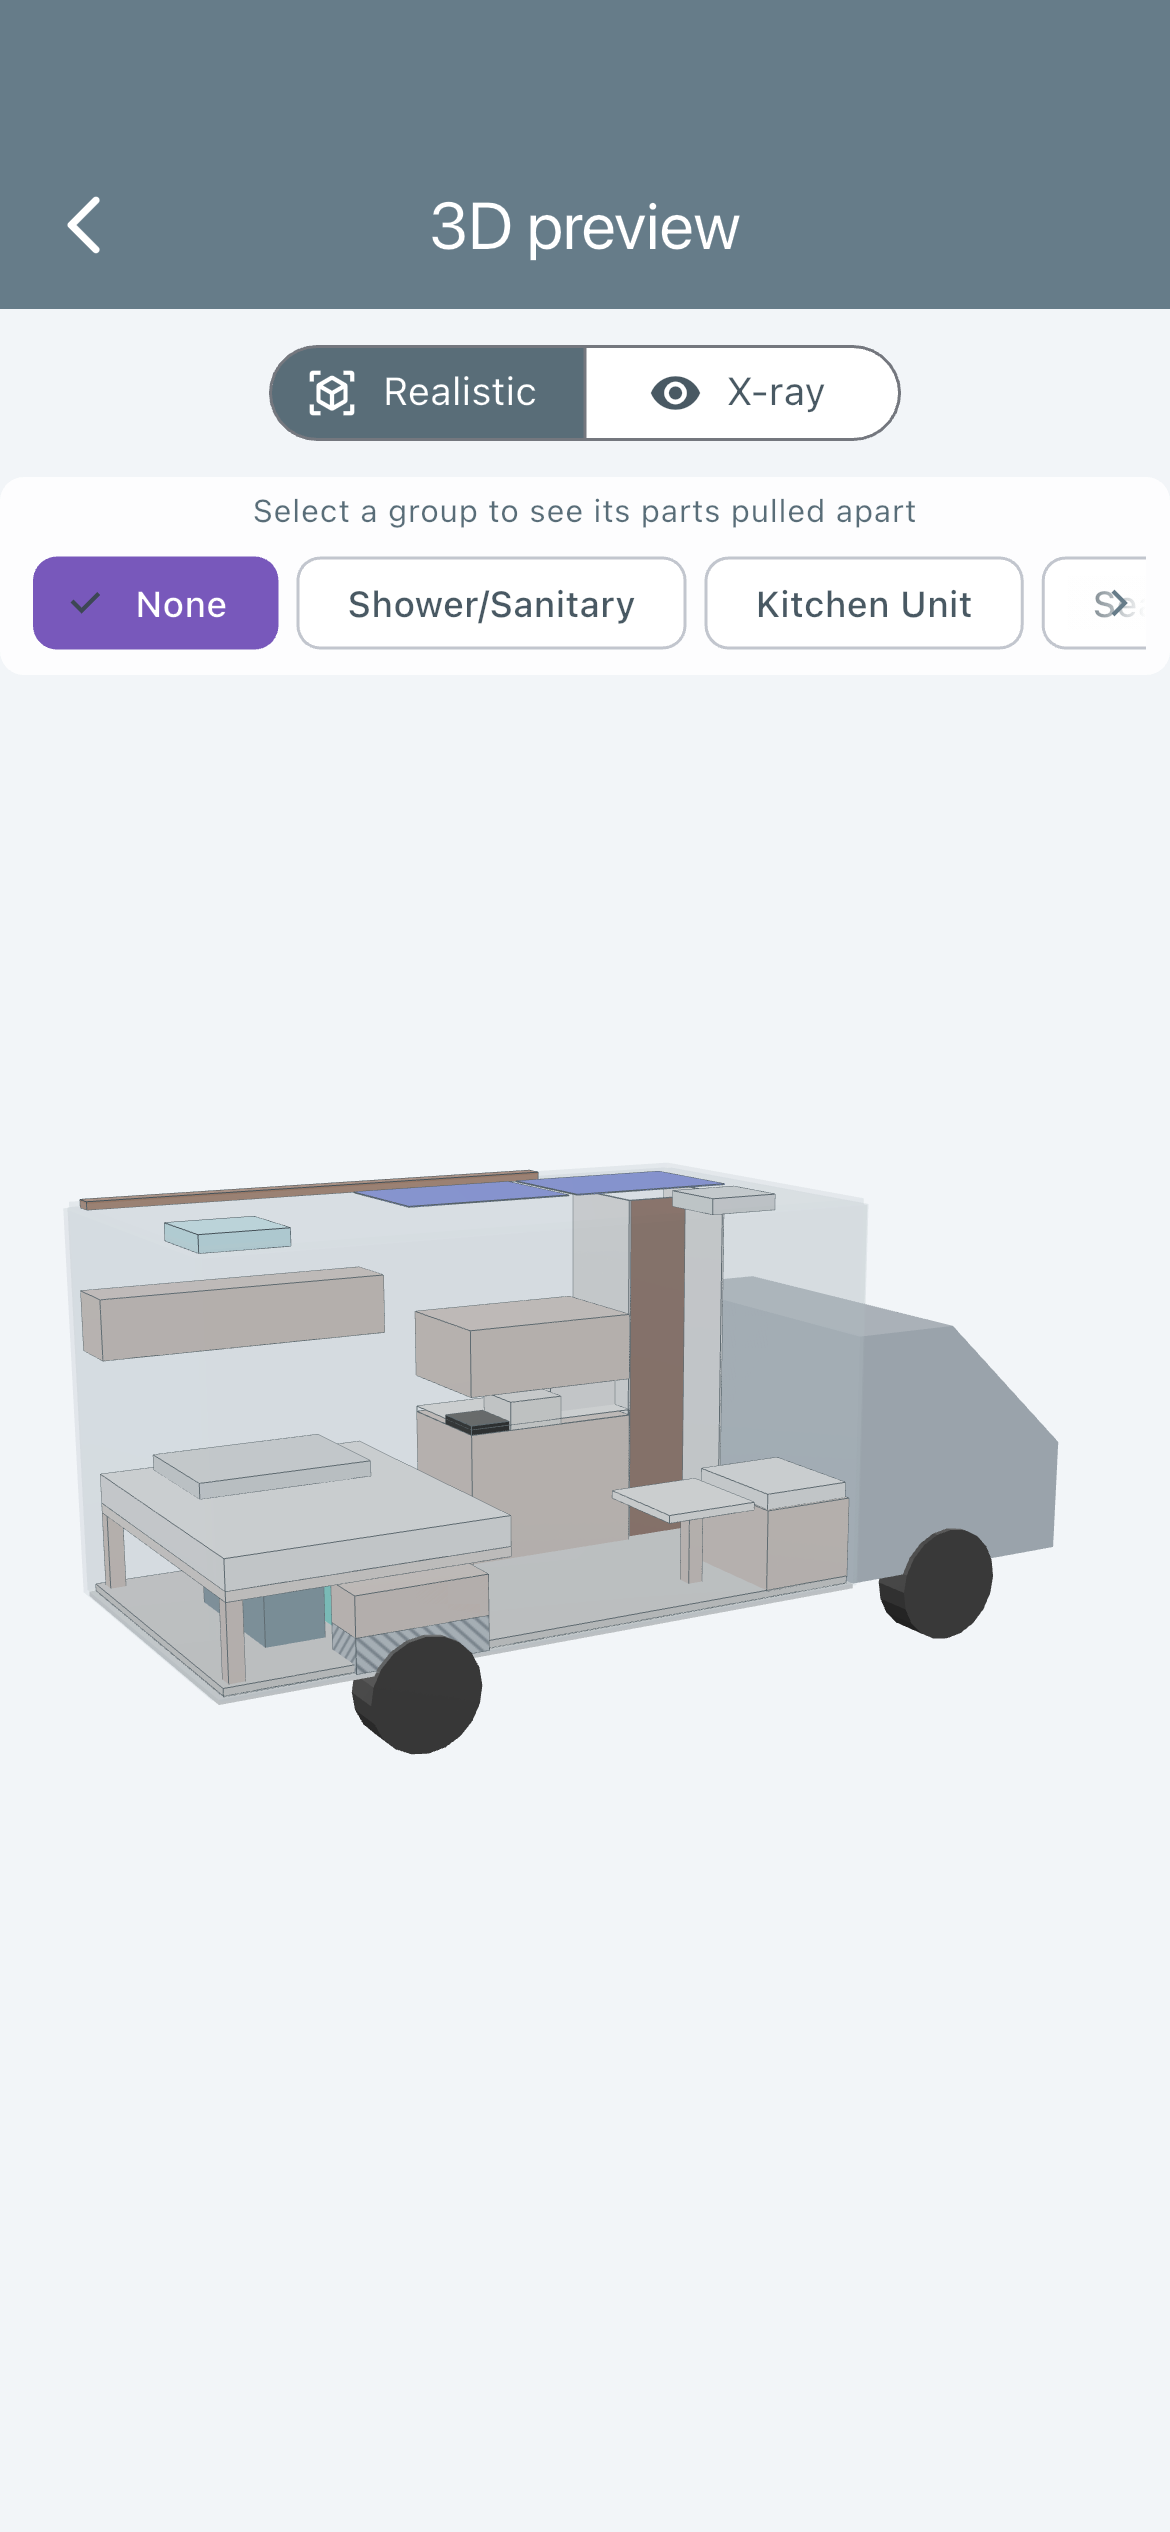
3D preview of your build.
X-ray mode makes furniture transparent. That lets you see into the hollow cavities: what’s stored under the bed, how full the rear garage actually is, whether the tank fits next to the battery.
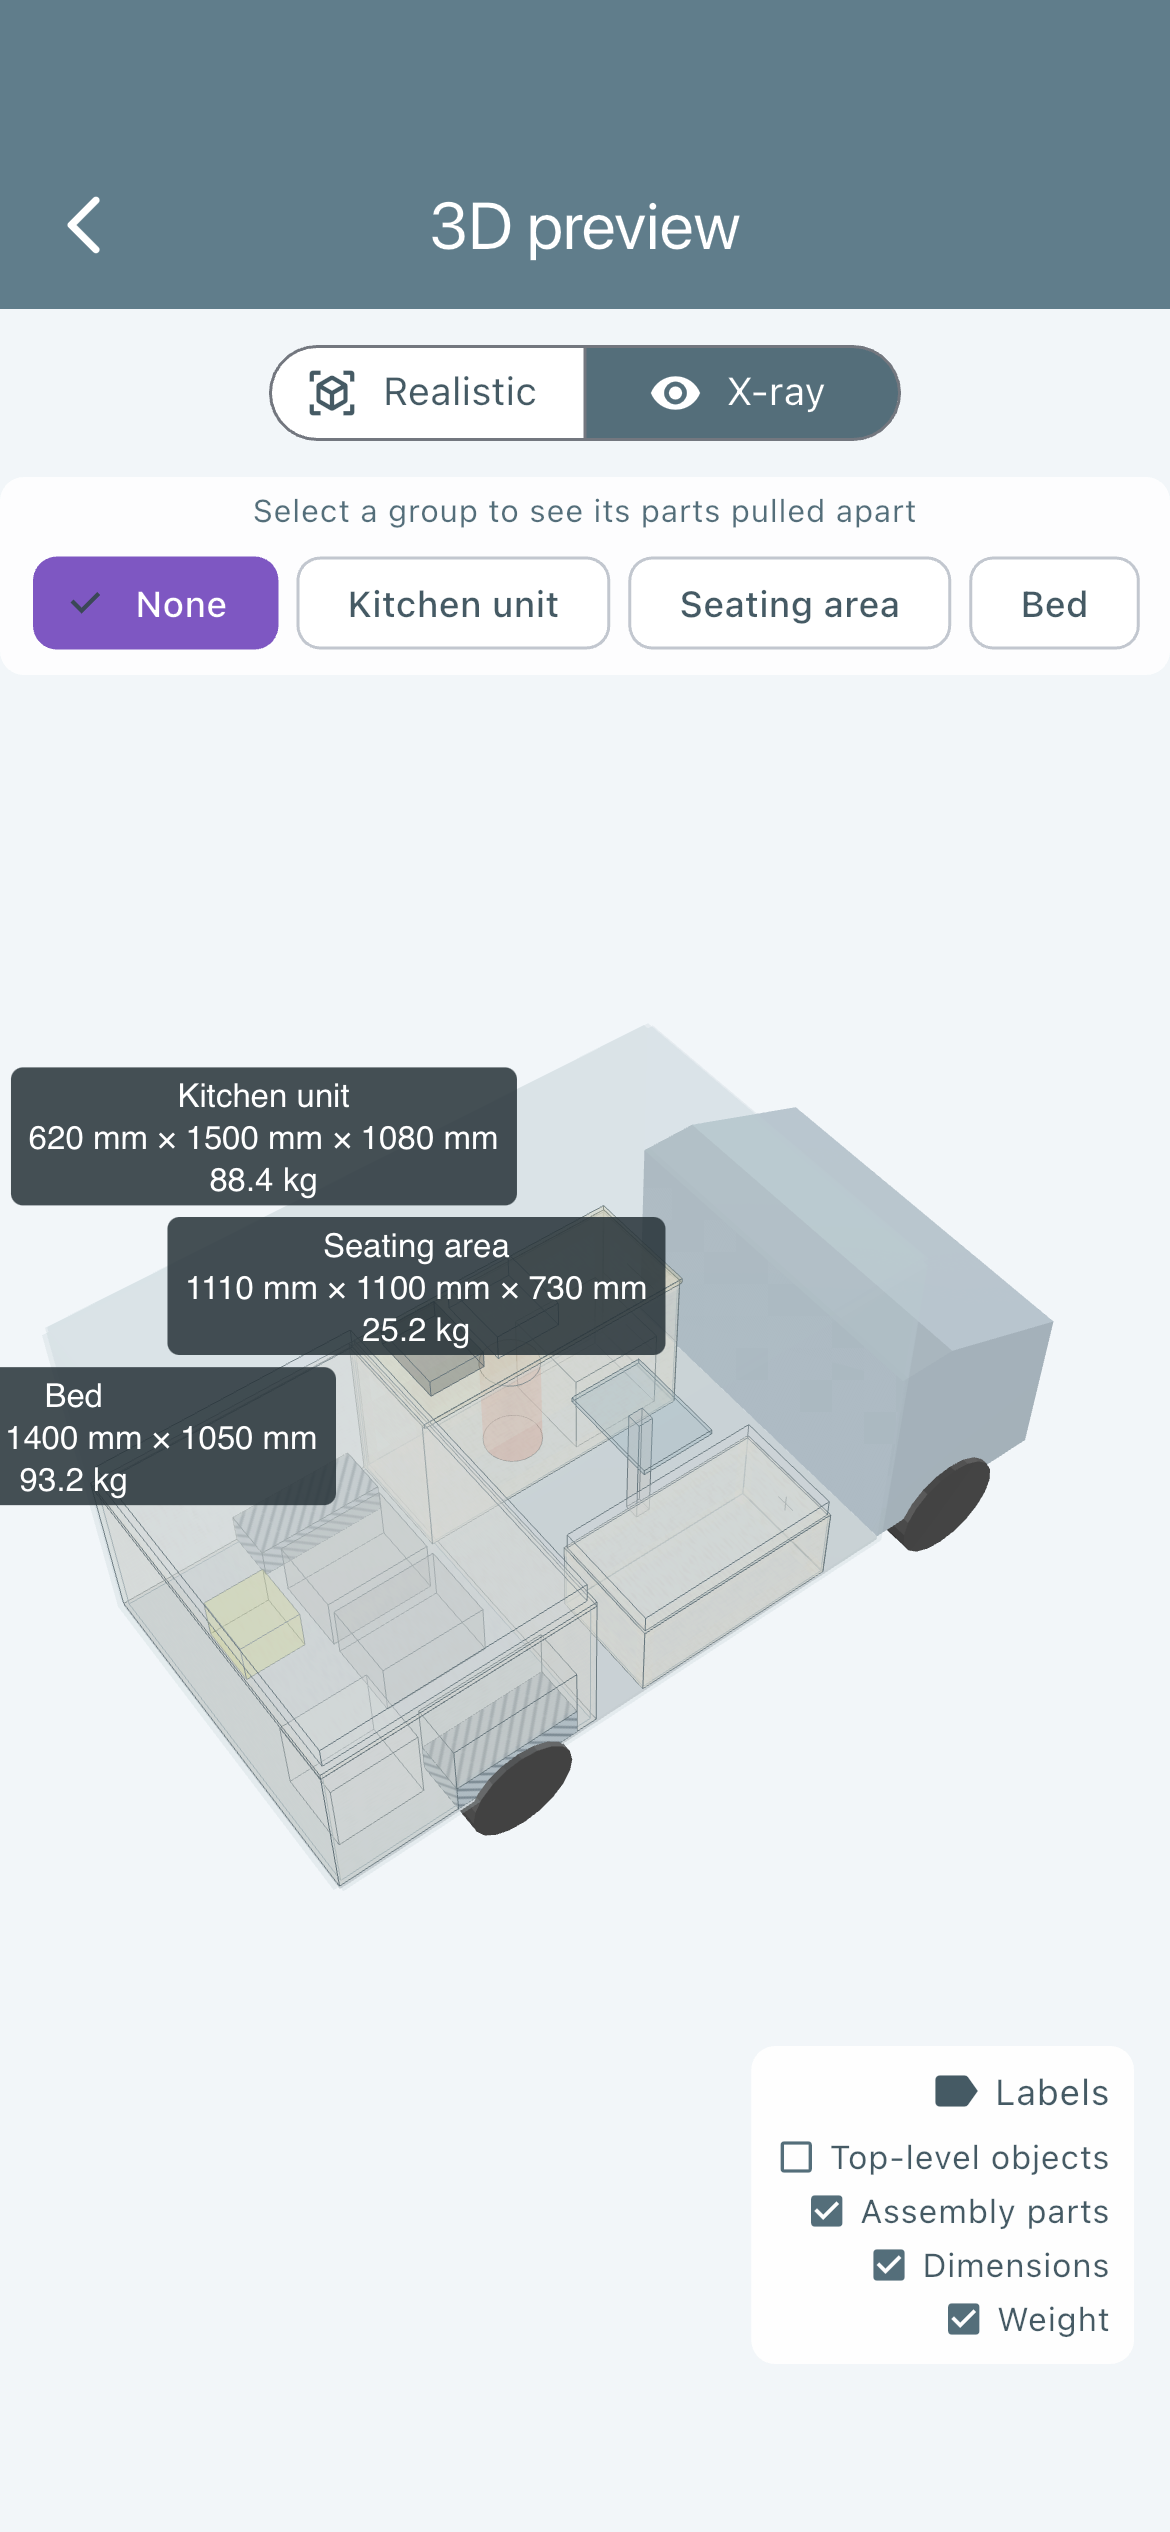
X-ray mode: kitchen block, seating area and bed shown transparent — each with dimensions and weight labelled.
The labels showing dimensions and weight directly in the 3D view are coming in one of the next app updates — already testable in the web app.
Right in the object editor, you can also open a single piece of furniture isolated in 3D — with a genuine cross-section view that makes solid and hollow distinguishable at a glance, instead of just looking translucent.
For an assembly made of several parts — the kitchen block, for example — you can also switch on an exploded view that pulls all the individual parts apart, colour-coded.
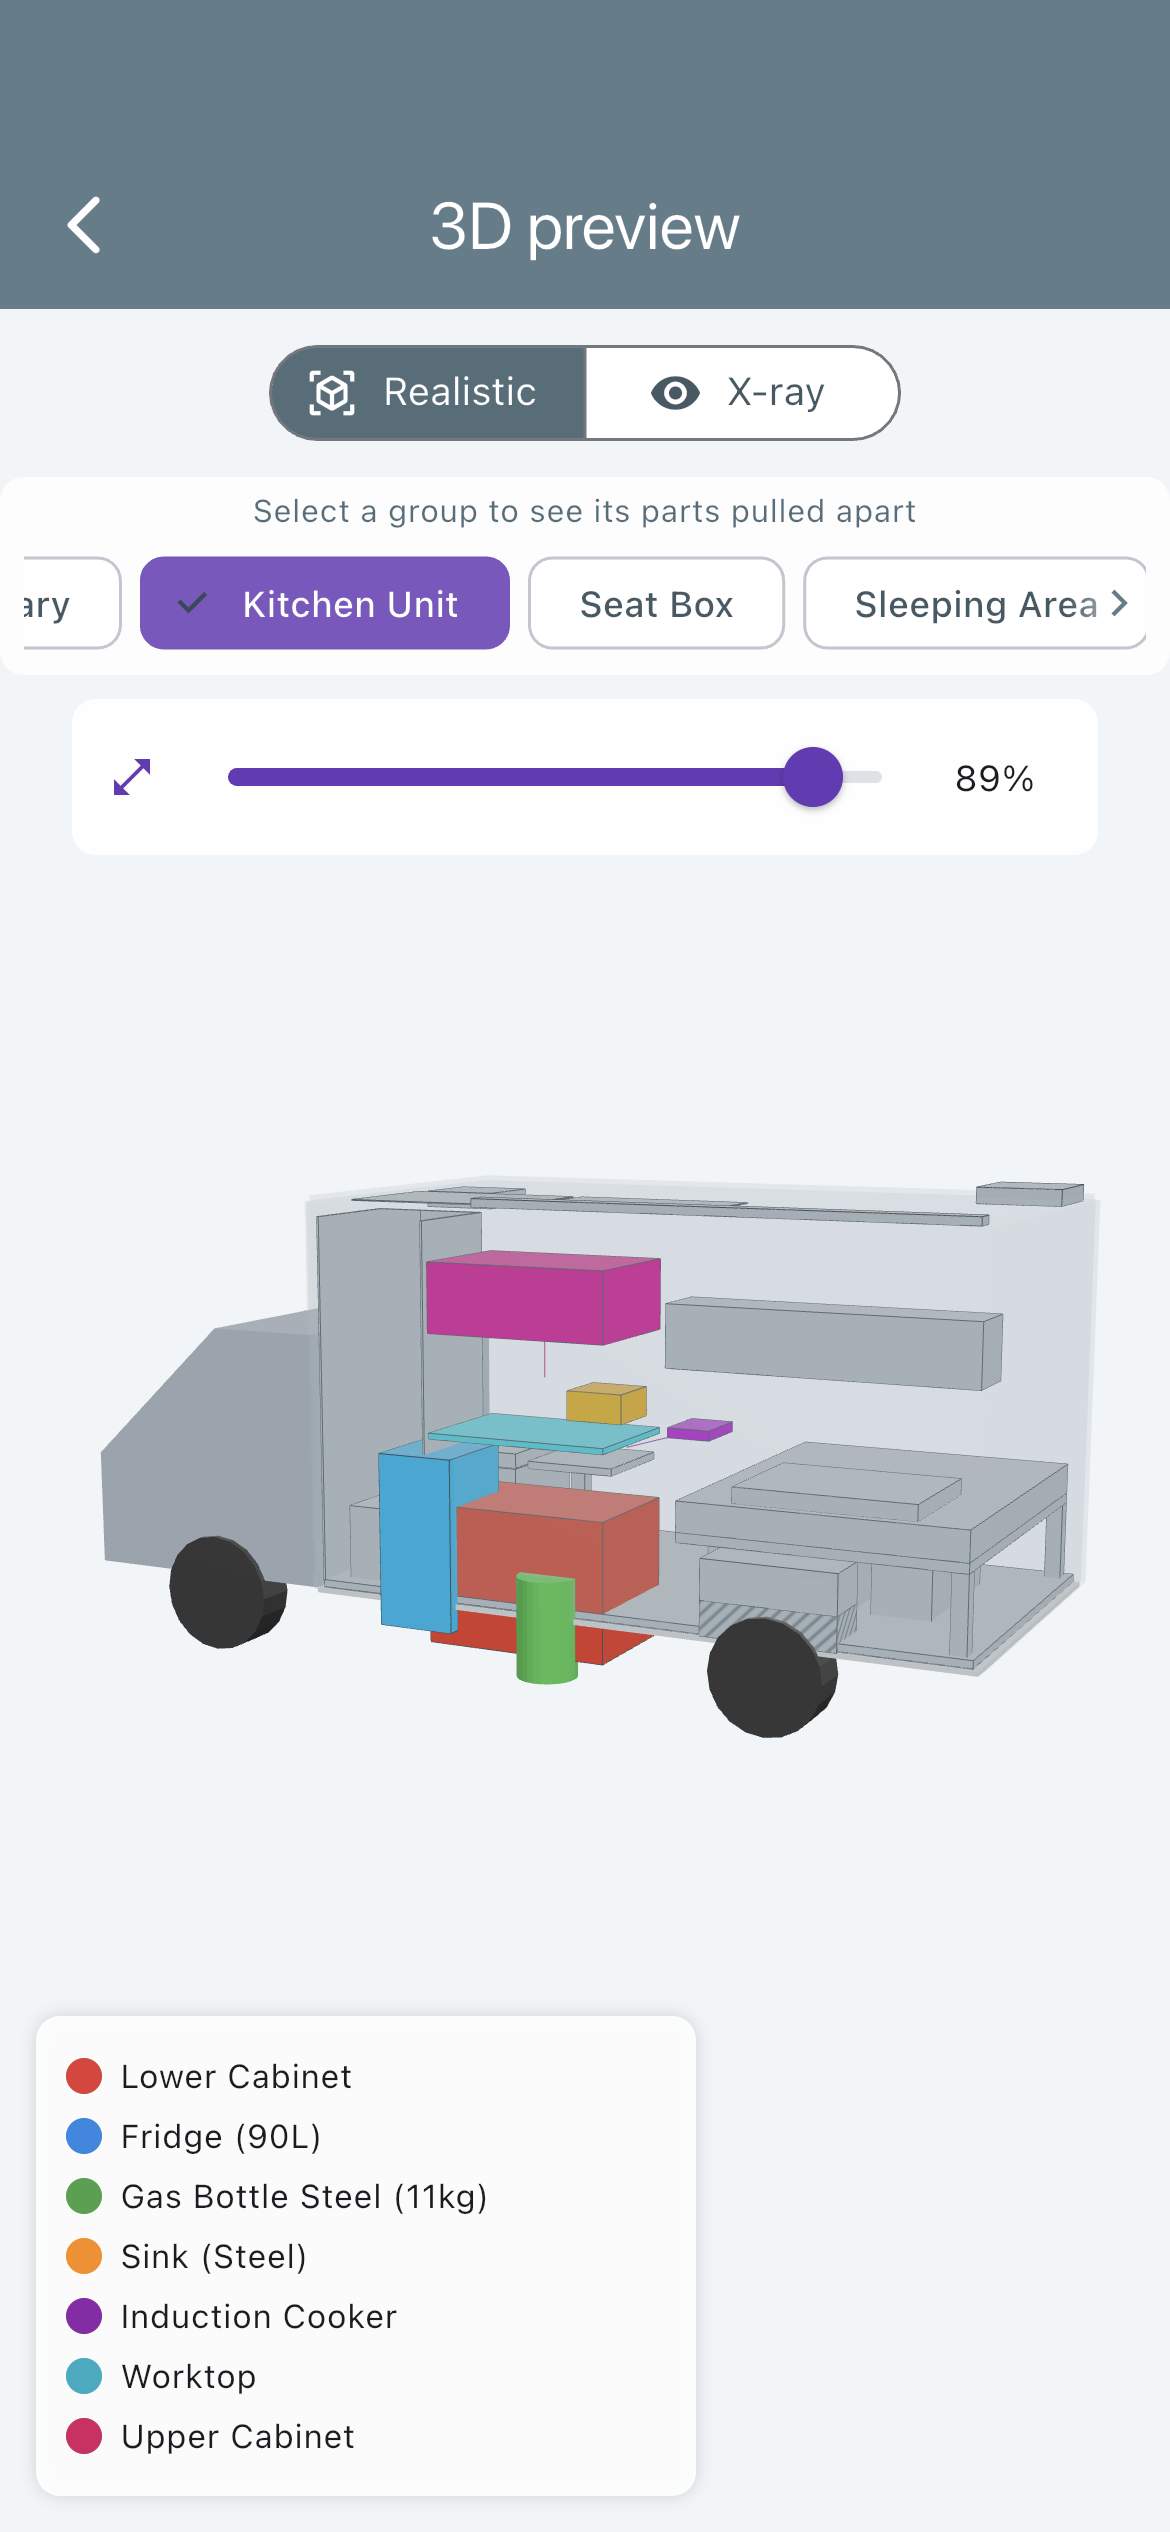
Exploded view: assemblies broken down into their individual parts.
Assemblies can also be built up freely from scratch, and saved as your own reusable template — for the next cabinet or the next project.
“Create assembly” and “Save as my own template” are coming in one of the next app updates — already testable in the web app.
The cutting list flips the planning around: instead of drawing furniture, you get a cutting list — which panel, which thickness, which area. That’s the file you take to the lumber yard.
And at the end there’s the technical inspection report as a PDF: base data, axle loads with status, centre of gravity height, payload check, and a tank fill-level simulation for empty, half and full. What the inspector actually checks at the appointment is covered in the technical inspection guide for van conversions.
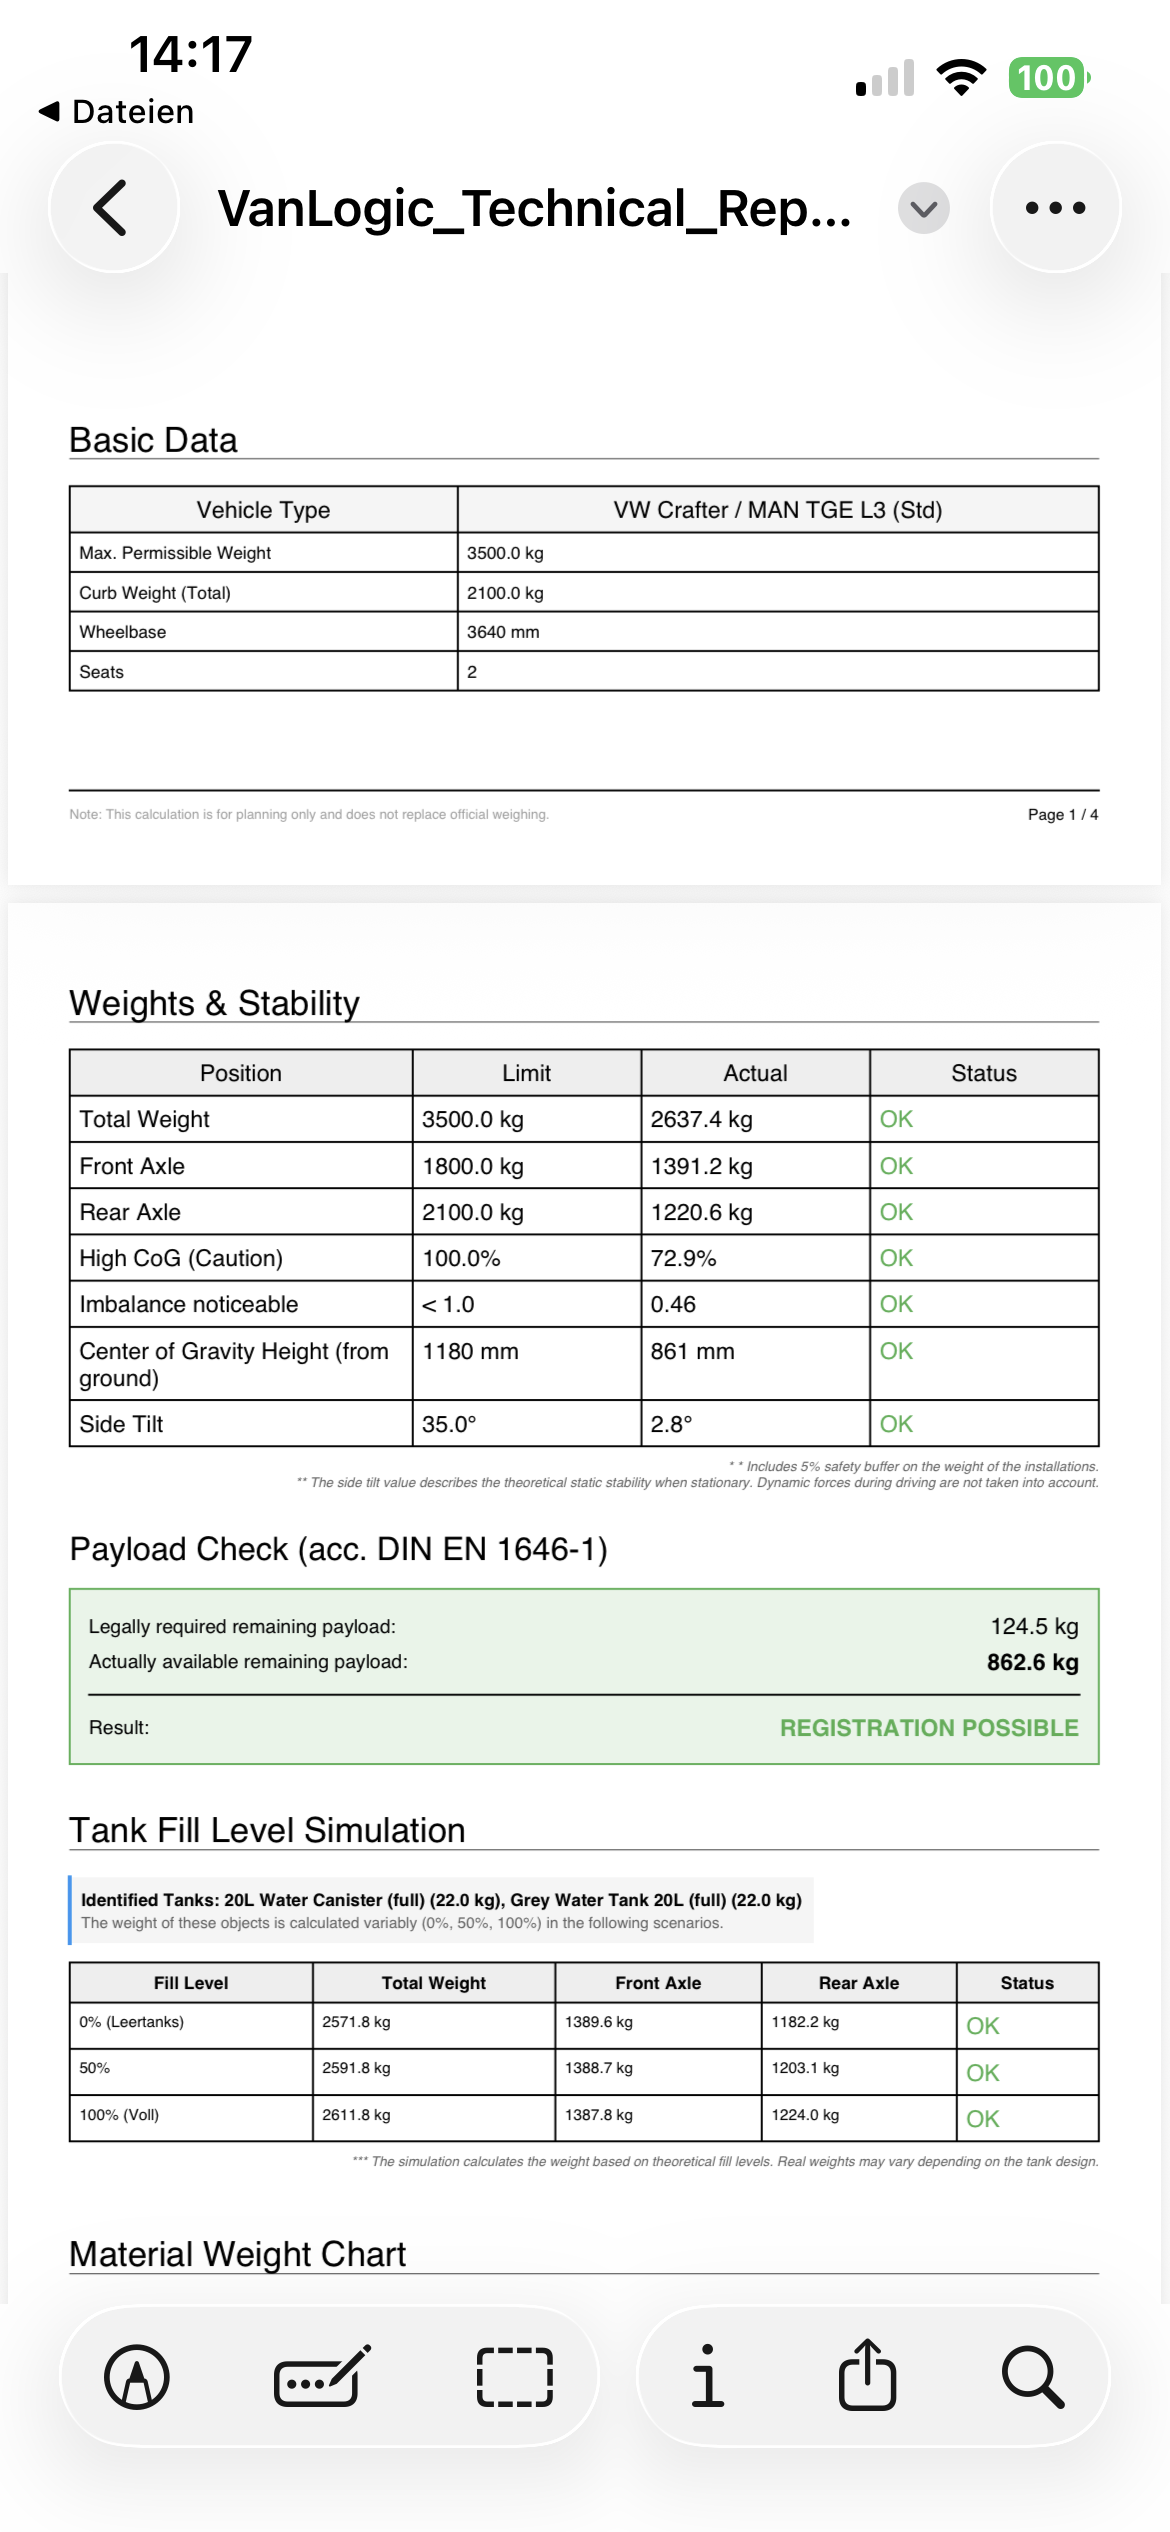
Technical inspection report as PDF — ready for your appointment.
7. Checklist: Twelve Points Before the First Cut
- Maximum permissible mass, kerb weight and both axle loads noted from your documents
- Realistic payload calculated — minus passengers, water, gas and luggage
- Layout type chosen that fits your body height (bed length checked!)
- Aisle at least 50 cm, better 60–70 cm
- Work height measured against your own body height, not taken from a standard
- Wheel arches marked in the floor plan — no floor-standing furniture stands inside them
- Clear floor space to open every cabinet door and every drawer
- Roof taper accounted for on every overhead cabinet
- Build method chosen deliberately per piece of furniture, not the same everywhere
- Tanks between the axles, heavy things low
- Left–right distribution checked
- Axle loads and centre of gravity checked in the finished plan — not just on the scale
Planning for a wheelchair user? The same core principles apply — just with stricter minimum measurements. Details in our article Wheelchair-Accessible Camper Van Conversion.
Conclusion
Floor plan, vehicle structure, material, build method and weight aren’t a set of disconnected tools in VanLogic — they’re one single, continuously connected system. You see how your build will behave on the scale from the very first piece of furniture, not just after it’s built. To see how VanLogic compares to other planning tools, check out our comparison of camper van conversion planners.
For even more detail on every build method, every collision case and the exact calculation logic, check out the Detailed Help — built into the app or right here in your browser, 20 chapters, in all 8 languages.
Start planning right in your browser — free, no download required
→ Plan your build now — vanlogic.app
About VanLogic: VanLogic is a planning app for camper van builders that automatically calculates weight from shape, dimensions, material and build method, and shows axle loads, centre of gravity, tipping risk and collisions with the real vehicle structure in real time. Available for iOS and Android — and testable directly in your browser.
Frequently Asked Questions
How do I plan a camper floor plan correctly?
Don't start with the layout — start with your vehicle data: maximum permissible mass, kerb weight and both axle loads. Then pick the basic layout type that fits your height and how you travel, and only after that check the details — aisle width, wheel arches, roof taper. Finally, run the numbers on weight and axle load before you cut anything.
How wide does the aisle in a camper need to be?
At full height between two cabinets, 50 cm counts as the lower limit, with 60 to 70 cm being comfortable. Between a bench seat and a kitchen block, where you just walk past, 45 cm works too.
How much does a camper conversion weigh?
Depending on the floor plan and build method, somewhere between about 330 kg for a simple build and over 500 kg for a full conversion with a wet bath. The biggest factor isn't the size of the furniture, but how it's built — the same kitchen cabinet can weigh between 22 and 40 kg.
Will a transverse bed fit in my van?
Only if your height fits the load width. Panel vans have 1.78 to 1.87 m, and after insulation and cladding you're rarely left with more than 1.80 m. Up to about 1.75 m body height, a transverse bed is the most space-efficient solution. Above that you need a longitudinal bed or a wall bump-out.
Where should the water tank and battery go in the floor plan?
As low and as close to between the axles as possible. A full 90-litre tank weighs 105 kg — move it one metre further back and roughly 30 kg shifts from the front to the rear axle. In the rear it also makes the front axle load worse.
What am I actually allowed to build in?
Payload is the difference between the maximum permissible mass and the kerb weight — but passengers, water, gas and luggage all come out of that first. Out of 1,300 kg of payload, realistically 800 to 900 kg is left for the build itself.
How do I account for wheel arches?
A floor-standing piece of furniture can't stand inside the wheel arch. Either it ends in front of or behind it, or it sits as a hollow carcass above it — in which case the floor at that spot needs to be recessed or raised.
Can I test the floor plan before I build it?
Yes. You can view your plan in 2D and 3D, look inside hollow cavities with X-ray mode, and check axle load, centre of gravity and collisions live — before the first panel is cut.